 I love food, or should I say I love food that has character, flavour and maybe a story behind it, as it makes things much more interesting. The area of Southern Asia covers a huge expanse, and includes the likes of India, Pakistan, Bangladesh and Nepal, and its resulting rich and diverse culture and cuisine. There is a mountain of history that defines these distinct areas and that has developed over the years and influenced some of the food that we have become familiar with, including Biryani and ‘Korma’.
 Onions seem to form the basis of many dishes that come from the region of Southern Asia and the Korma is no different. Now, I really hate Korma or should I say Chicken Korma, I suspect because of the dishes I have tasted are either from a take-away (once), or one someone close to me has made (I suspect from a Jar, Shhh) again once, I did not like either of them!
I discovered on page 146 in Diana Henrys’ ‘A Bird in the Hand’ book an interesting ‘Royal Korma’ recipe, the book has recently taken a spot nestled amongst Yotam Ottolenghi, Sabrina Ghayour, Maria Elia, Sam Clarke and various other chefs who inspire me to cook.
I am not going to provide ingredient details so buy the book as i did, i am just going to describe some of the processes and my results, so you can get an idea of how the Korma might be cooked. The book is a very worthy investment and contains loads of inspirational food to cook based on Chicken.
 Back to the Onions as there are two different ways they need to be dealt with, sliced and given a liberal salting, and chopping finely. Above you can see above a considerable amount of onions sitting in the colander, once salted and left for at least 30 minutes, the amount of water that gets extracted is quite significant in the picture below. The Onions need to be fried (use a deep fat frier on about 160 degree’s) until golden brown, then drained very well and blitzed with some water to create an Onion Puree. The salting process helps remove much of the water but be careful as there will be a lot of spitting when you put the Onions into the Oil.
 Once completed the aroma is slightly sweet, pungent and just yum, you can see my effort above. I suspect many of the Korma’s in restaurants and in jars have sugar added to provide the sweetness, this recipe has no added sugar (I have just checked two well known sauce brands on the internet and yes, they both have quite a lot of added sugar)!
 The other core elements that make this dish ‘sing’ include Black and Green Cardamom, Ground White Pepper, Kashmiri Chilli, Cloves, Cinnamon and Ground Coriander Seeds. To add to the this, a puree of both Almonds and Cashew Nuts are needed along with Saffron, (I used Afghanistan Saffron which comes from a village co-operative encouraged to stop growing drugs, that’s got to be good). The majority of my spices come from Steenbergs in Yorkshire, sorry for keep mentioning them but their products are just brilliant and well worth investing in.
 I had a ‘debate’ with my partner of 27 of so years on the Chicken cut, and I stood my ground (typical obstinate bloke I her you say). I had a pack of Chicken Thighs which would be perfect, but I was battling against Breast Meat which my partner wanted to go with.
I needed to skin, de-bone and clean up the Thighs which I did, and the final results in both our opinions was well worth it. If you remember at the beginning there were two types of Onion, the 1st stage of cooking needs the finely chopped Onion to be sweated and browned before adding the other ingredients as per the order in the book.
 I will admit to cheating a bit with the Rice, and used a couple of packets of the ‘quick cook’ variety but with some added ingredients. Golden Raisins which had been steeped in Earl Grey Tea for a least an hour, some cloves, a little broken Cinnamon stick, a few crushed Green Cardamon pods and a light sprinkling of the Saffron Water, finally some chopped Coriander and a few flaked Almonds, the whole lot goes in the Microwave for 2-3 mins (yes a Microwave)!
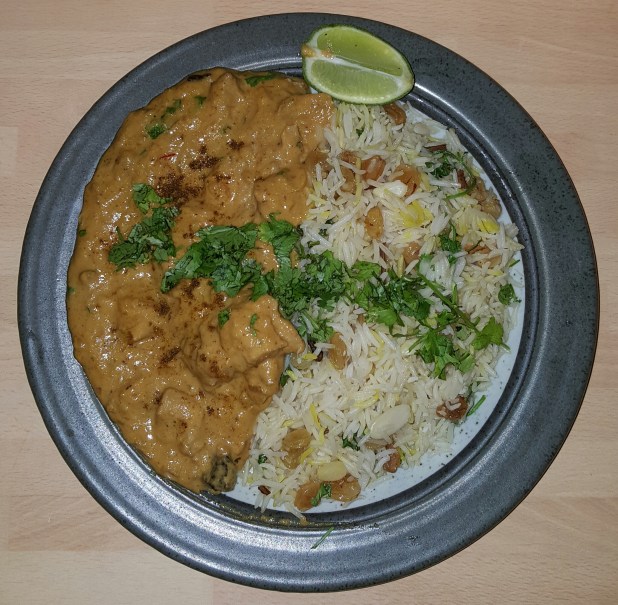
Before you serve TASTE TASTE TASTE, the dish needs a decent ‘whack’ of Salt at the end, it lifts the dish so much. When I 1st tasted it, it was between ‘bland’ and ‘Ok”, tasting, adding a little salt and tasting, more Salt and it just went ‘WOWSER!!
 So, the Korma hating critic was gobsmacked, this was bl@@dy amazing with deep flavours, a slight nuttiness but not too much, sweet but not sweet (the Onion puree I guess), this was just sublime. The Kashmiri and Ginger (I didn’t mention the Ginger so you do need the book to recreate this 🙂 providing some heat long with the White Pepper.
Thank-you Diana Henry for the chance to cook what is probably much more authentic than what you would get in Restaurants, as the dish takes some time and patience to prepare. You could do some of the processes the day before, such as the Onion Puree, I am not sure about the Nut Mixture.
If you want to try and cook a Korma, and you don’t (didn’t) like Korma like me, buy the book and give this one a go, you will be pleasantly surprised. This is being added to my Love it list of dishes for repeating again in the future.
……………..Until Next Time…………………L8ers…………..

 The usual disclaimer as this is a review, I paid full price for this course and received no incentives to publish this review, what you read is what you get, now onto the serious stuff!
 A bit of research and I had found a likely candidate at the cooking school I use the most (in the U.K.), Richard Bertinet in Bath. It’s a great setup on 2 floors so sometimes 2 different courses can be run at the same time, I had already attended more than 3 courses previously and all had been fantastic so the risk was minimal.
 We took the train to Bath, and Taxi to the School as it’s a very steep walk and we needed our energy for cooking! On arrival we were greeted with massive smiles and a very warm welcome by Fionn who helps manage everything behind the scenes at Bertinets’ and is brilliantly organised, and our tutor for the day Jenny Chandler.
 There were 2 other children on the course, I think the parents were more nervous than the kids but we all got on really well as we started to understand what was going to happen for the next few hours, it’s a ‘proper’ cooking course but aimed at little ones.
 The next item on the agenda was a Chowder, blimey that’s quite advanced for adults let alone children at 10 years of age, this is where the knife skills were introduced. Jenny carefully explained how to use a knife to SAFELY cut Onions which were needed for the Chowder. Chop, chop, chop and soon the Onions were slowly frying in the pan as explanations about how to cook them correctly, to translucent stage!!
 Meatballs were next, three different versions were produced showing how the same basic recipe could be used to make dishes with completely different flavours, at the same time, the method of testing before cooking a whole batch enabled seasoning to be introduced to ensure the end result tasted correct.
 The school is very very well laid out with lots of room, each person having their own cooking station and stool to rest their weary feet if needed, and enough knives, bowls etc to go round so no one was left out.
 I have to say that I think the adults enjoyed the cookery as much as the 3 children, it was quite hard work for all of us, concentrating on Jenny’s instruction and helping from time to time where needed.
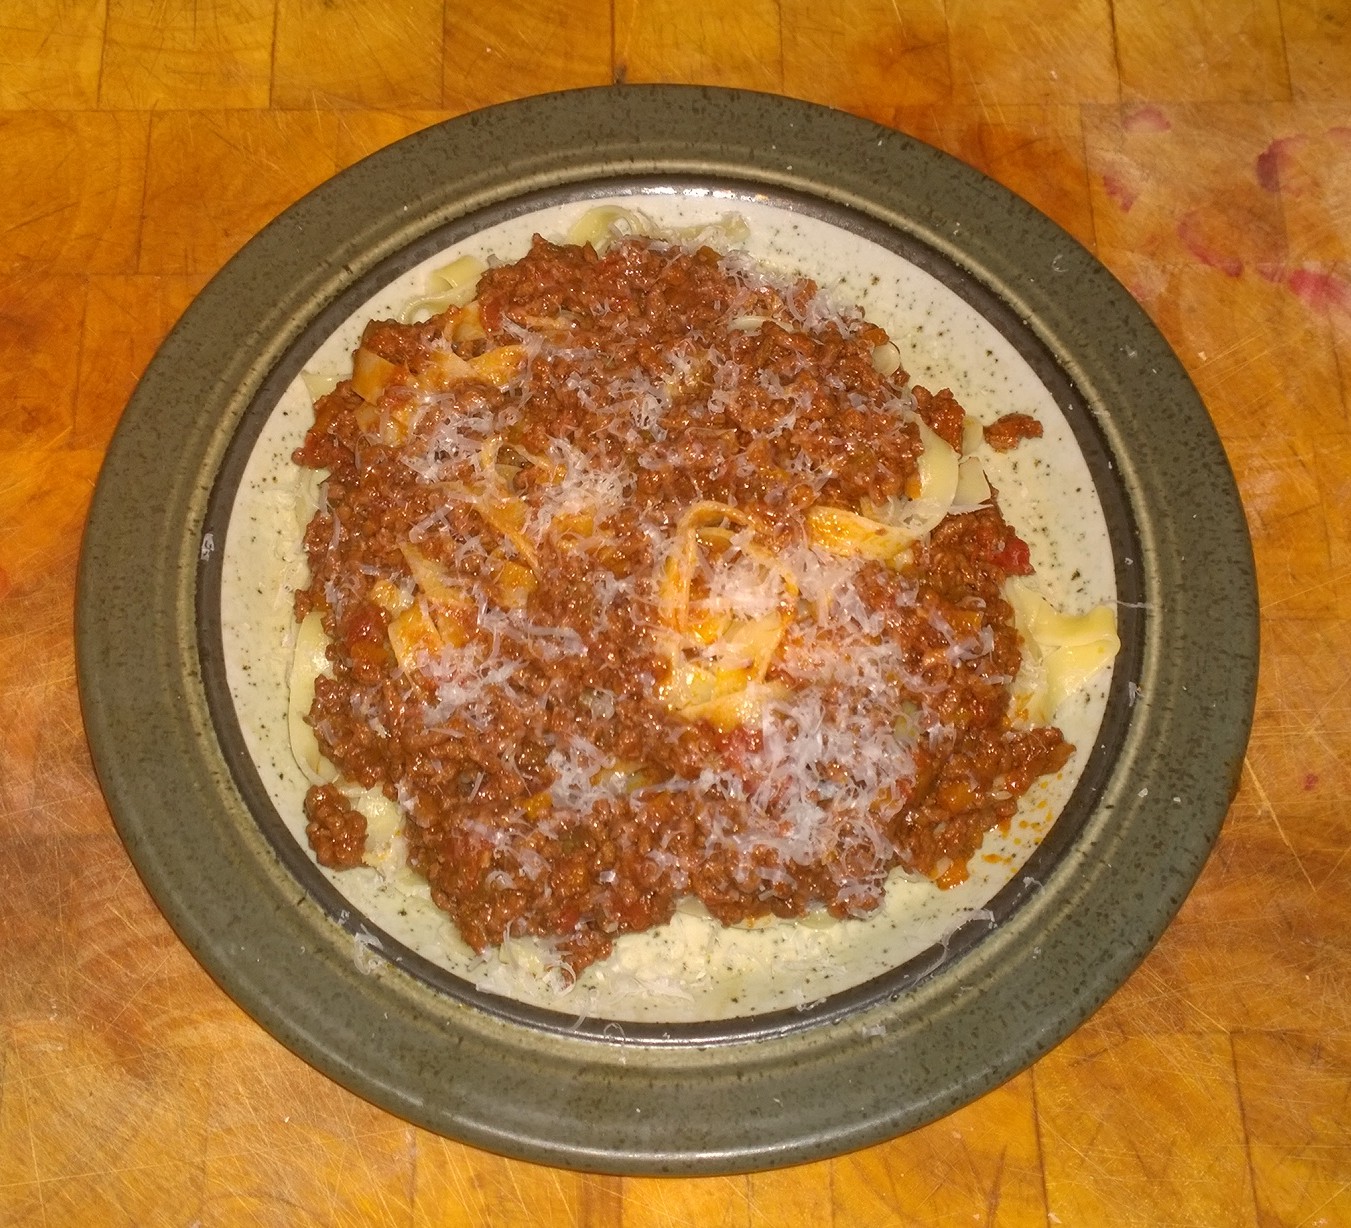
 I will admit from the start that whilst this dish tasted amazing it needed at least another hours cooking, so allow a good 6 hours for this beautiful dish, voted
  With the weather cooling slightly something warm and fragrant was in order, so looking at various cookery books,
  The Beef Short Ribs are BIG! I took the time to put some colour on them first, giving them a burst of heat on each side before starting on the rest of the process. I think next time I cook this dish I will try Ox Cheek which is a great cut of meat for slow braising and has slightly less fat content, and is easier to handle 🙂
 There are quite a few ingredients in this dish and the Star Anise, Cardamon, Cloves are fried in a little oil to release their flavour, before adding a single ‘bashed’ Lemongrass shoot. Then the spice mix is added and fried for a few minutes, finally add the Beef, Coconut Milk, Tamarind some water, Palm Sugar and
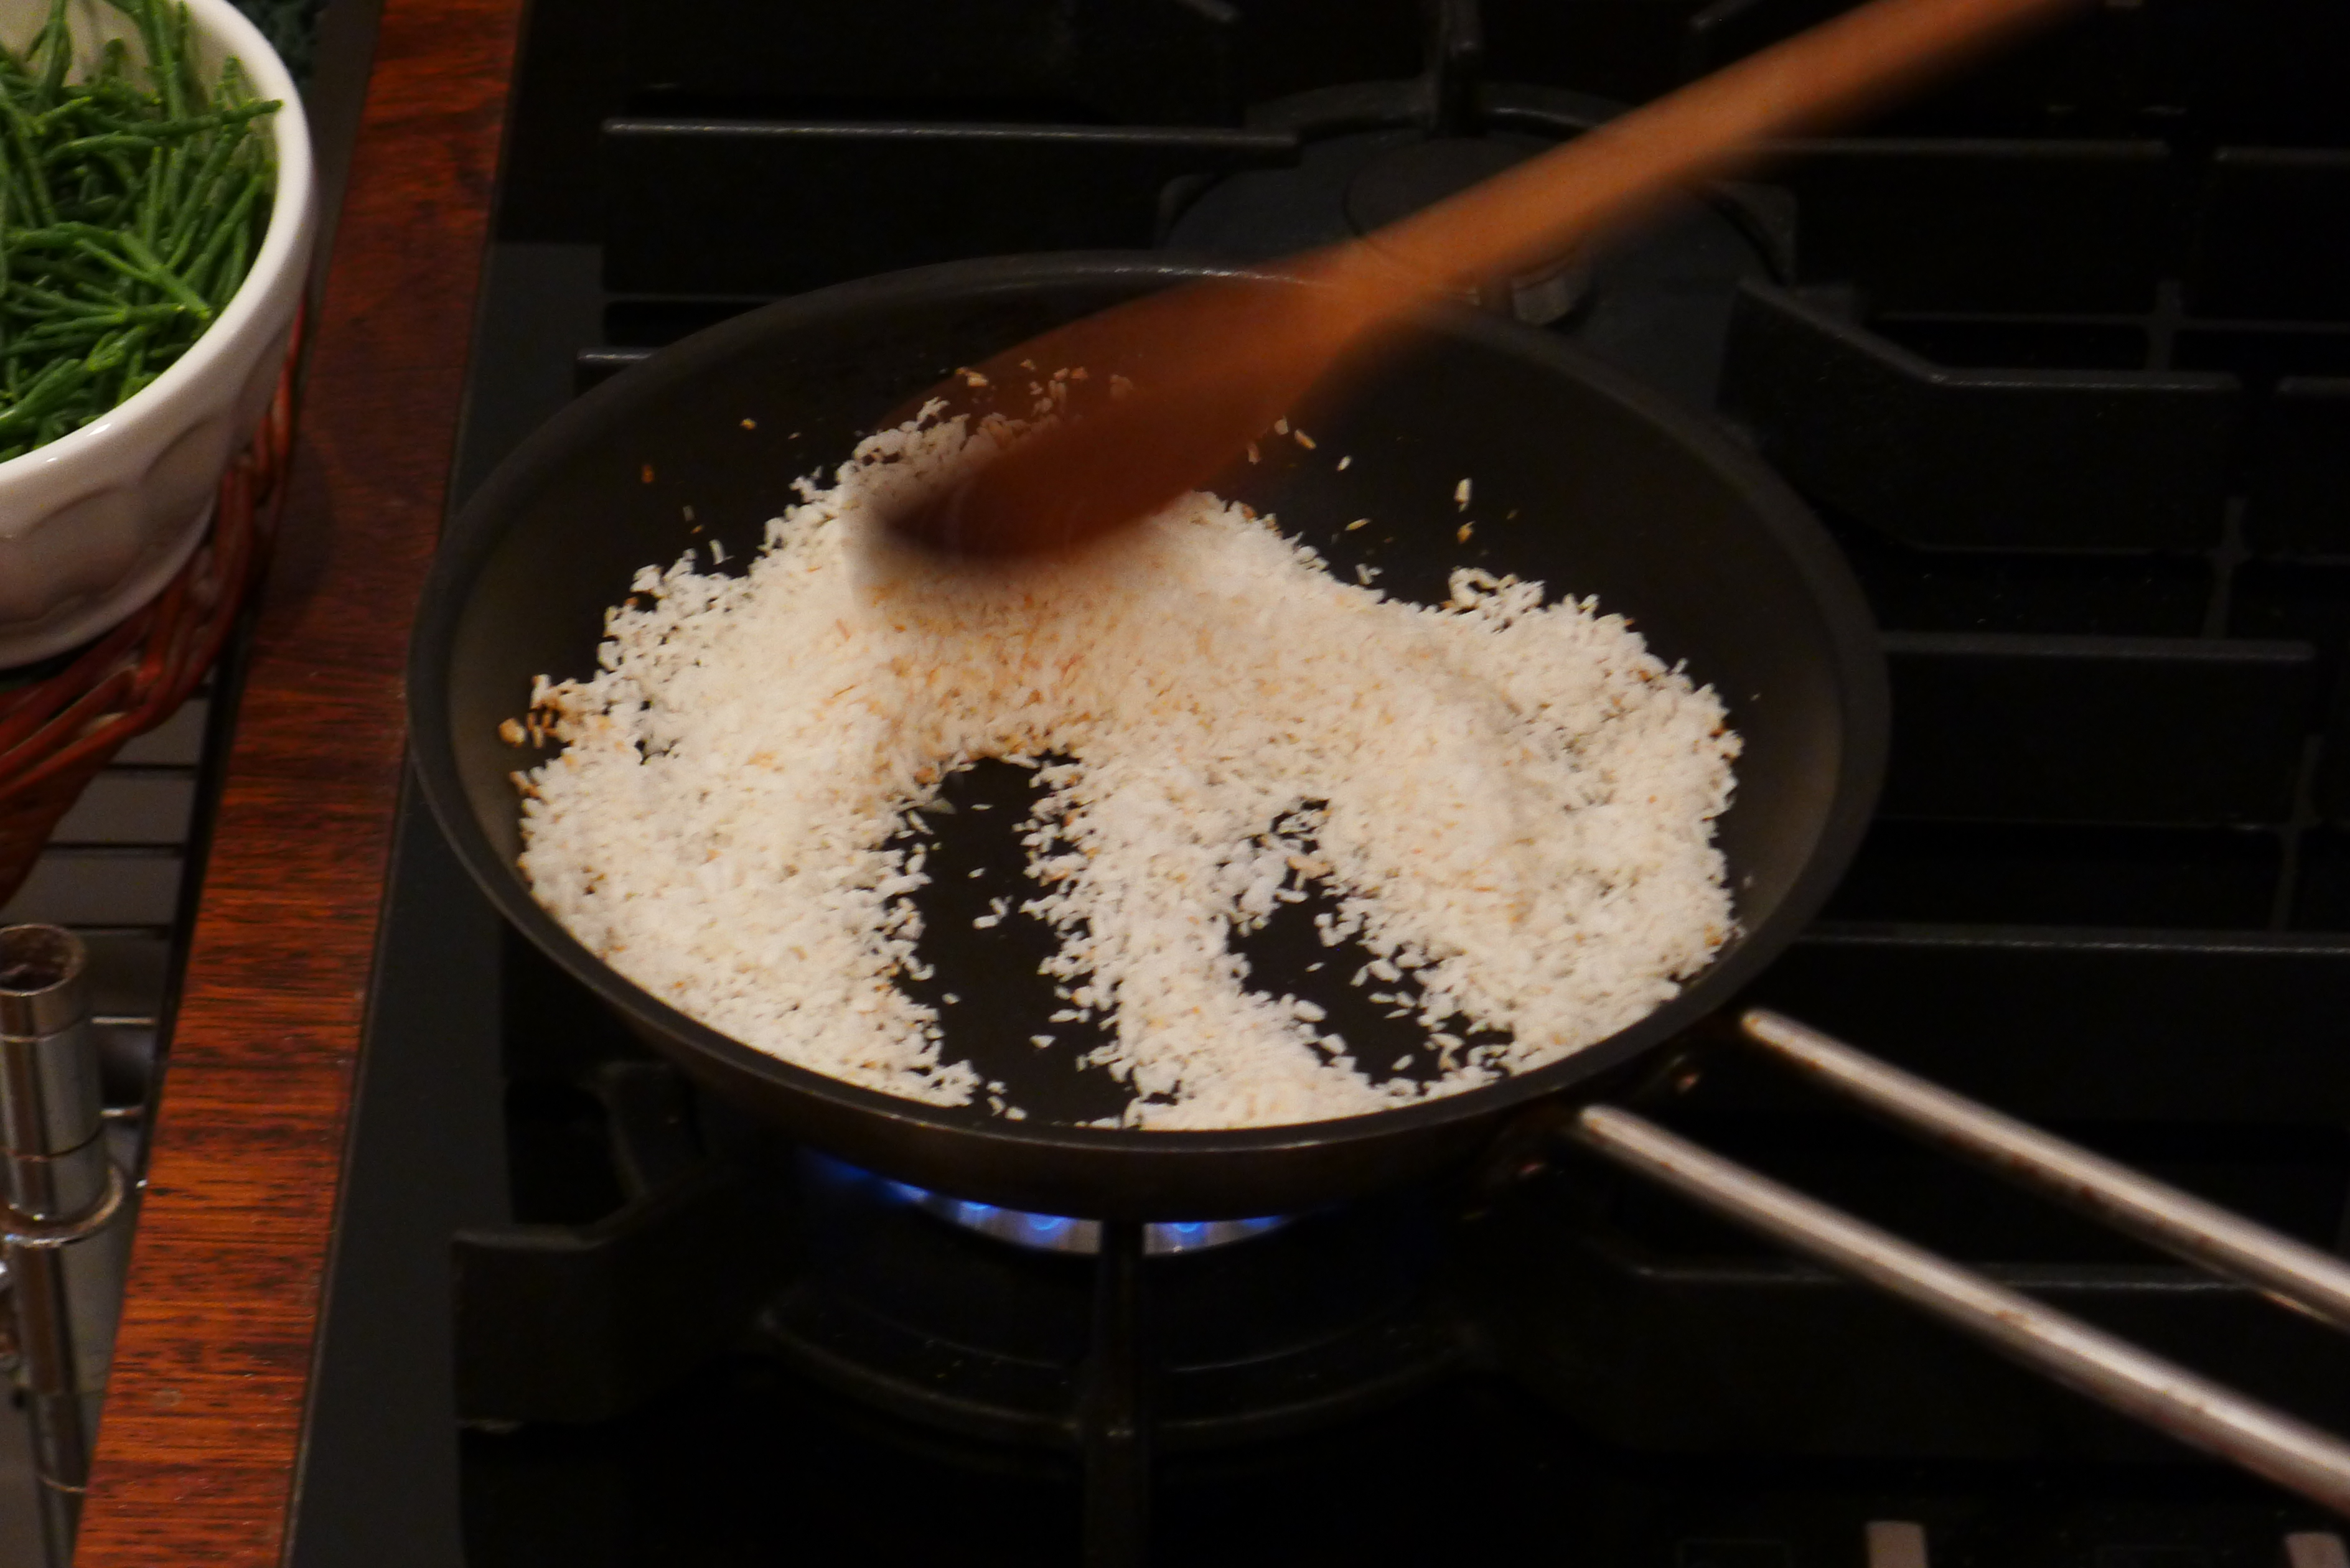
  Kerisik is ground Coconut that has been fried until golden brown and can be made using desiccated Coconut if you cannot find fresh, again there are lots of references on the web, you can see my 1st attempt below.
 Kaffir Lime leaves are also added, I could not find mine so used some lime zest instead. The whole lot now cooks and cooks and cooks, this is a low and slow dish. There are several stages to the process which I had somehow missed (they are in the Rendang Wiki link above), the 1st stage is easy as you can see above. After approximately 3 1/2 hours, the mixture had reduced and I saw the Oil on the surface and this is where I went wrong, as I removed it, rather than letting the dish carry on cooking allowing for more evaporation, colourisation, and the flavours penetrating the meat.
 You can still see lots of moisture above, the dish should be much dryer but I now know for next time. I also think that using the food processor was a bad idea, as pounding in a pestle and mortar would have produced a better textured spice paste, but cooking is about learning so some more things to remember and lessons learnt.
 So there you have it, it almost worked if only I had left the dish cooking for longer until the meat was darker and the moisture evaporated completely. My attempt would not have won the CNN best dish award but it was still very tasty and the meat tender, the Rice with Pandan was a great addition.
 The stunning
  There is a SERIOUS amount of cooking on this course and it is excellent value for money, preparing and eating local French traditional cuisine, three courses, with local cheese and copious quantities of wine to wash things down twice a day, and don’t forget the breakfast, you don’t go hungry.
 There were 8 of us on the course, here we have left to right Julia (From Tasmania!), Elena and her mum Judith, David (the chef/host) and John, in the kitchen were two friends from St. Petersburg (Russia), the attendees come from all over the world, in this case everyone but Elena had attended at least one previous course, some more than one which demonstrates how good the Gascony Cookery School really is. This was a session on gutting, de-scaling and filleting fish, we were all very comfortable and confident by the end of the week.
 We had a comprehensive agenda starting most days with breakfast at 8:30, and cooking starting at 9:00. The times are really important, there was a lot to get through and we could not afford to get behind as we would not have anything to eat.
 So would I recommend this school, hell yeah it’s awesome. My second visit was just like the 1st which is difficult to describe as you HAVE to experience it for yourself. Just to be clear, I paid full price and have received no incentives for this review, it’s me, what I think and as good as a description of the experience I can give.
 A course like this needs excellent ingredients, seafood HAS to be fresh and ours was no exception. The planning that goes into ensuring the right products are available is not easy, especially when the school location is in the middle of nowhere!
 It was not just about preparing Fish and Crustaceans, the stunning Crab Tart required a very delicate
  Just as difficult, I think even more so was the
 It was finally here! The date of a ‘Bread Baking’ course I had booked many months ago, getting in a class with Richard Bertinet seems to require at least 6 months planning, which in many ways says that this guy is in demand, and he could be very good!
 This is not a course for the fainthearted, it’s hard work but we were continually refreshed by his team of excellent helpers, on hand to make Tea/Coffee and provide nibbles during the break, which was were well received.
 If you want to learn the techniques of a master and fancy bread then book this course, it’s a must do for anyone keen on understanding and practising how to produce awesome loaves, time after time. I am looking forward to my next time at Richards’ cookery school, with my nine year old at a class for youngsters.
 I wasn’t going to blog this dish, I was battling with it, as maybe it was too simple. After the taste test it had to be done, it was delicious and involves a few techniques and
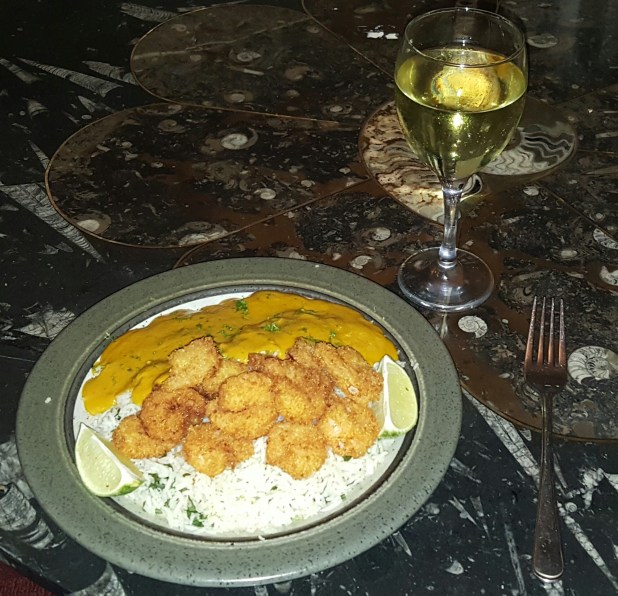
  The ingredients are for two hungry adults (and a spare spear or two for junior opp to try!). Thinking of presentation, having a triangular pattern on the plate seemed a nice idea, so 3 bundles of 3 asparagus spears, tightly wrapped in Pancetta started this feast off.
 Earlier in the afternoon I had made some Dough with my son, and although it had not worked out quite as planned, we got it into the oven and baked some bread, this was to go with the Asparagus, it’s a French passion, bread is part of the meal not a course to start things off!! (it was delicious ;-))


 After marinating, the Lamb is browned in a frying pan in some olive oil, and put into a dish with 250 mls of HOT Vegetable Stock mixed with 2 tsp of tomato puree then into a 130 deg (centigrade) fan oven for 2 1/2 – 3 hours! I covered mine with tinfoil for the first couple of hours, and removed the foil allowing the stock to reduce for the last hour or so. You will need to keep and eye on it and stir from time to time to make sure things don’t dry out.
 The 1 day session was awesome, we all learnt loads and despite my fears of piping and making a complete fool of myself, the end results were really very good (according to wife and family who can consume more sugar in a day than I can in a month)! Some of the end product are pictured above, I managed a couple all day!
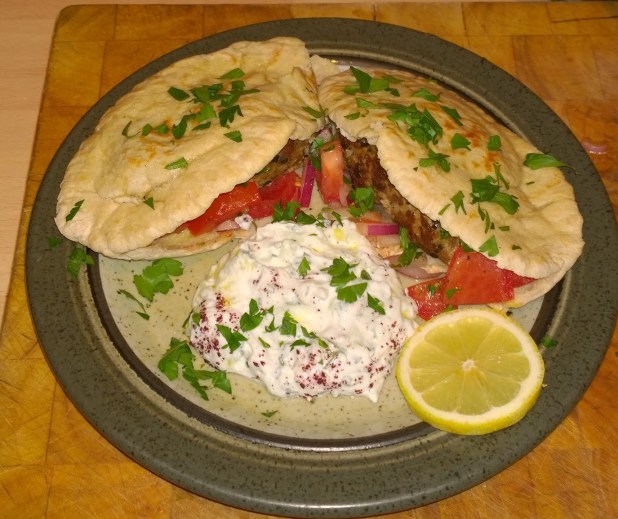
 I am not sure how the Lime managed to get into the picture earlier, you need to add Lemon Juice to taste, a good squeeze or two and for salt, I used some


 Having not been able to drive for 6 months a letter from the DVLA just before Christmas bought a big smile to my face, with Doctors exchanging letters I could get back behind the wheel as long as I met the conditions, which I did. So with the busy season out of the way a trip to our local specialist asian shop near Reading meant I could experiment with some more unusual ingredients, herbs and spices.
 I had a helper for this exercise in oriental cooking, our son Justin, who is 9 years old. When I was at Junior School, I joined a cookery club which is probably where my interest in cooking started, we don’t have that pleasure at the moment but when I asked if he wanted to help me, his eyes lit up and we had some fantastic time in the kitchen.
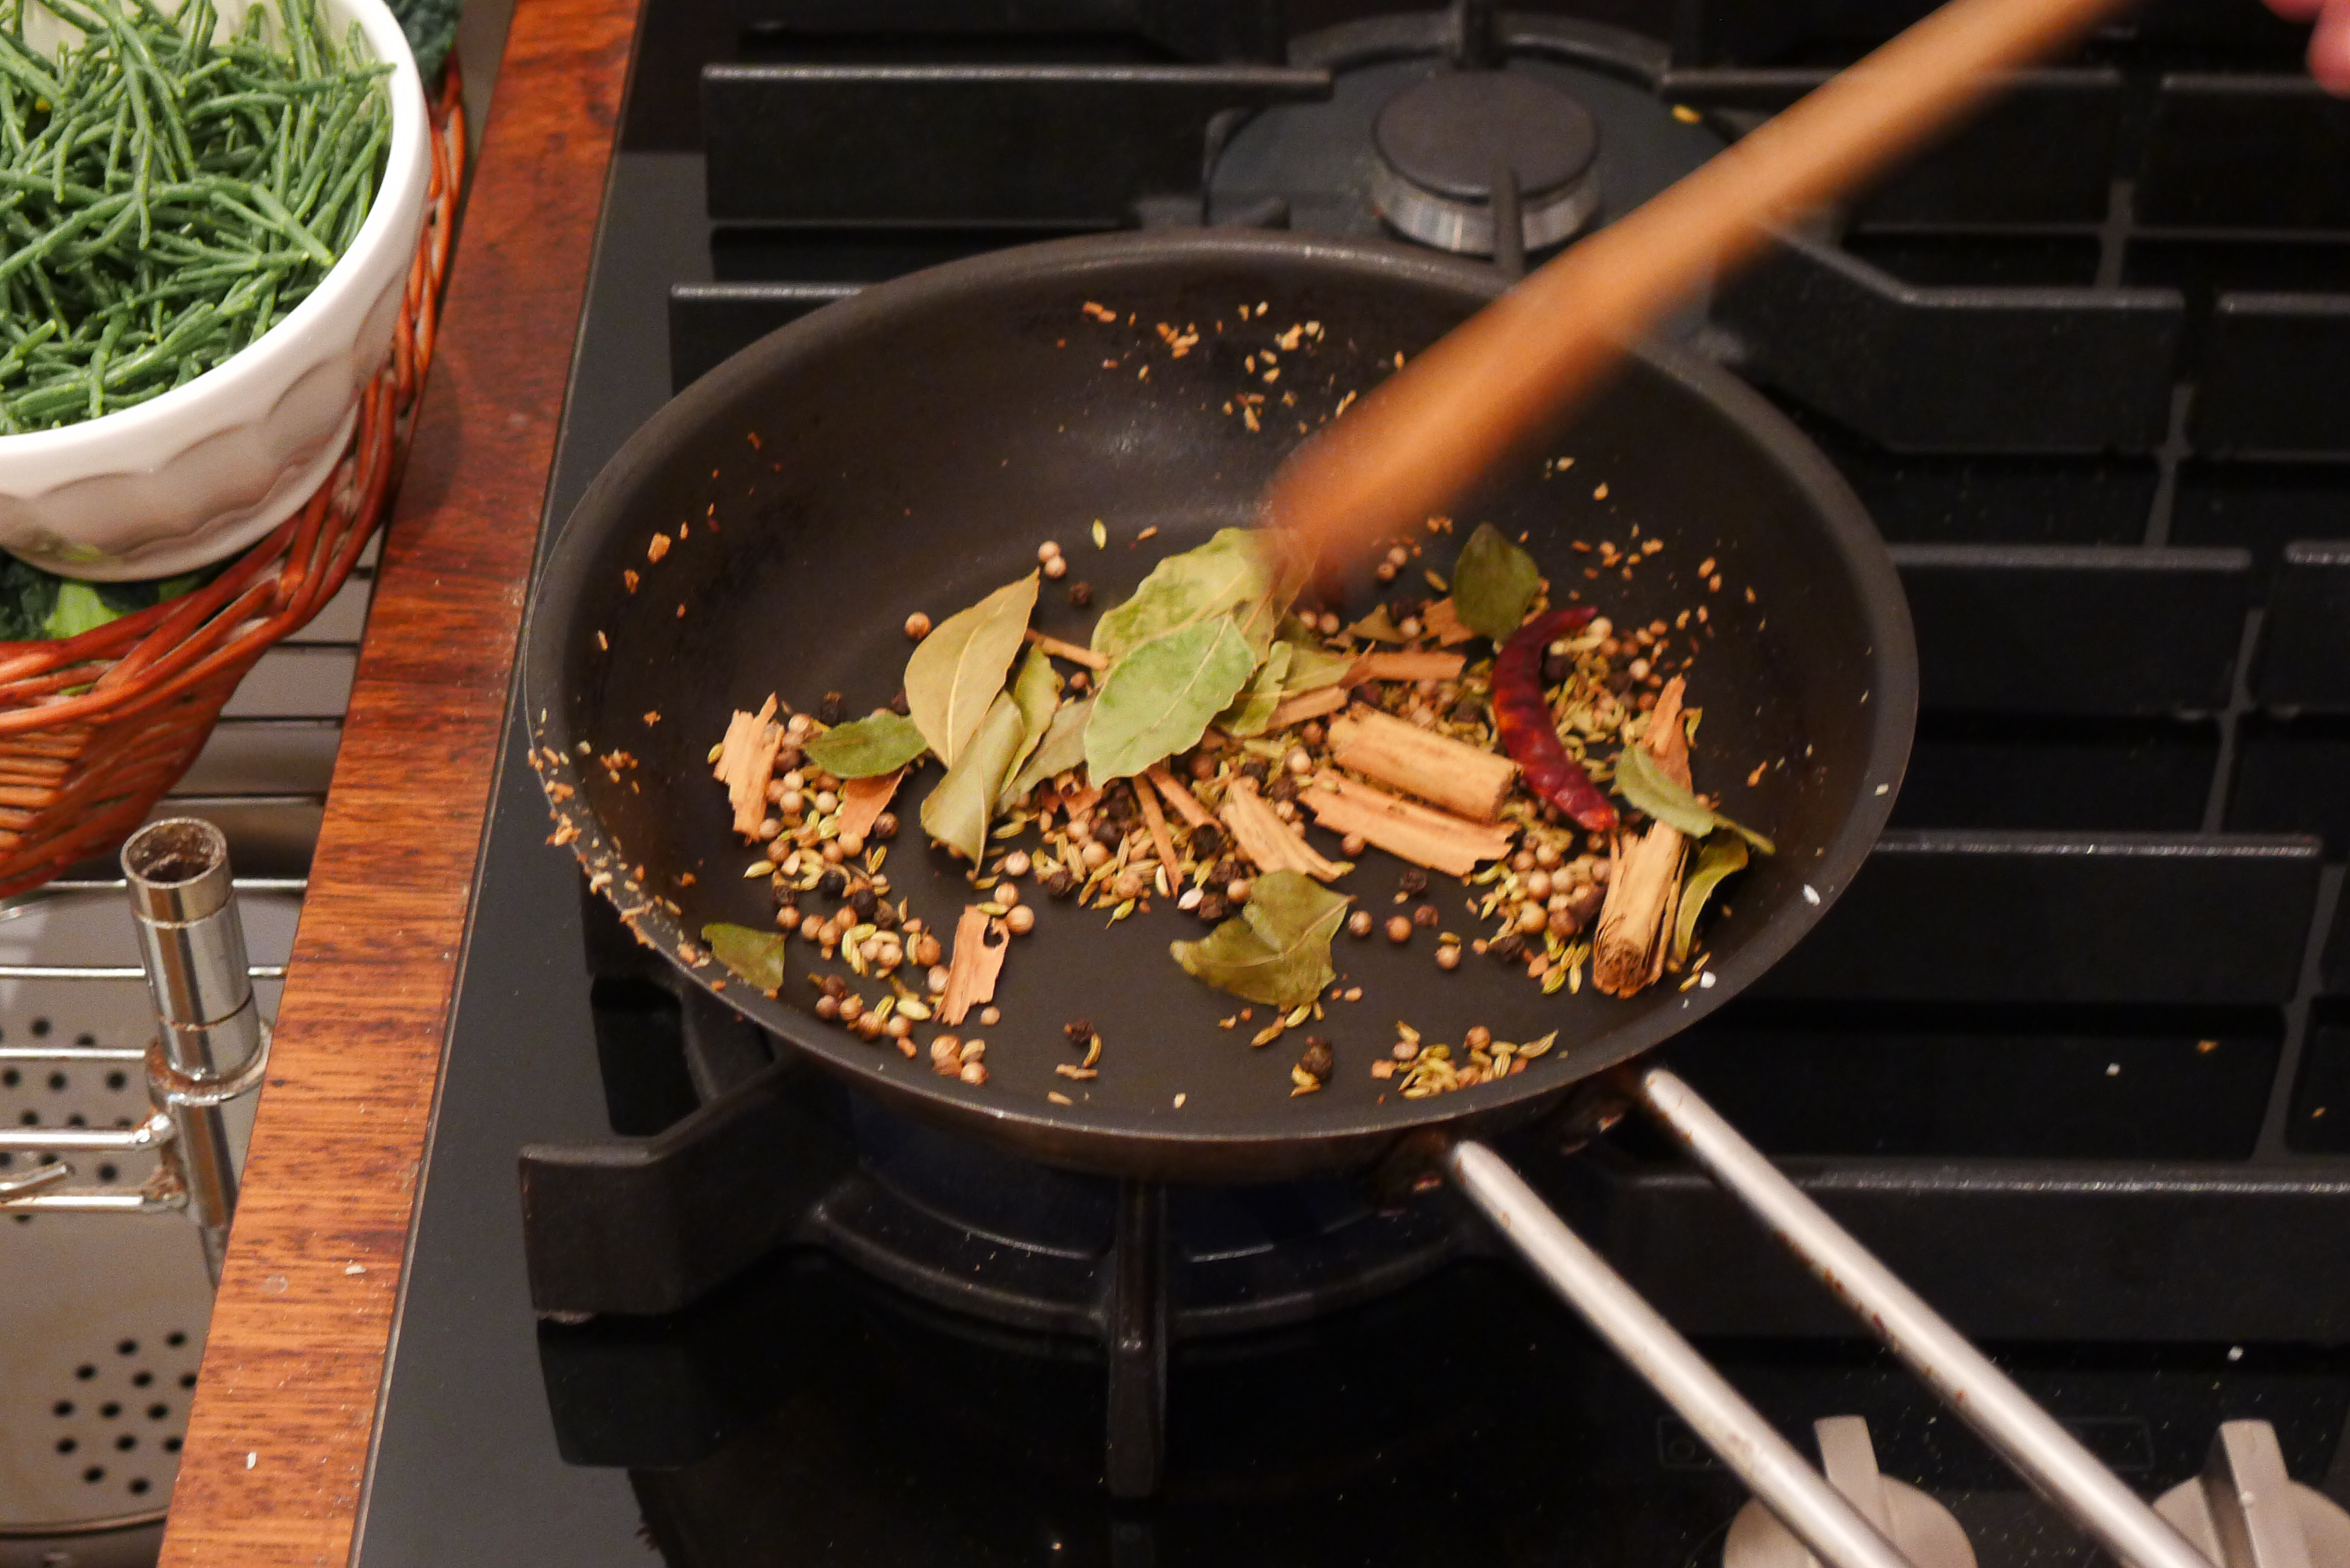
 You need to dry roast the ‘hard’ spices first, Cumin Seeds, Coriander Seeds, Fenugreek Seeds, Fennel Seeds, Green Cardamom (which I de-podded 1st, removing the green outer skin). Once you can smell the aromas wafting from the pan, transfer to a pestle & mortar and grind to a smooth powder. As we were adding ingredients to the pan, my little helper was inquisitive as to where all the spices came from, so we added a bit of geography to the cooking as well as sniffing each of them and trying to describe the smell! You will also need some Garam Masala and fresh Turmeric if you can get it, powdered if not.
 Once the dry ingredients were done (put a tea spoon of it to one side, you will need it later), we started on the Onion, Carrot, Galangal, Red Chilli’s and Garlic which are all gently fried in a little oil until browned and then the Spice Mix and some Tomato Concentrate added, cooking for a couple of minutes.
 My little helper kept the questions coming as he helped prepare the ‘Katsu” Curry, once the sauce had been simmering for 20-25 minutes it needs processing or blending with a ‘Stick’, I have a trusty Swiss
  Once you have blended the Sauce, pass it through a sieve as there will still be some fibrous material from the Galangal which will need to be removed, you should end up with a silky smooth delicious fragrant sauce which you can put to one side until you need it.


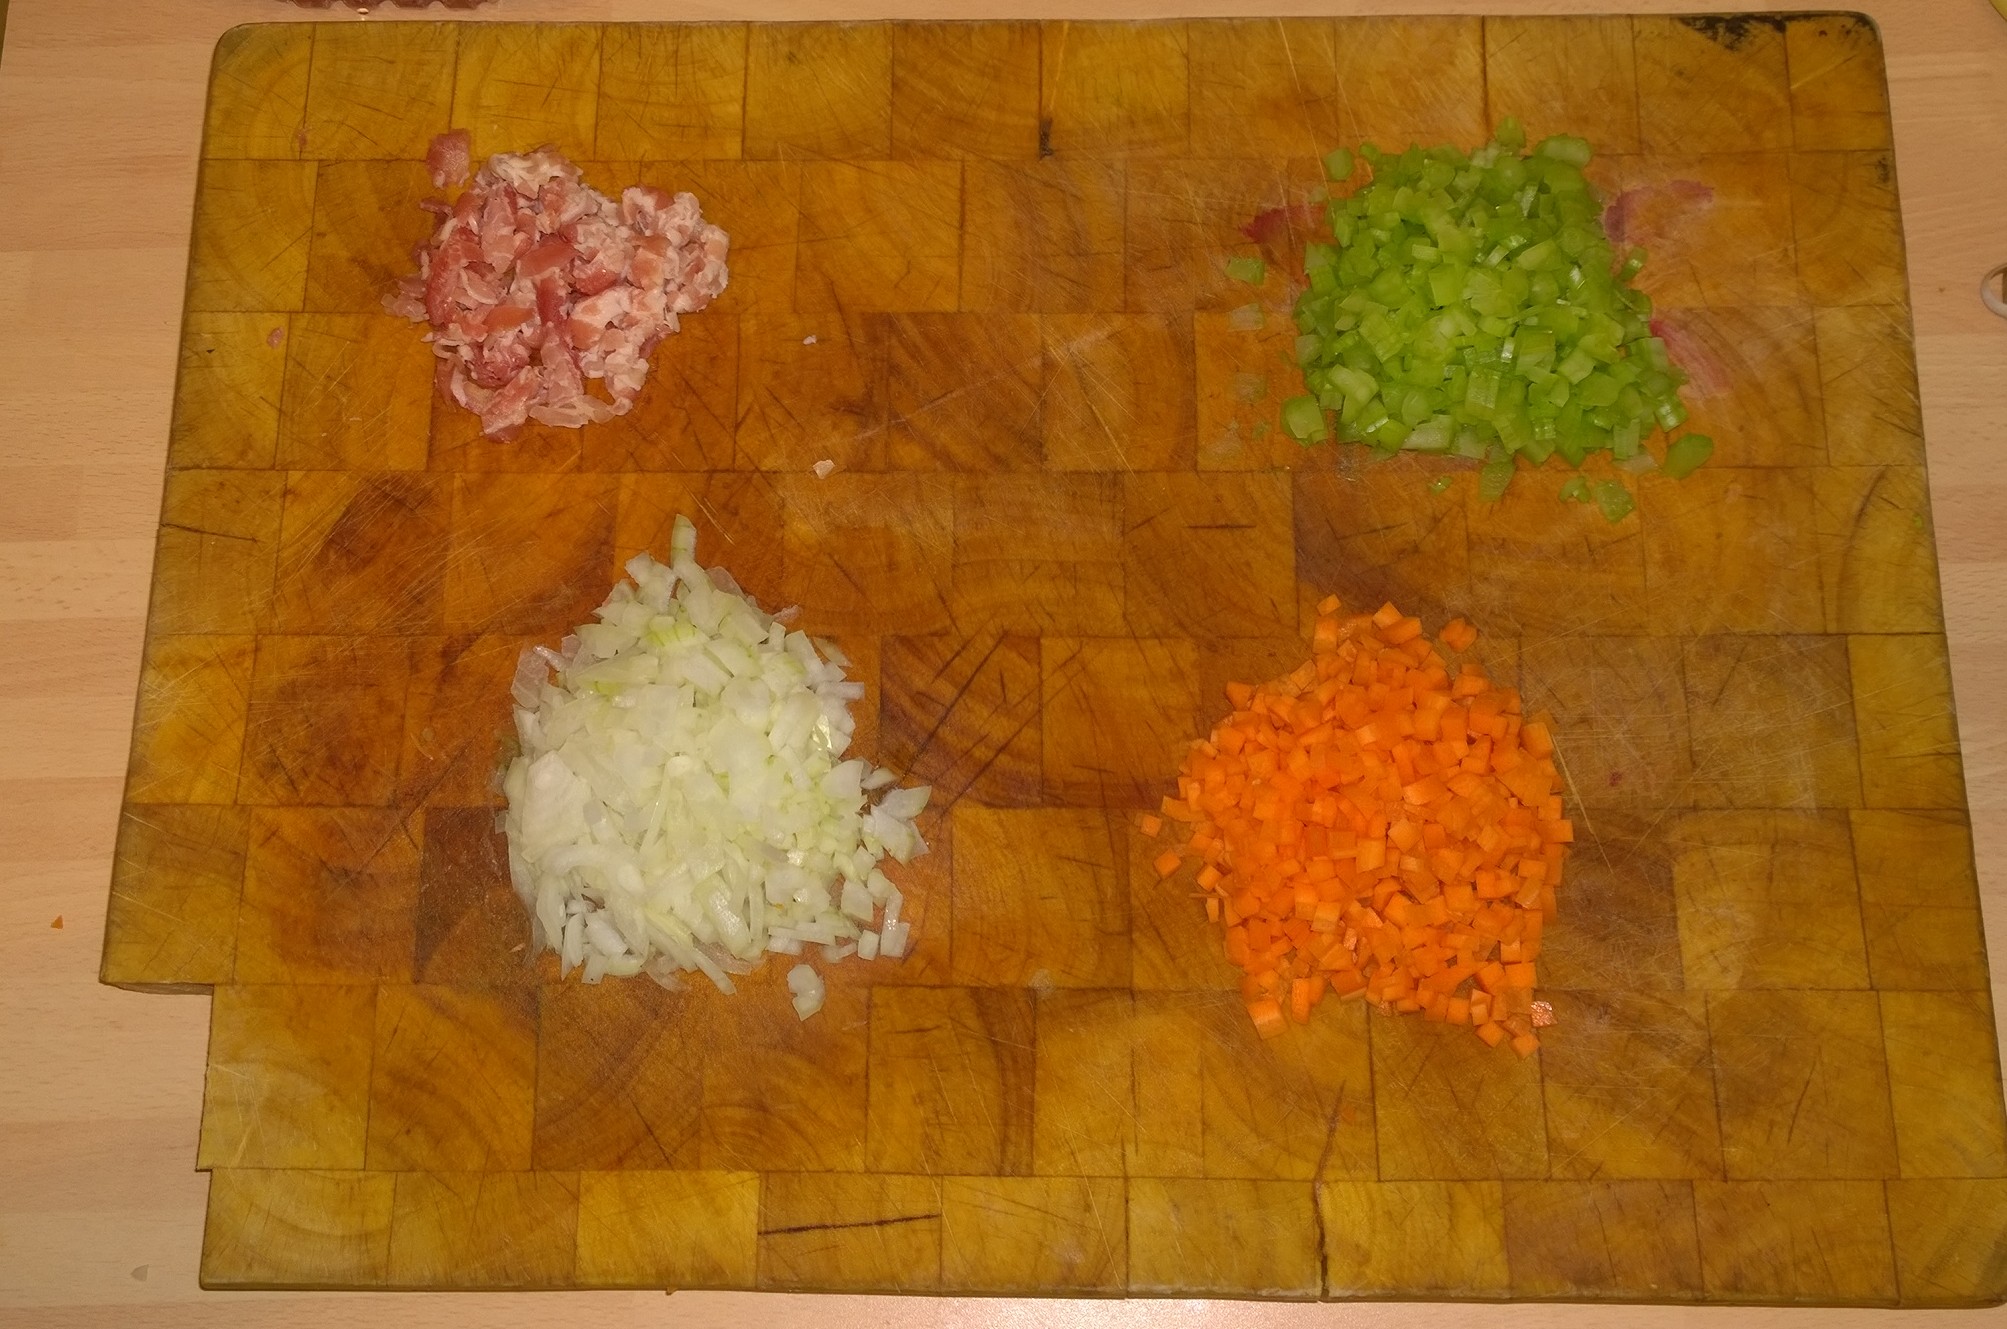

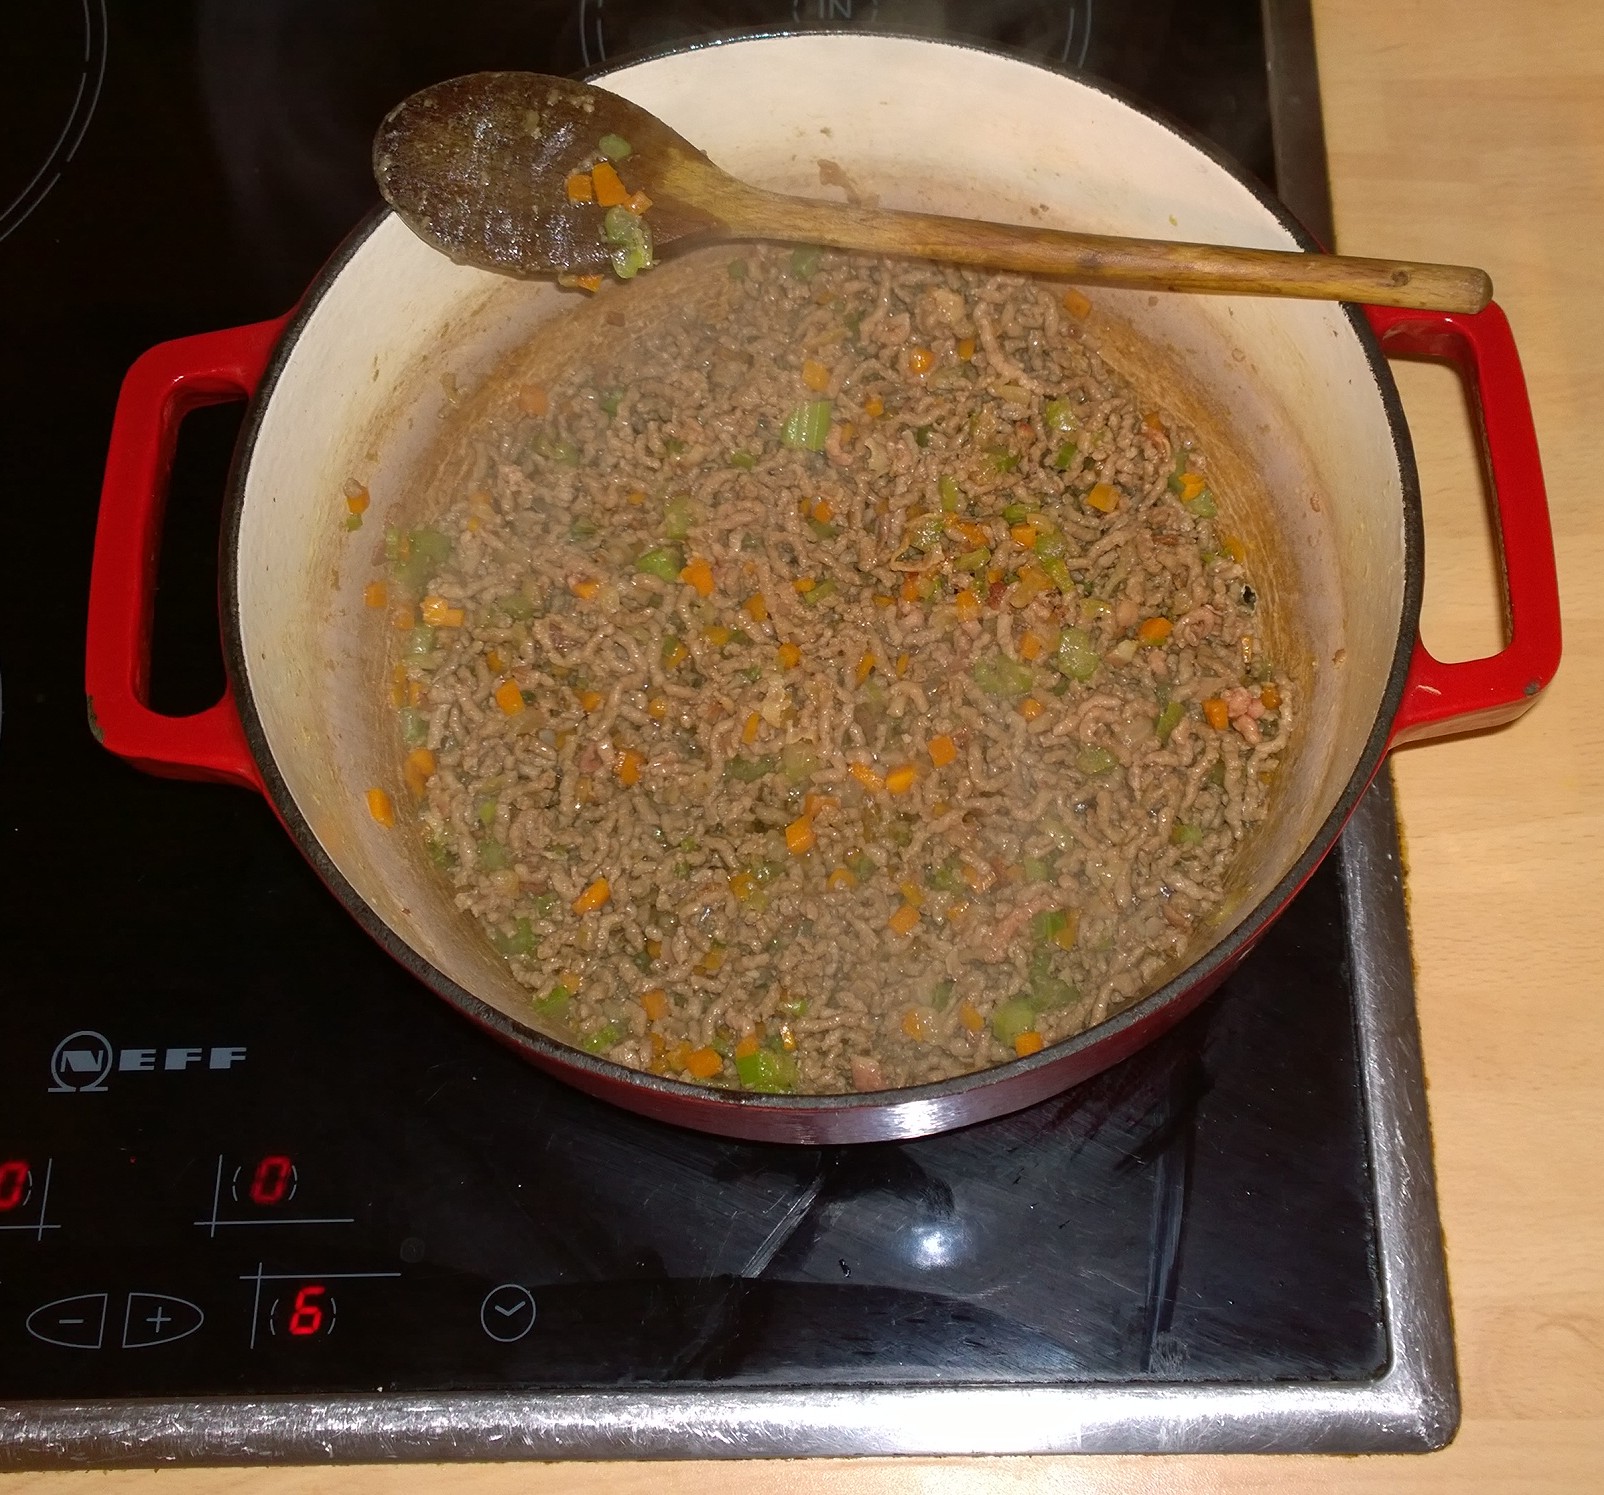
 Once the Pancetta has crisped up, add the Onion and cook slowly for about 5 minutes , you want just a bit of colour as in the picture above, before you add the carrot continuing to cook on a medium heat.


![WP_20150804_15_24_36_Pro[1]](https://julianrolfe.com/wp-content/uploads/2015/08/wp_20150804_15_24_36_pro1-e1438787635655.jpg)
![WP_20150804_15_46_09_Pro__highres[1]](https://julianrolfe.com/wp-content/uploads/2015/08/wp_20150804_15_46_09_pro__highres1-e1438788782888.jpg)
![WP_20150804_16_06_43_Pro[1]](https://julianrolfe.com/wp-content/uploads/2015/08/wp_20150804_16_06_43_pro1.jpg)

![WP_20150804_20_34_45_Pro[1]](https://julianrolfe.com/wp-content/uploads/2015/08/wp_20150804_20_34_45_pro1.jpg)
