π, No not that one, Pie! My take on an Egyptian Neolithic period or New Stone Age food!

Hi peeps, it’s Sunday, I’ve finished work until the 6th January and don’t need an excuse to get in the kitchen. We had planned to have Chicken on Saturday night, but instead went for a Cheese Fondue as I wanted to do something a little special, and Roast Chicken and all the trimmings so close to Christmas just didn’t seem right.

WP_20131221_16_23_33_Pro

I absolutely love a good Pie, but getting one is really challenging, I believe the best are ones made with love and care in your own home, by your own hands and fresh as a daisy!  I am sure there are good Pie’s available but quite often my eating habits change within the space of five minutes, so here is my take on something that first surfaced in 9500BC!

WP_20131222_11_40_31_Pro

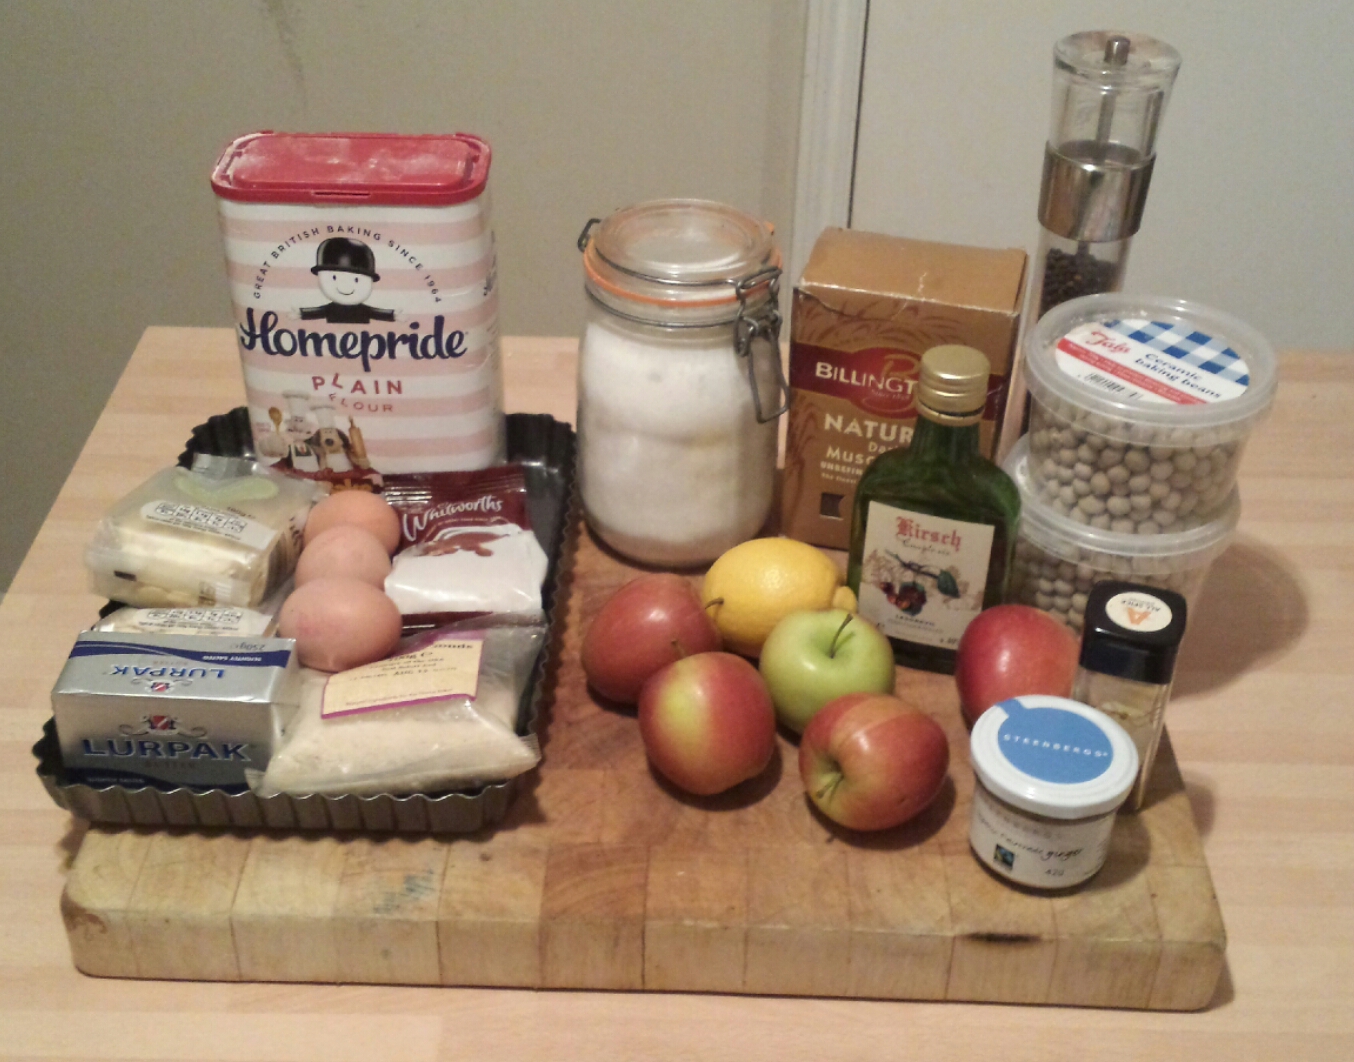
For me a good Pie is made of the best ingredients you can get (or afford), in this case an excellent Free Range Chicken from our favourite supplier, no added ANYTHING! You also need a quality stock to make a sauce, the carcass of the Chicken is the base of this, with some aromatics such as Thyme, Rosemary, Parsley, Peppercorns and a Star Anise.

WP_20131222_12_09_52_Pro

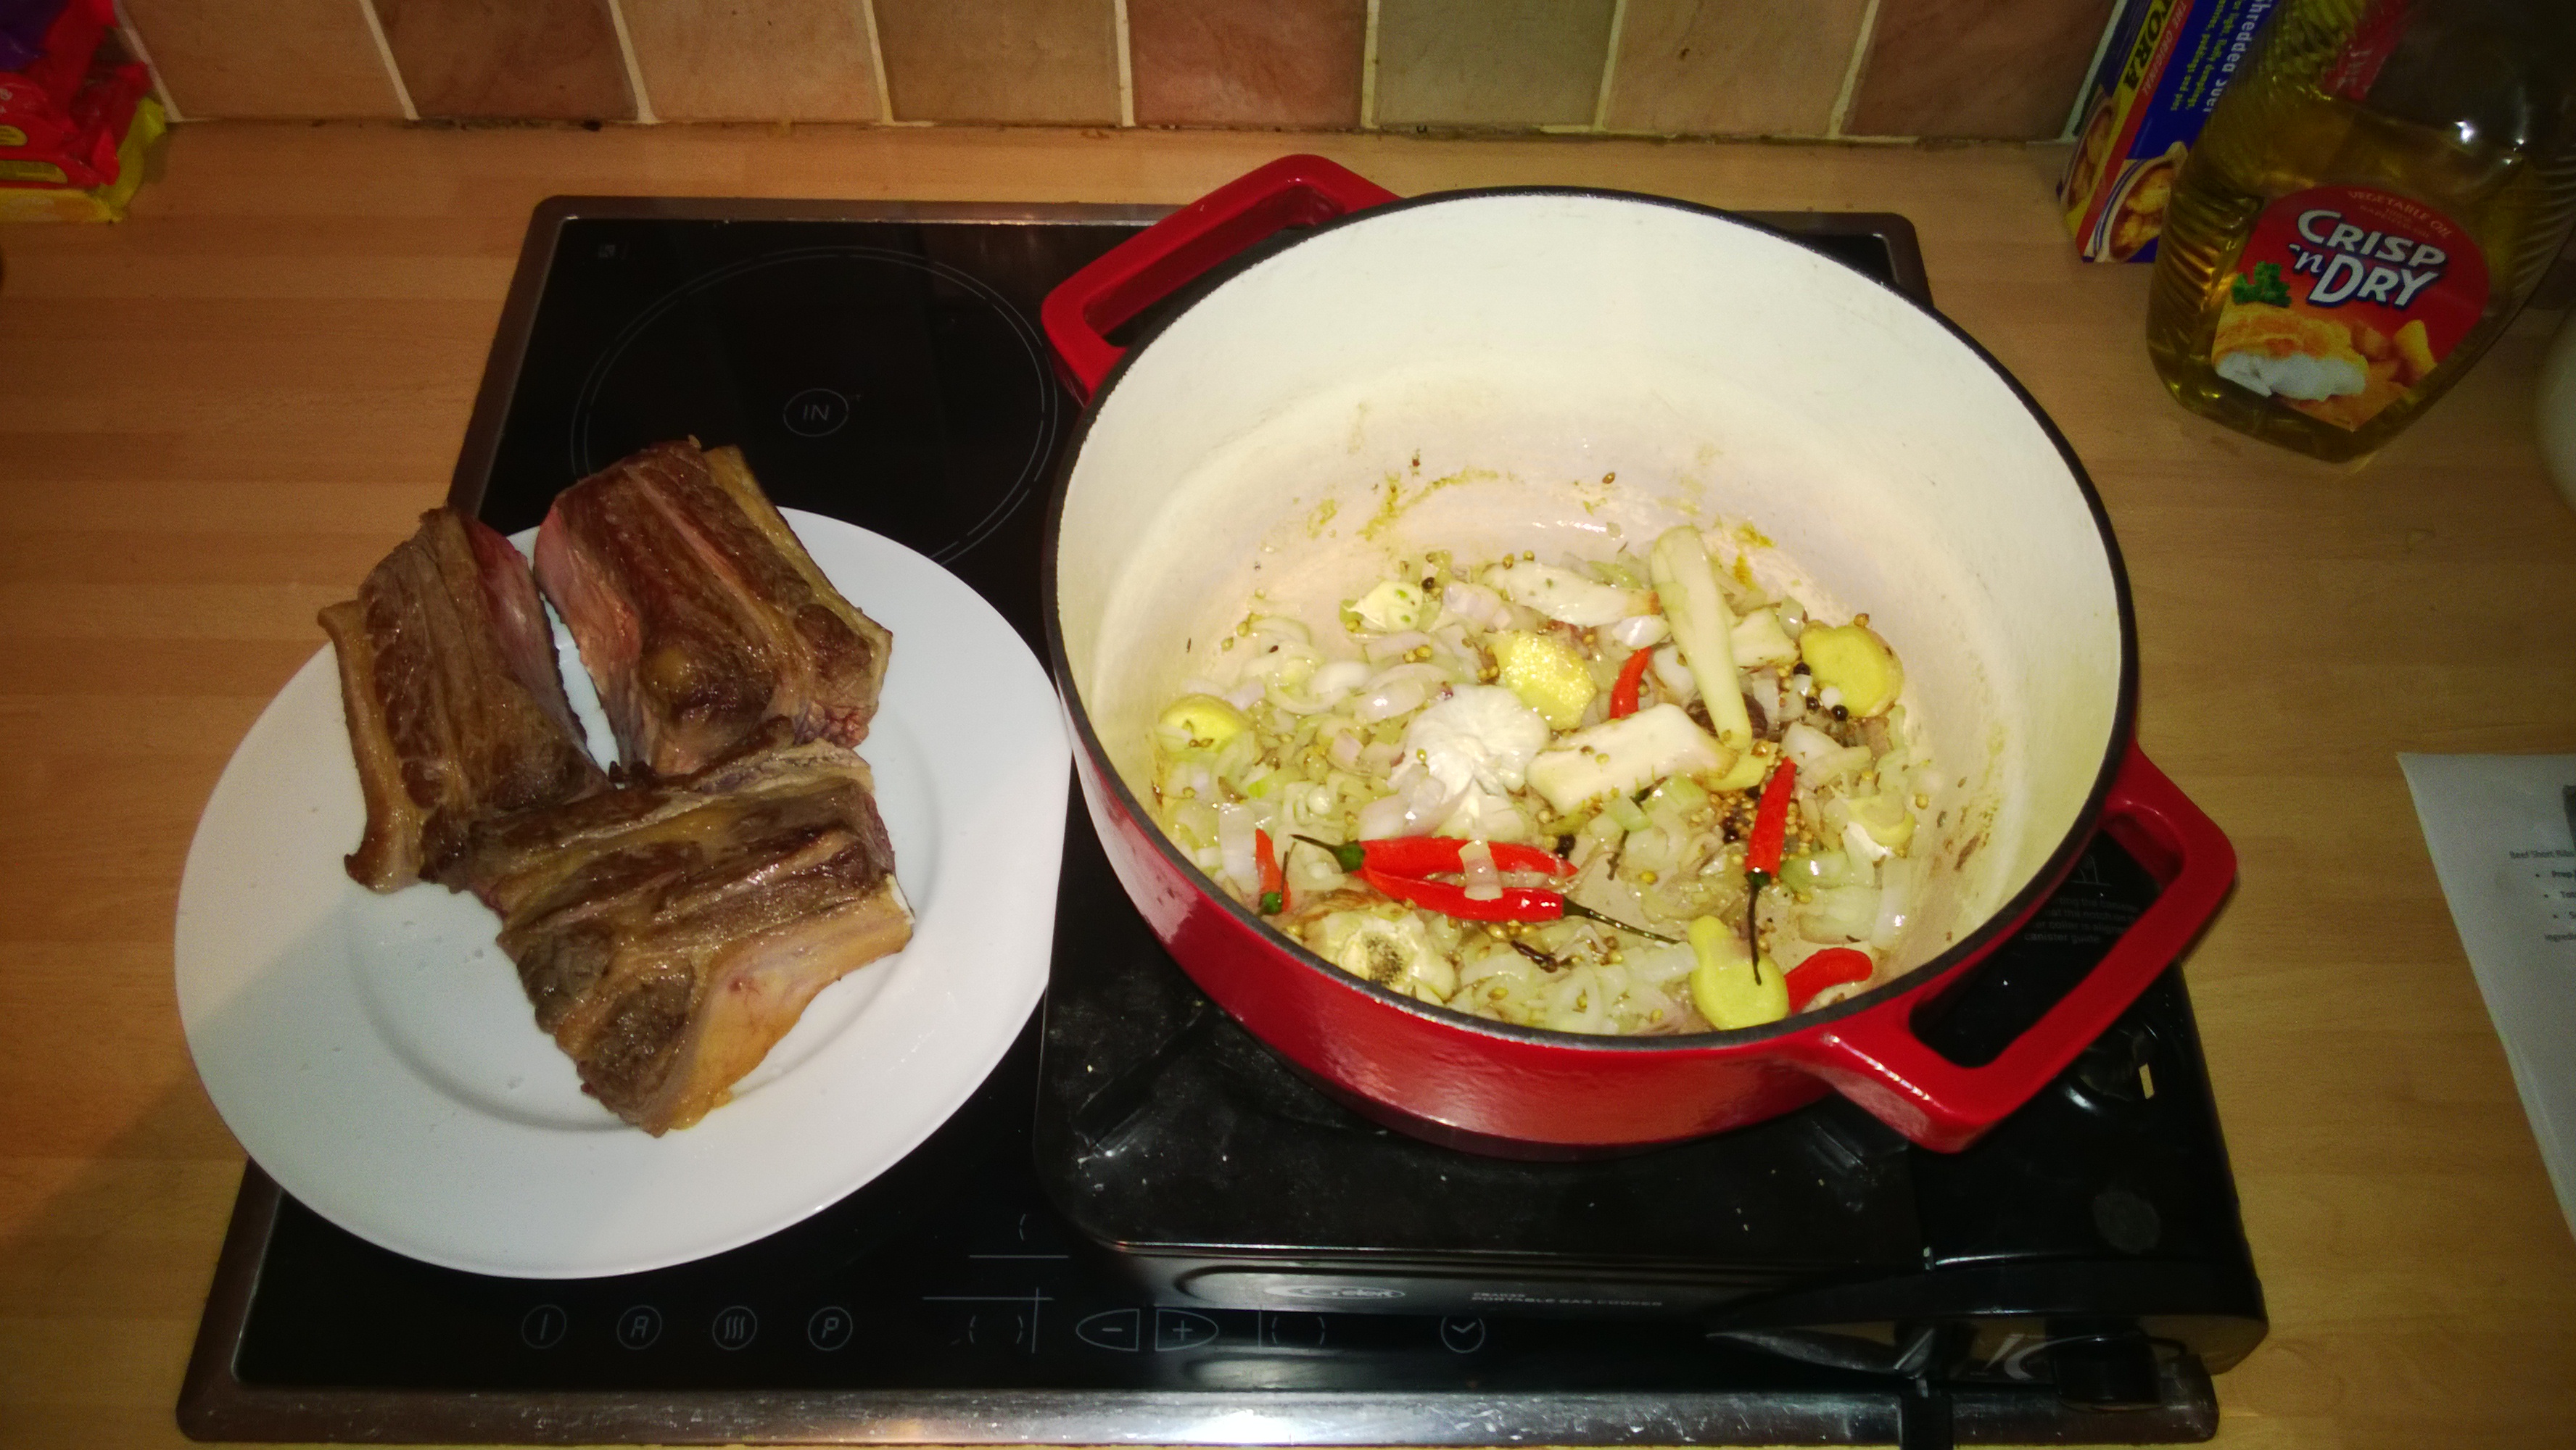
I roasted the Chicken on the Saturday evening,  put half a head of Garlic in the cavity along with a halved Clementine, rubbed Olive Oil all over the skin and seasoned with Salt and Pepper. Roasting took 1 hour 20 minutes in my case, I then covered the beast with a couple of layers of foil, and a towel and let cool for a good couple of hours. Transfer the Chicken to the fridge, covering with greaseproof paper and foil to keep all those flavours where they need to be! DON’T clean the roasting dish, you are going to use it in the morning so cover with some foil to keep any nasties out.

The stock is simmering as I am writing this blog entry.

Earlier this morning I stripped the carcass of its meat and put the carcass back in the same roasting dish I used last night, adding to the flavour with the juices and crispy bits. Also in the dish went a stick of celery and a carrot, cut into chunks, and two onions cut in half with their skins still on, then into a 180deg oven (160 deg fan) for 1 hour.

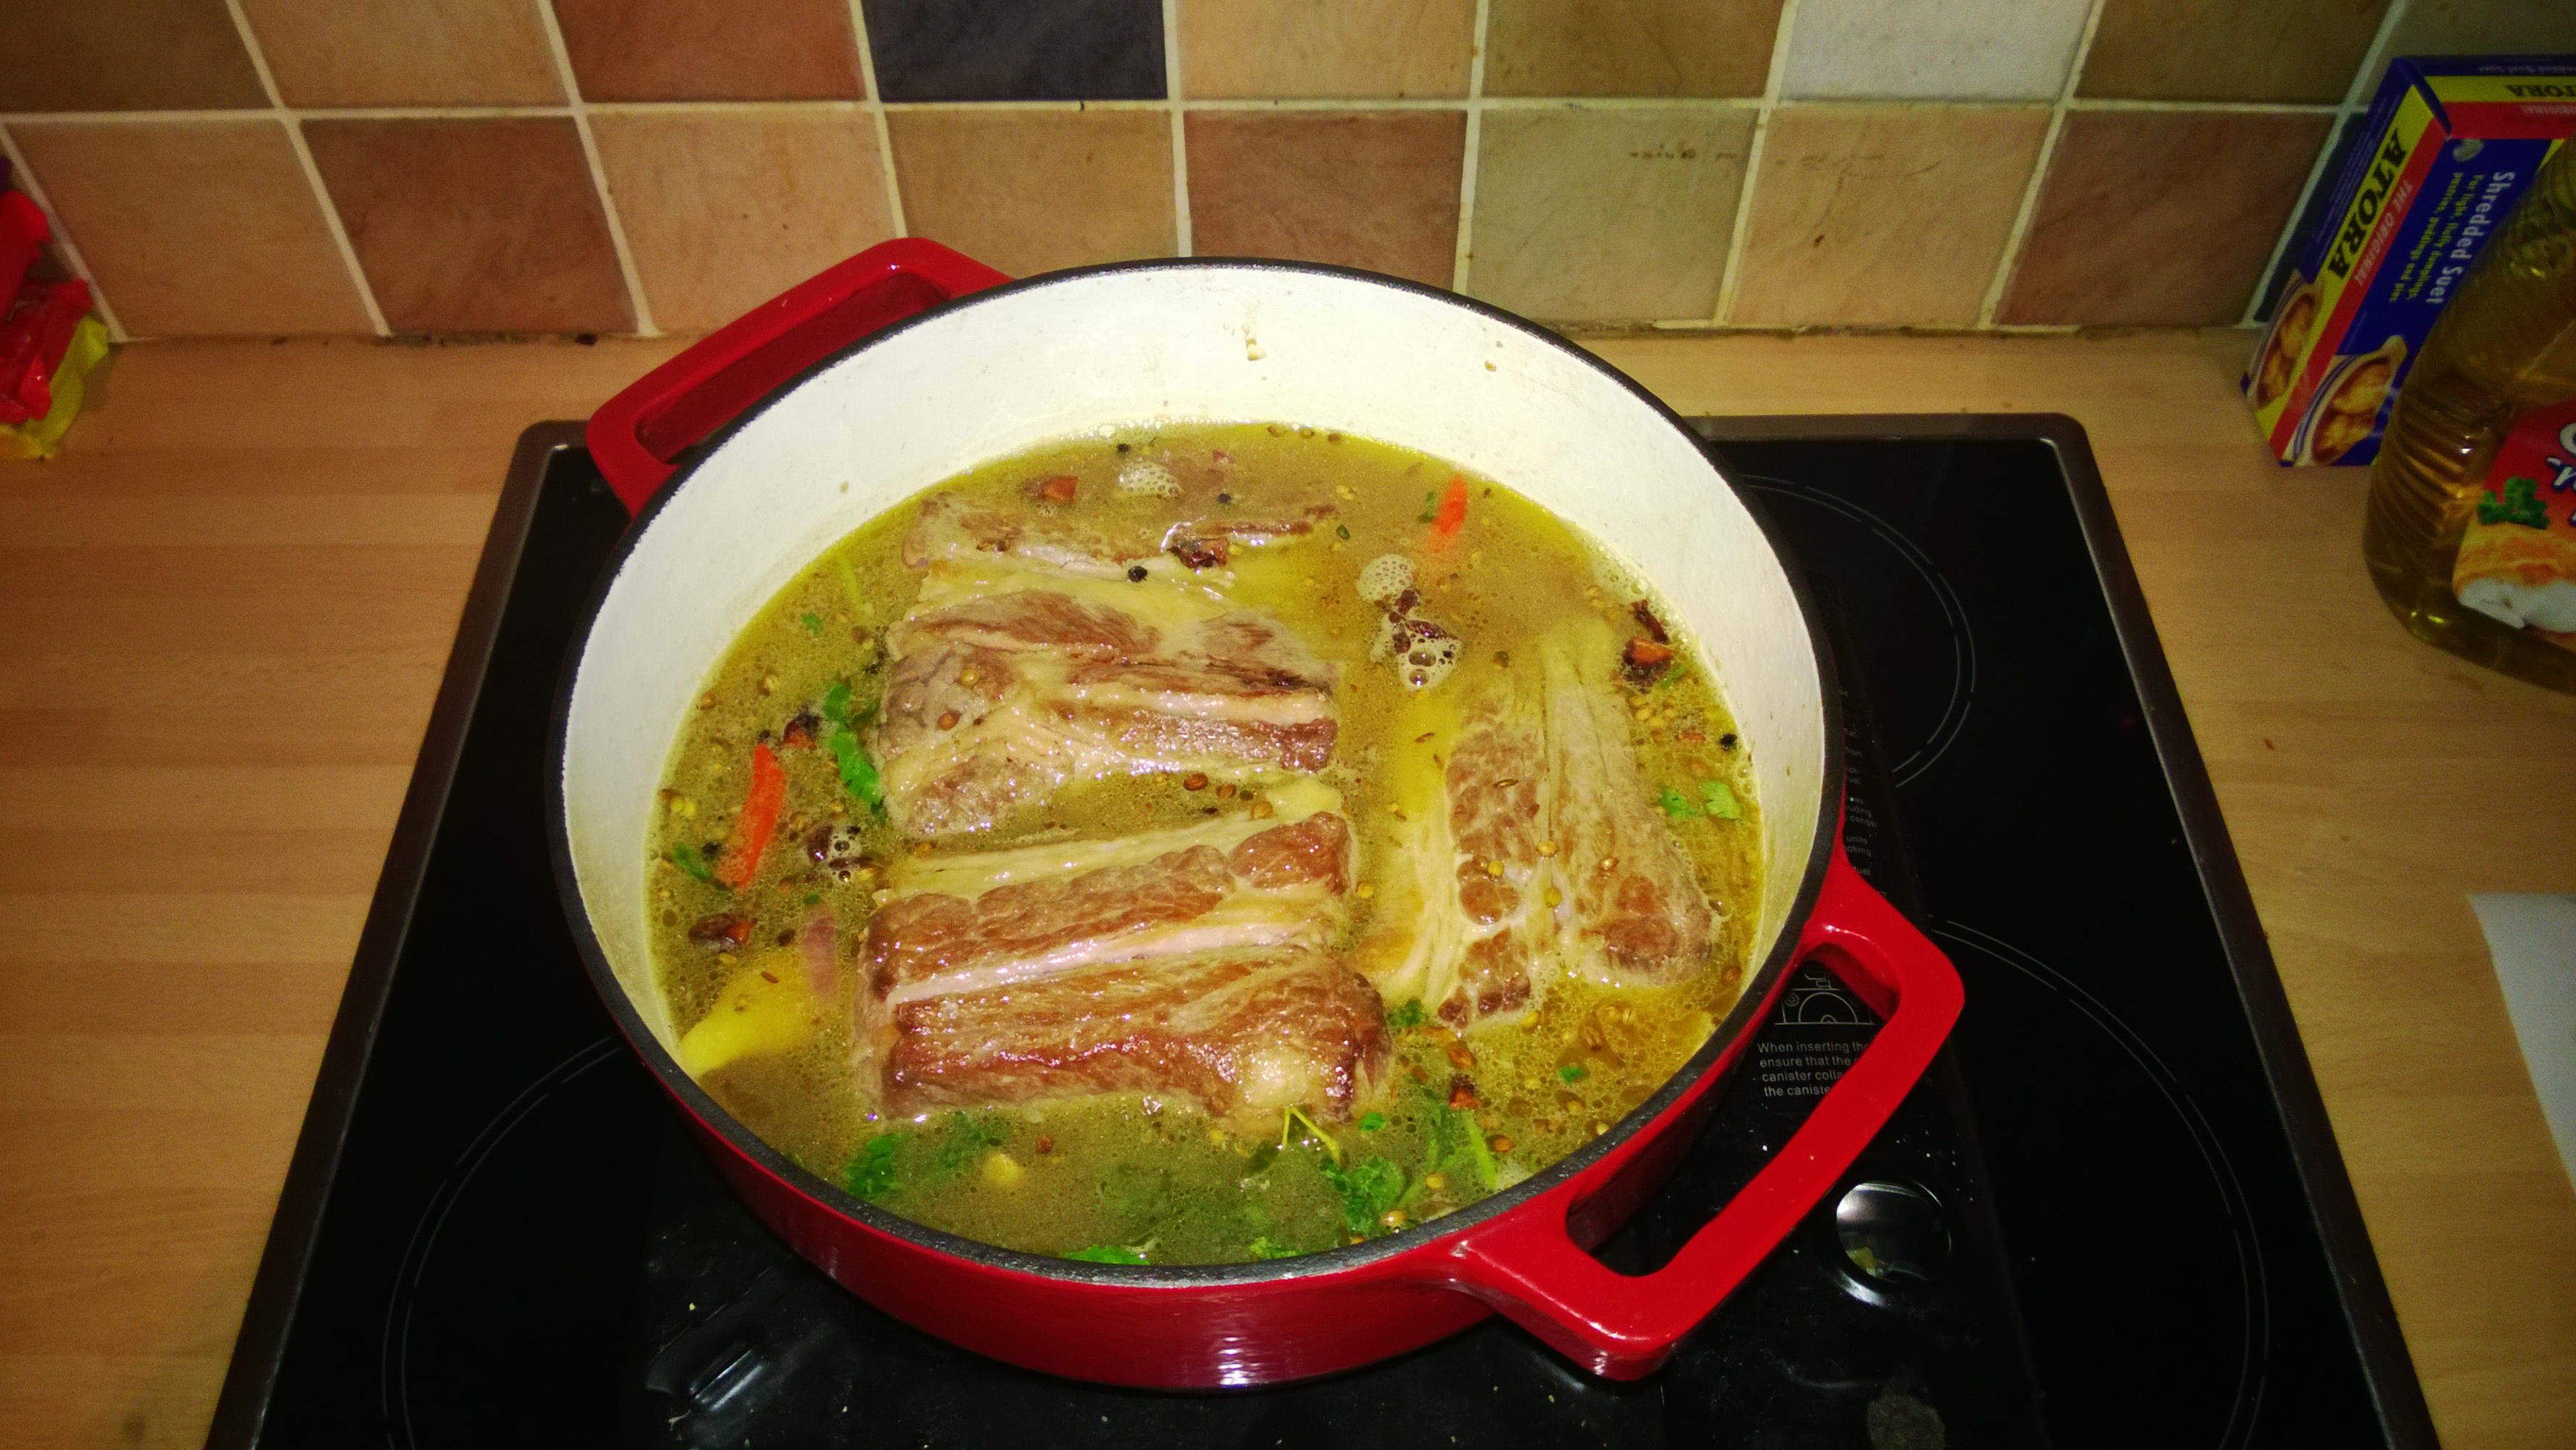
Once roasted put into a stock pot if you have one, or a large saucepan along with about 4 pints of water, a bunch of Parsley, 2 sprigs of Thyme, a sprig of Rosemary, 10 Black Peppercorns (Lampung in my case), 5 White Peppercorns (I used Muntok) and one Star Anise. The Stock needs to gently simmer for 4 hours, skimming any impurities of the surface as you go.WP_20131222_15_07_42_Pro

After 4 hours, remove the stock from the heat and filter through a sieve, the aromas filling the kitchen were….CHICKEN! You can see a small amount of fat on the surface, this can be removed when the stock has cooled down if you want too.

WP_20131222_13_23_17_Pro

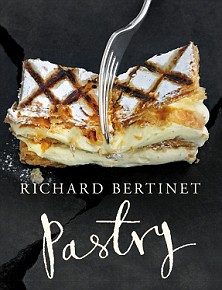
Whilst the stock is simmering, you can attack the Pâte Feuilletée or Puff Pastry. I know the shop bought stuff is apparently good, but this was to be a special pie and so an excuse to have a go myself. I followed the instructions of the well renowned Richard Bertinet, in his book Pastry, which I mentioned in the last blog.

There are a number of stages to go through, with chilling between each so allow yourself enough time (you could go and buy some but it won’t be the same!)

WP_20131222_14_50_10_Pro

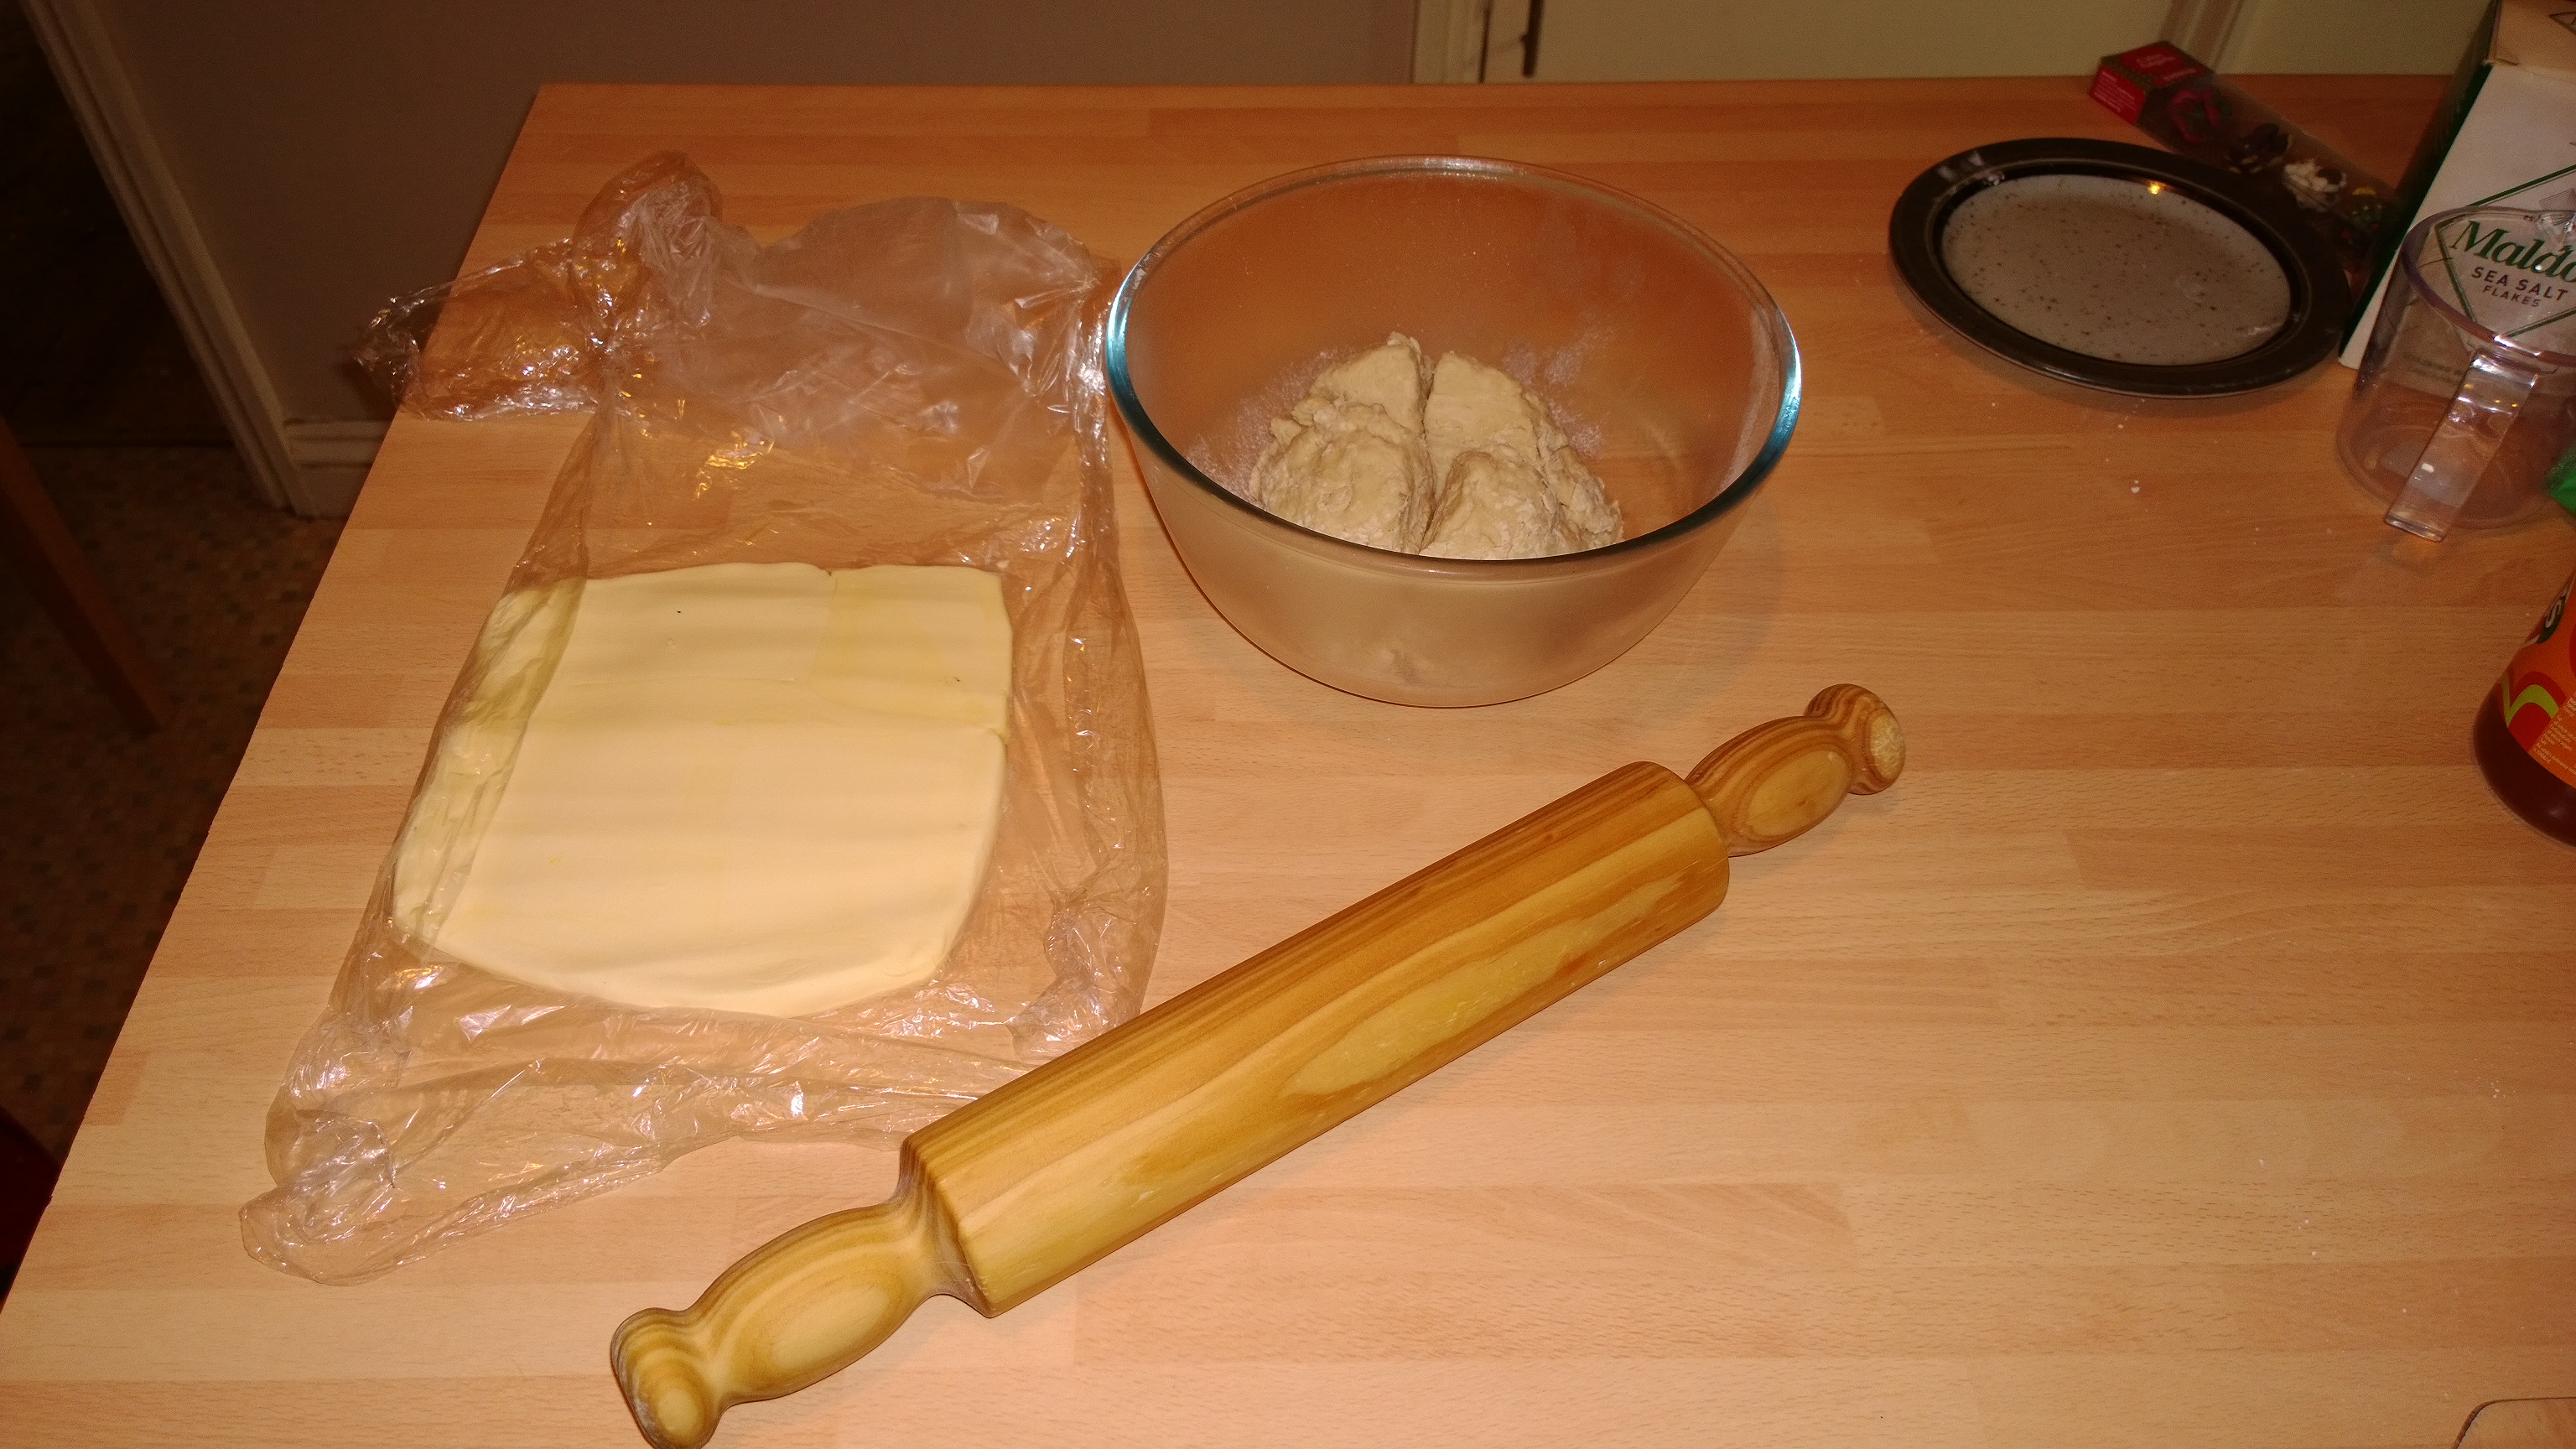
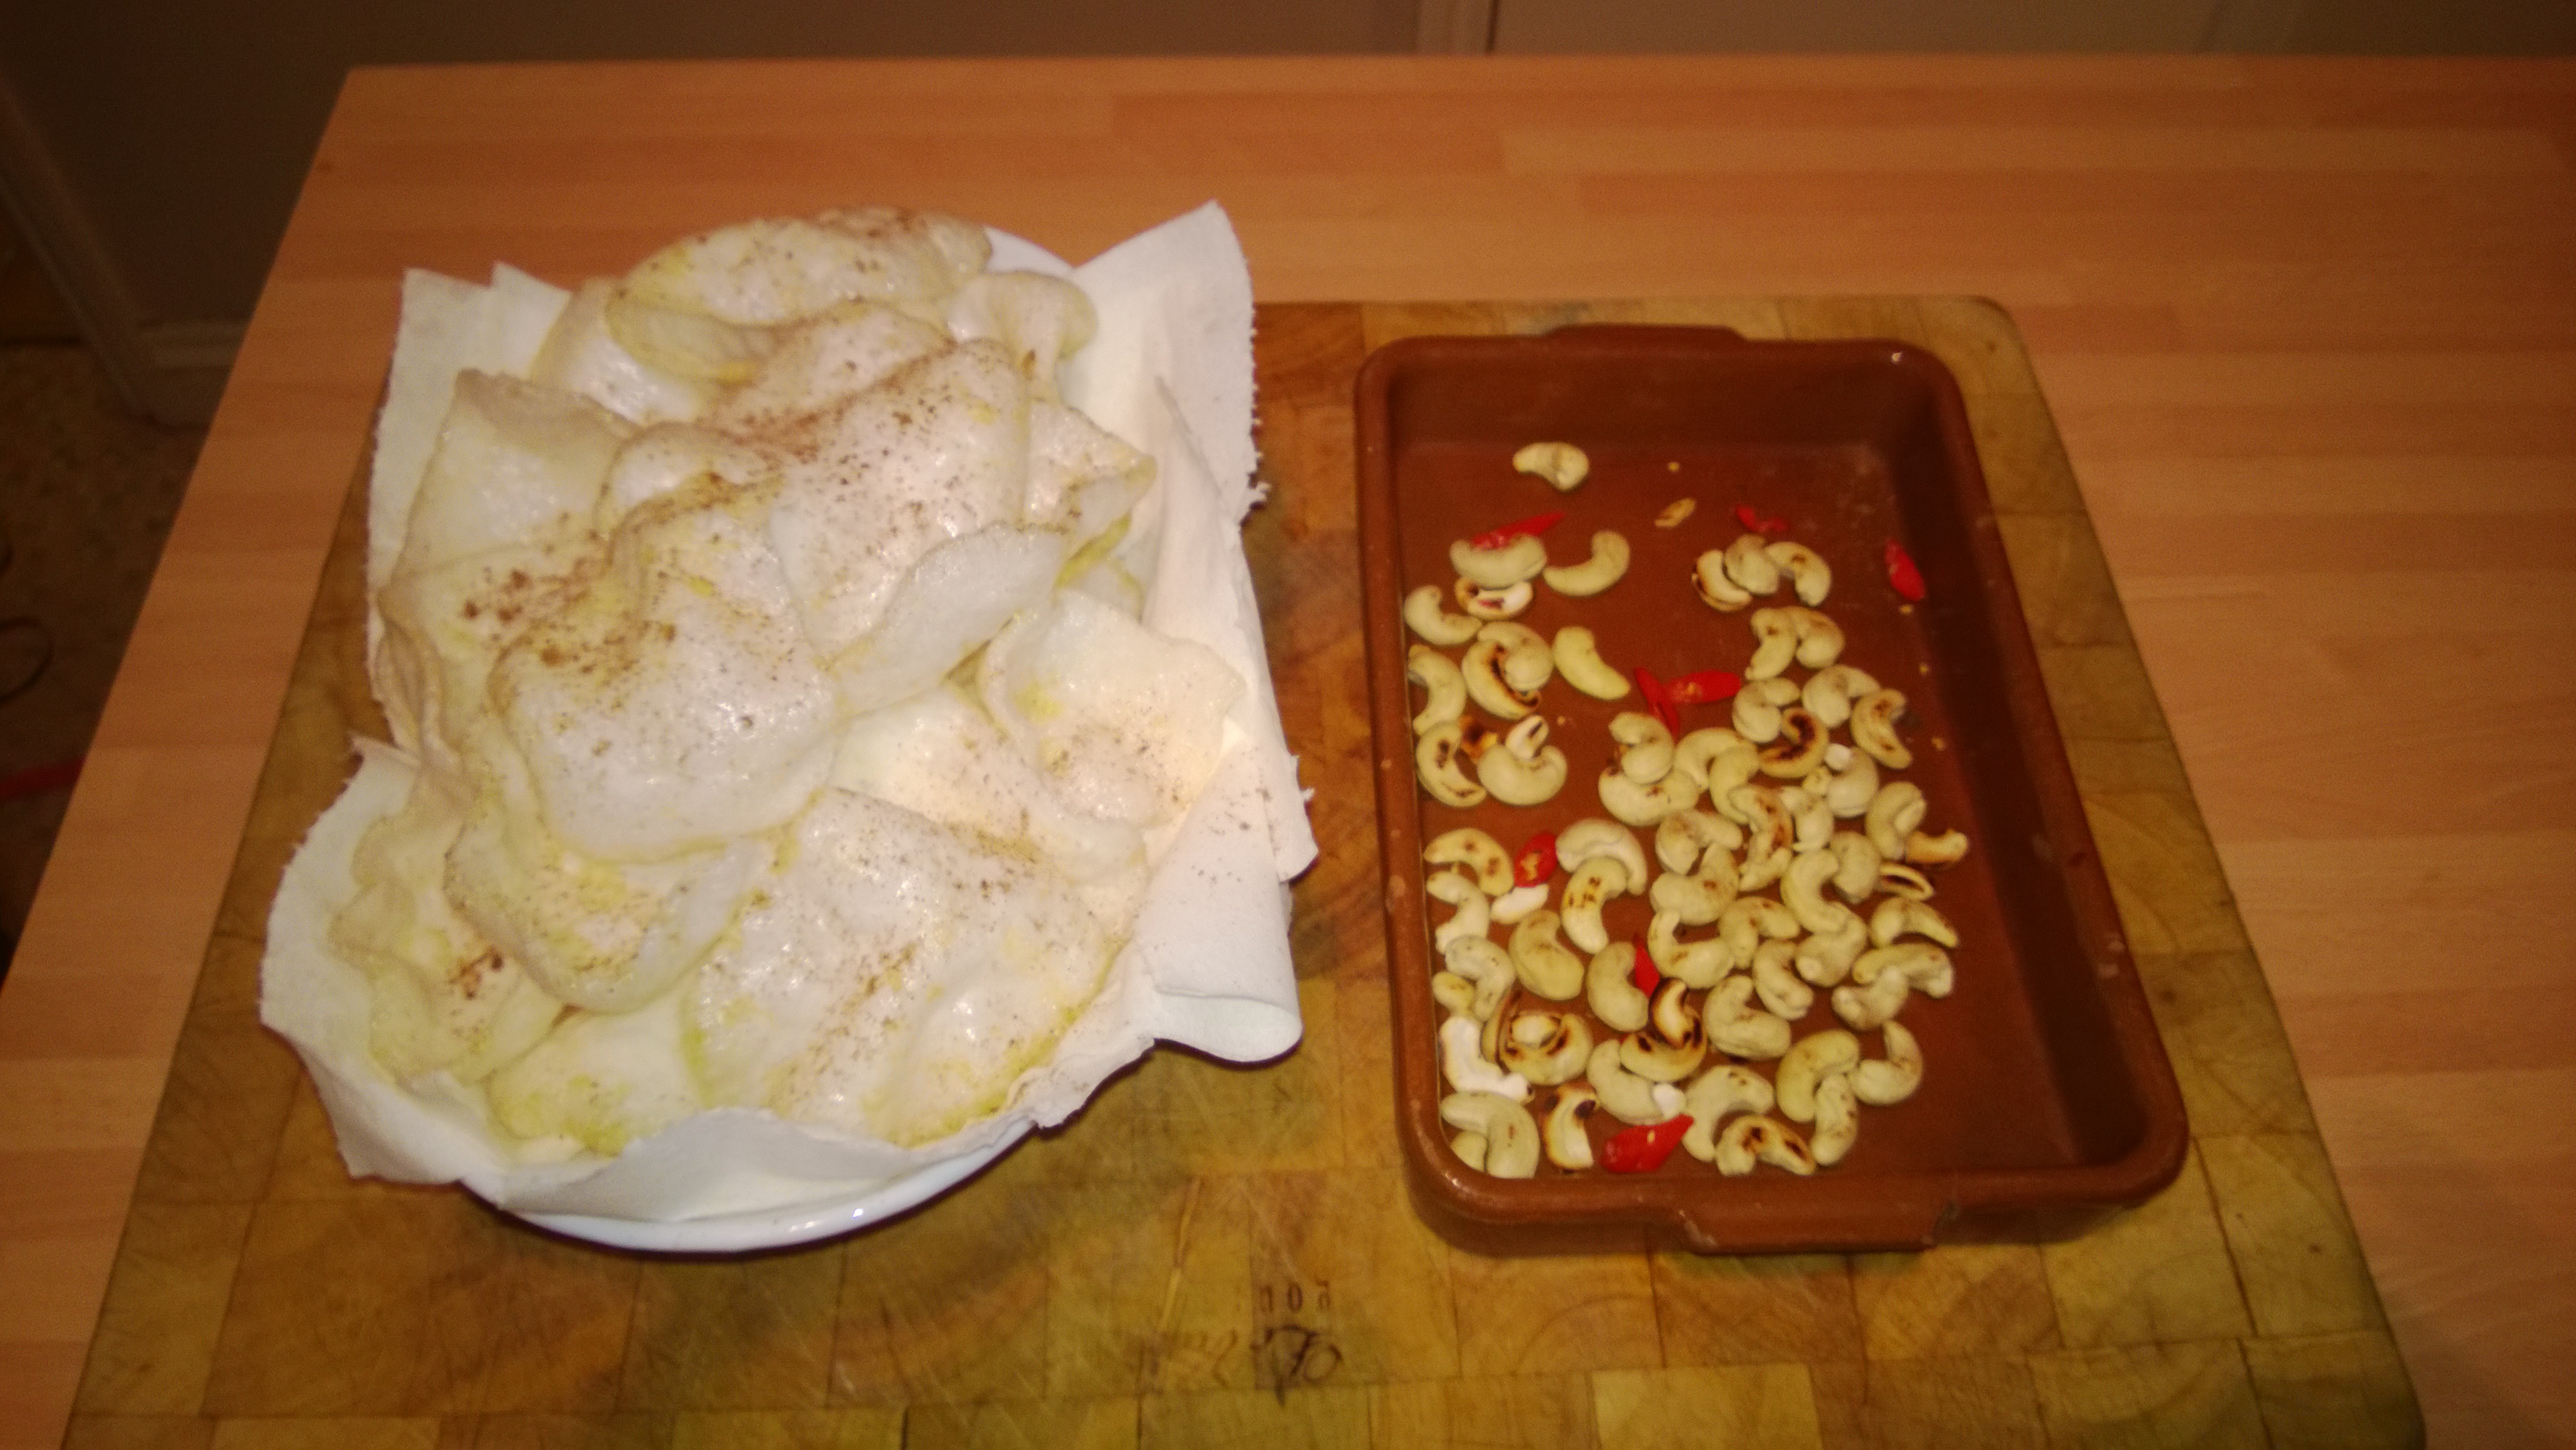
This is my attempt after I had added ice cold water to the flour, and knocked ten tons of, no, only joking, flattened the butter between two sheets of cling film. After another chill in the fridge, the butter will be incorporated into the flour mix in layers.

WP_20131222_16_03_25_Pro

There a two ways of folding to create Puff Pastry, Double Book and Single. Double Book is where you take each end and fold it into the middle. Single is where you fold ONE end in, and the other overlaps.  Just for a challenge I went for single, which requires 6 folds and 1/2 hour resting in the fridge after each (Its not a fast process!). This is mine after fold three, the finger dimples are intentional to enable you to remember where you are!

WP_20131222_16_08_20_Pro

In between the puff pastry process you can start to prepare the filling. You need Onions, Garlic, Button Mushrooms, Butter, Flour, Stock, Roast Chicken (chopped) and frozen Peas; Salt and Pepper to taste, Herbs de Provence or whatever flavourings you fancy. I included a small amount of Chilli to provide a background warmth.

Chop the Onions and fry gently in some Butter and Olive Oil until translucent, then add the Garlic (crushed or chopped) and continue to cook. Quarter the button Mushrooms and add, cooking for at least 5 minutes then the Roast Chicken and a tablespoon or so of Flour, and continue to cook, then about 300 ml of the freshly prepared Chicken Stock. Gently simmer for about 15 mins and towards the end, chuck in about 3 handfuls of frozen peas and remove from the heat. It should look like the above.

WP_20131222_17_55_55_Pro

To accompany ‘The Pie’ was going to be one of my all time favourite potato dishes, Gratin Dauphinoise. Layers of Potato, Garlic, Salt & Pepper and grated Nutmeg, filled with double cream and cooked slowly until golden and bubbling. Its a very rich and flavoursome dish that can be a meal in its own right.

WP_20131222_18_13_47_Pro

I topped mine with grated Grana Padano Italian hard Cheese which i deemed acceptable as the dish is from the Dauphiné area of France, near the Italian border, you could also use Gruyere as an alternative.

Back to the Pastry and we are almost done. We are now at turn six of the single turn method.

WP_20131222_18_21_48_Pro

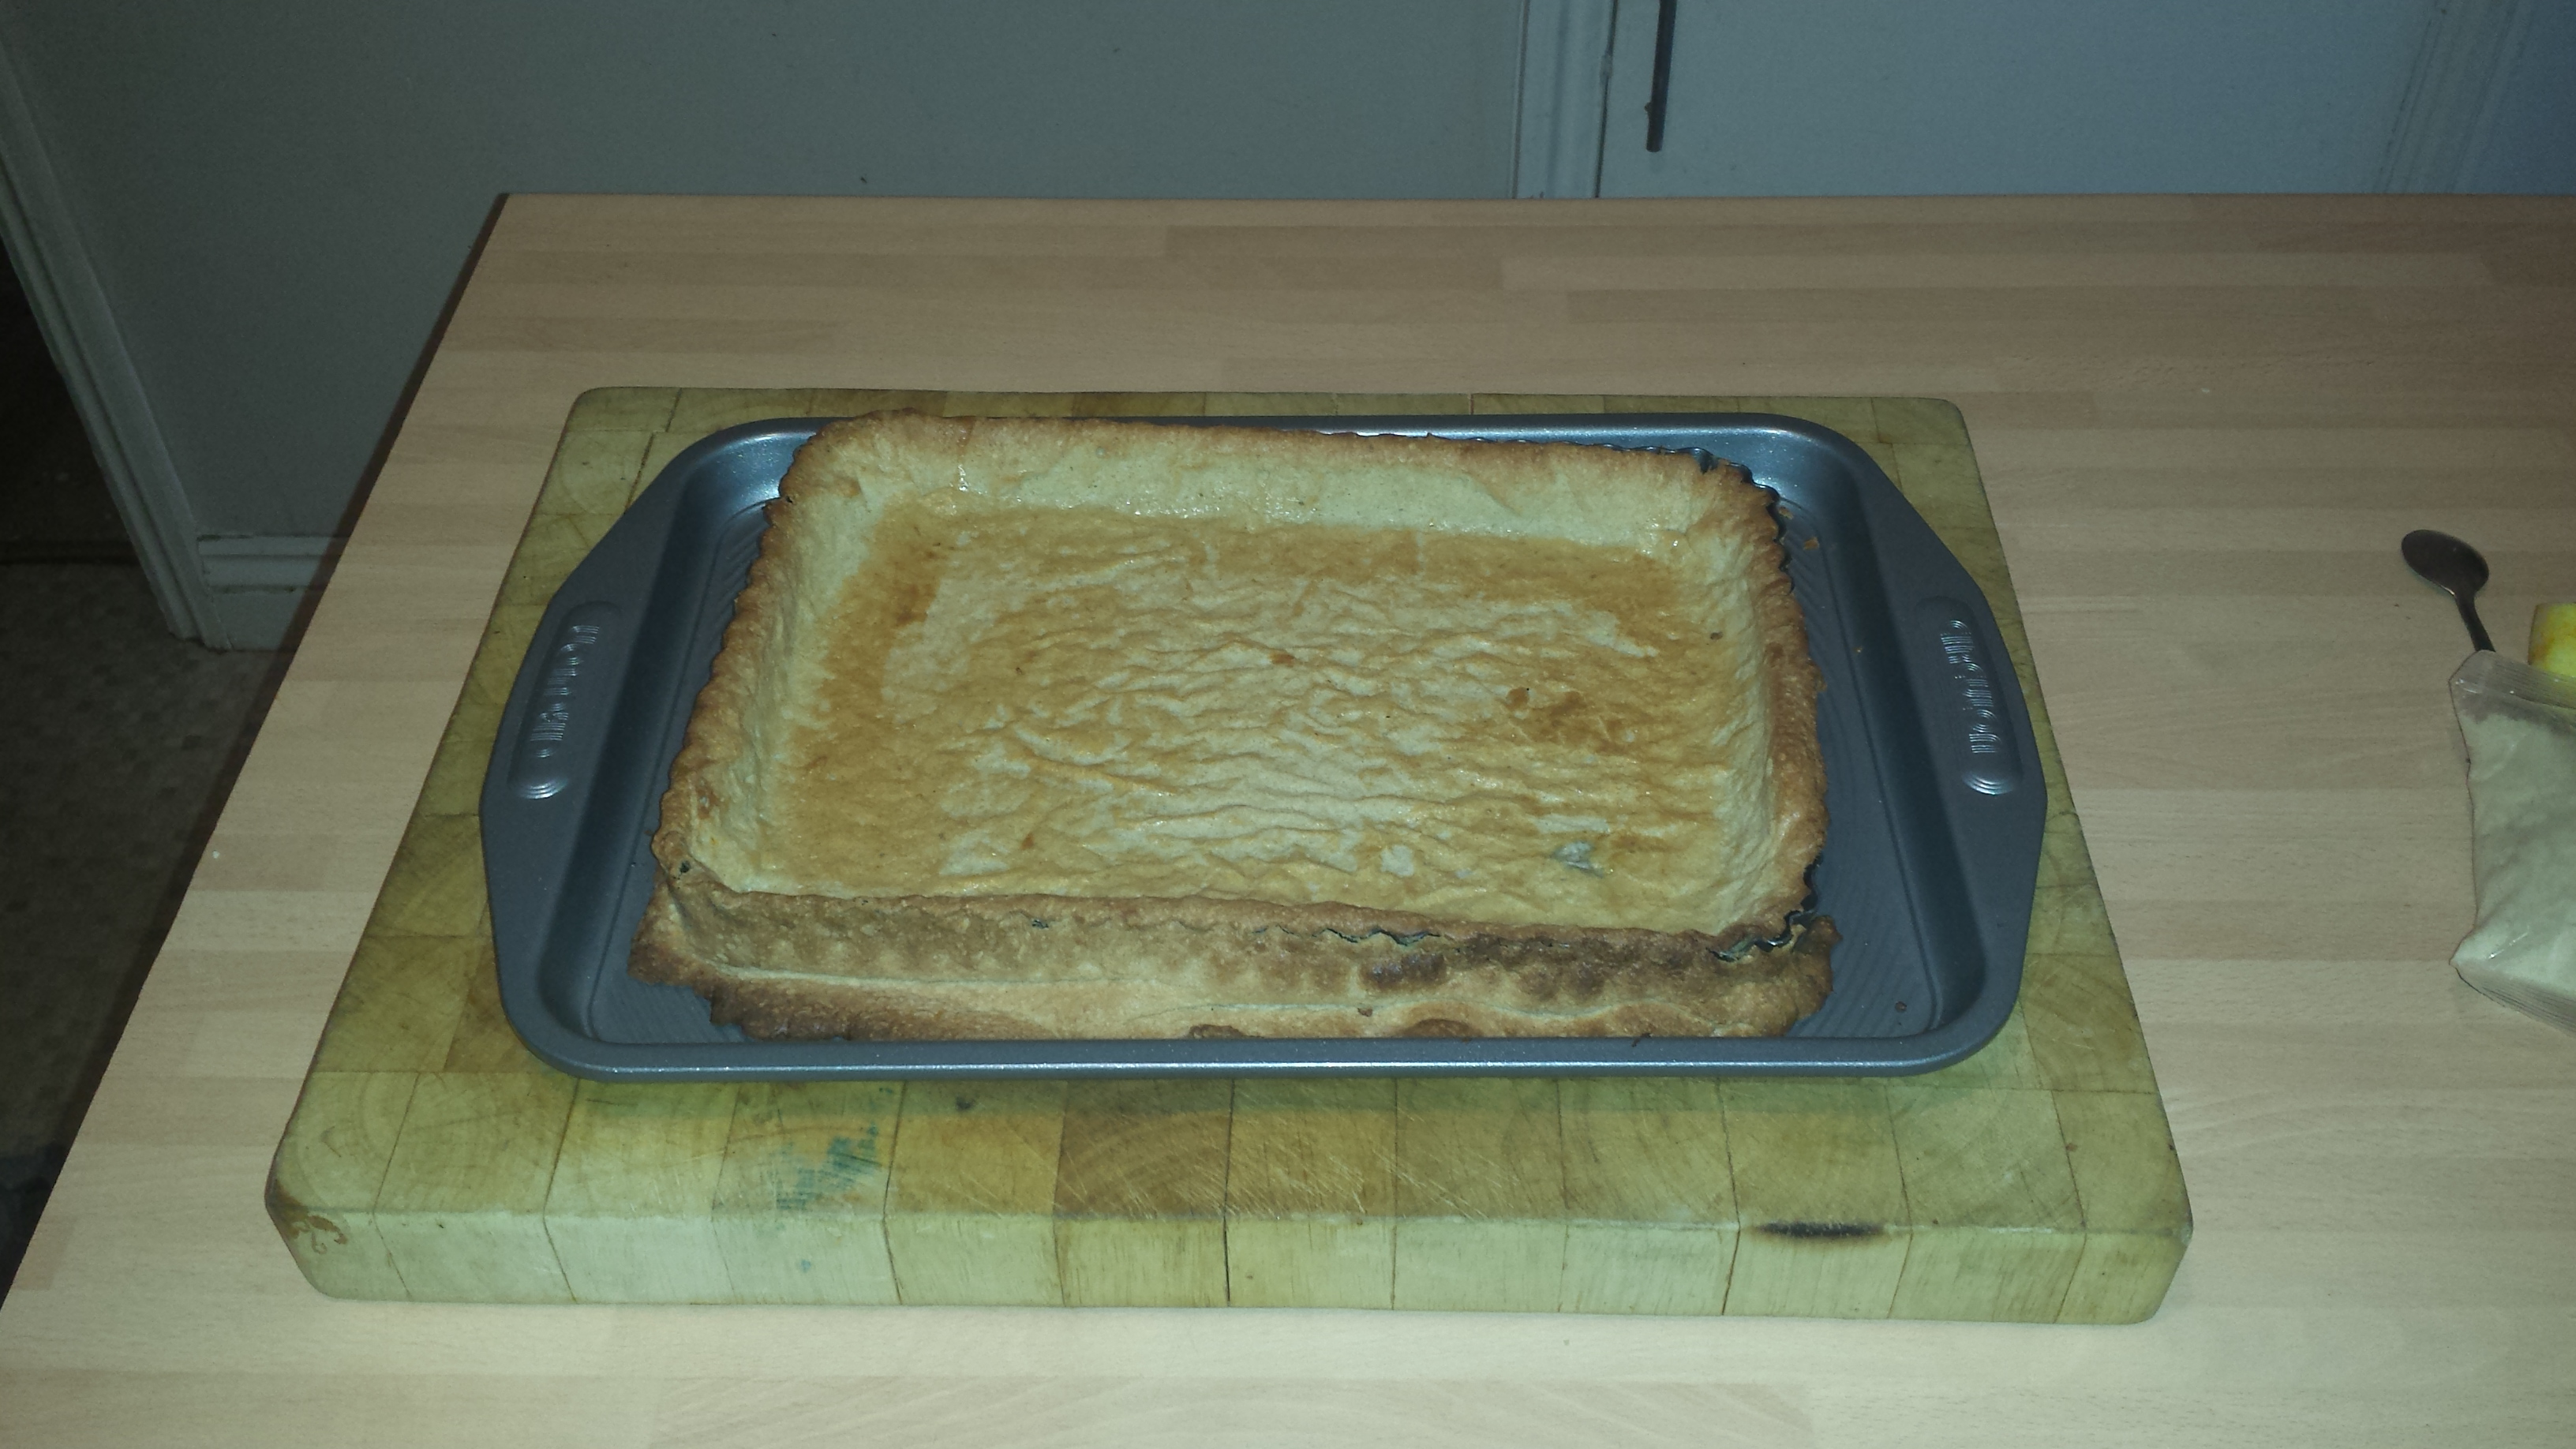
When you cut the Pastry you can see the thin wafer like layers of Butter, we are going to make a Flat Pie and you need to make the lid slightly larger than the base to cover the filling.

WP_20131222_18_33_09_Pro

Once you have the base rolled out to a thickness of a slightly less than a pound coin, brush egg wash  about an inch around the edge, pile in the chilled filling and place the lid on top. To seal the edges I used the thumb and two finger method to crimp the edge, and then rolled like a Cornish Pasty edge, nothing was escaping this bad boy!

WP_20131222_18_37_41_Pro

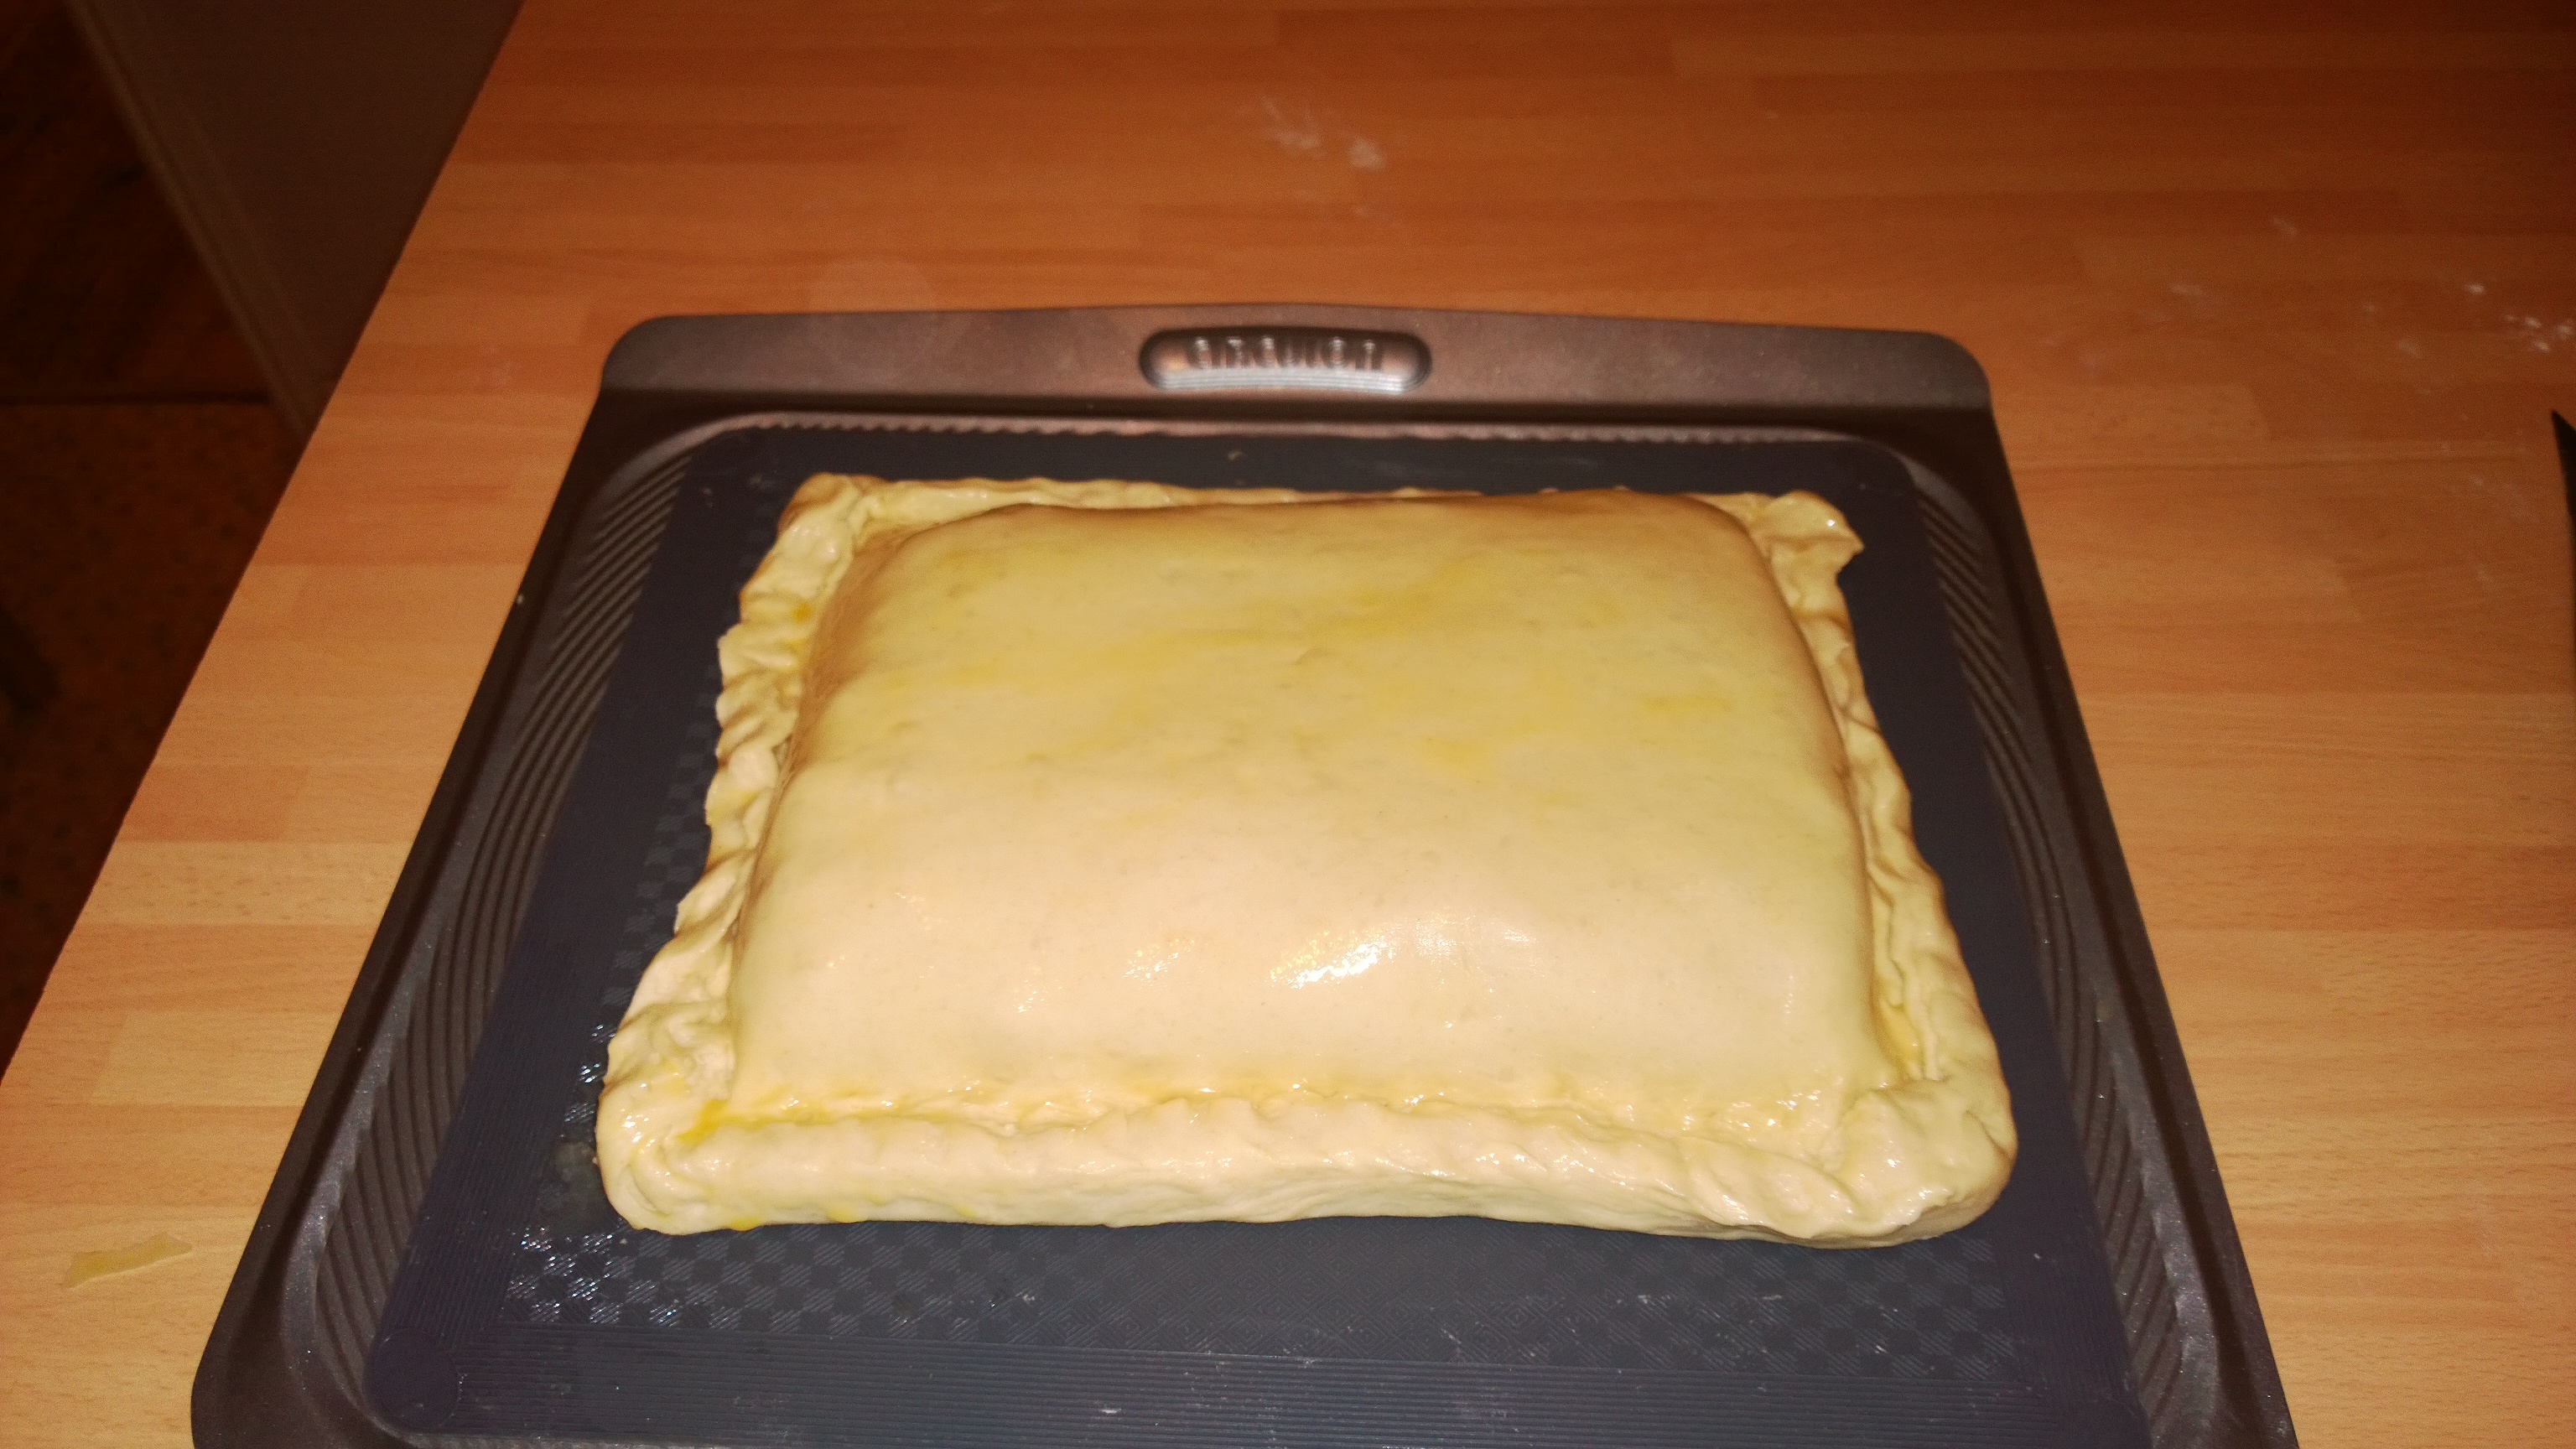
Brush the lid with egg wash and put in the fridge to relax for 10 mins. The take it out the fridge, egg  wash it again (this will help it go a deep brown colour) and using the BACK of a sharp knife, gently make curve patterns from the centre to the edge. If you don’t do this after the egg wash, you will loose the pattern. You can also make an incision in the centre to let some of the steam out during cooking.

WP_20131222_19_46_18_Pro

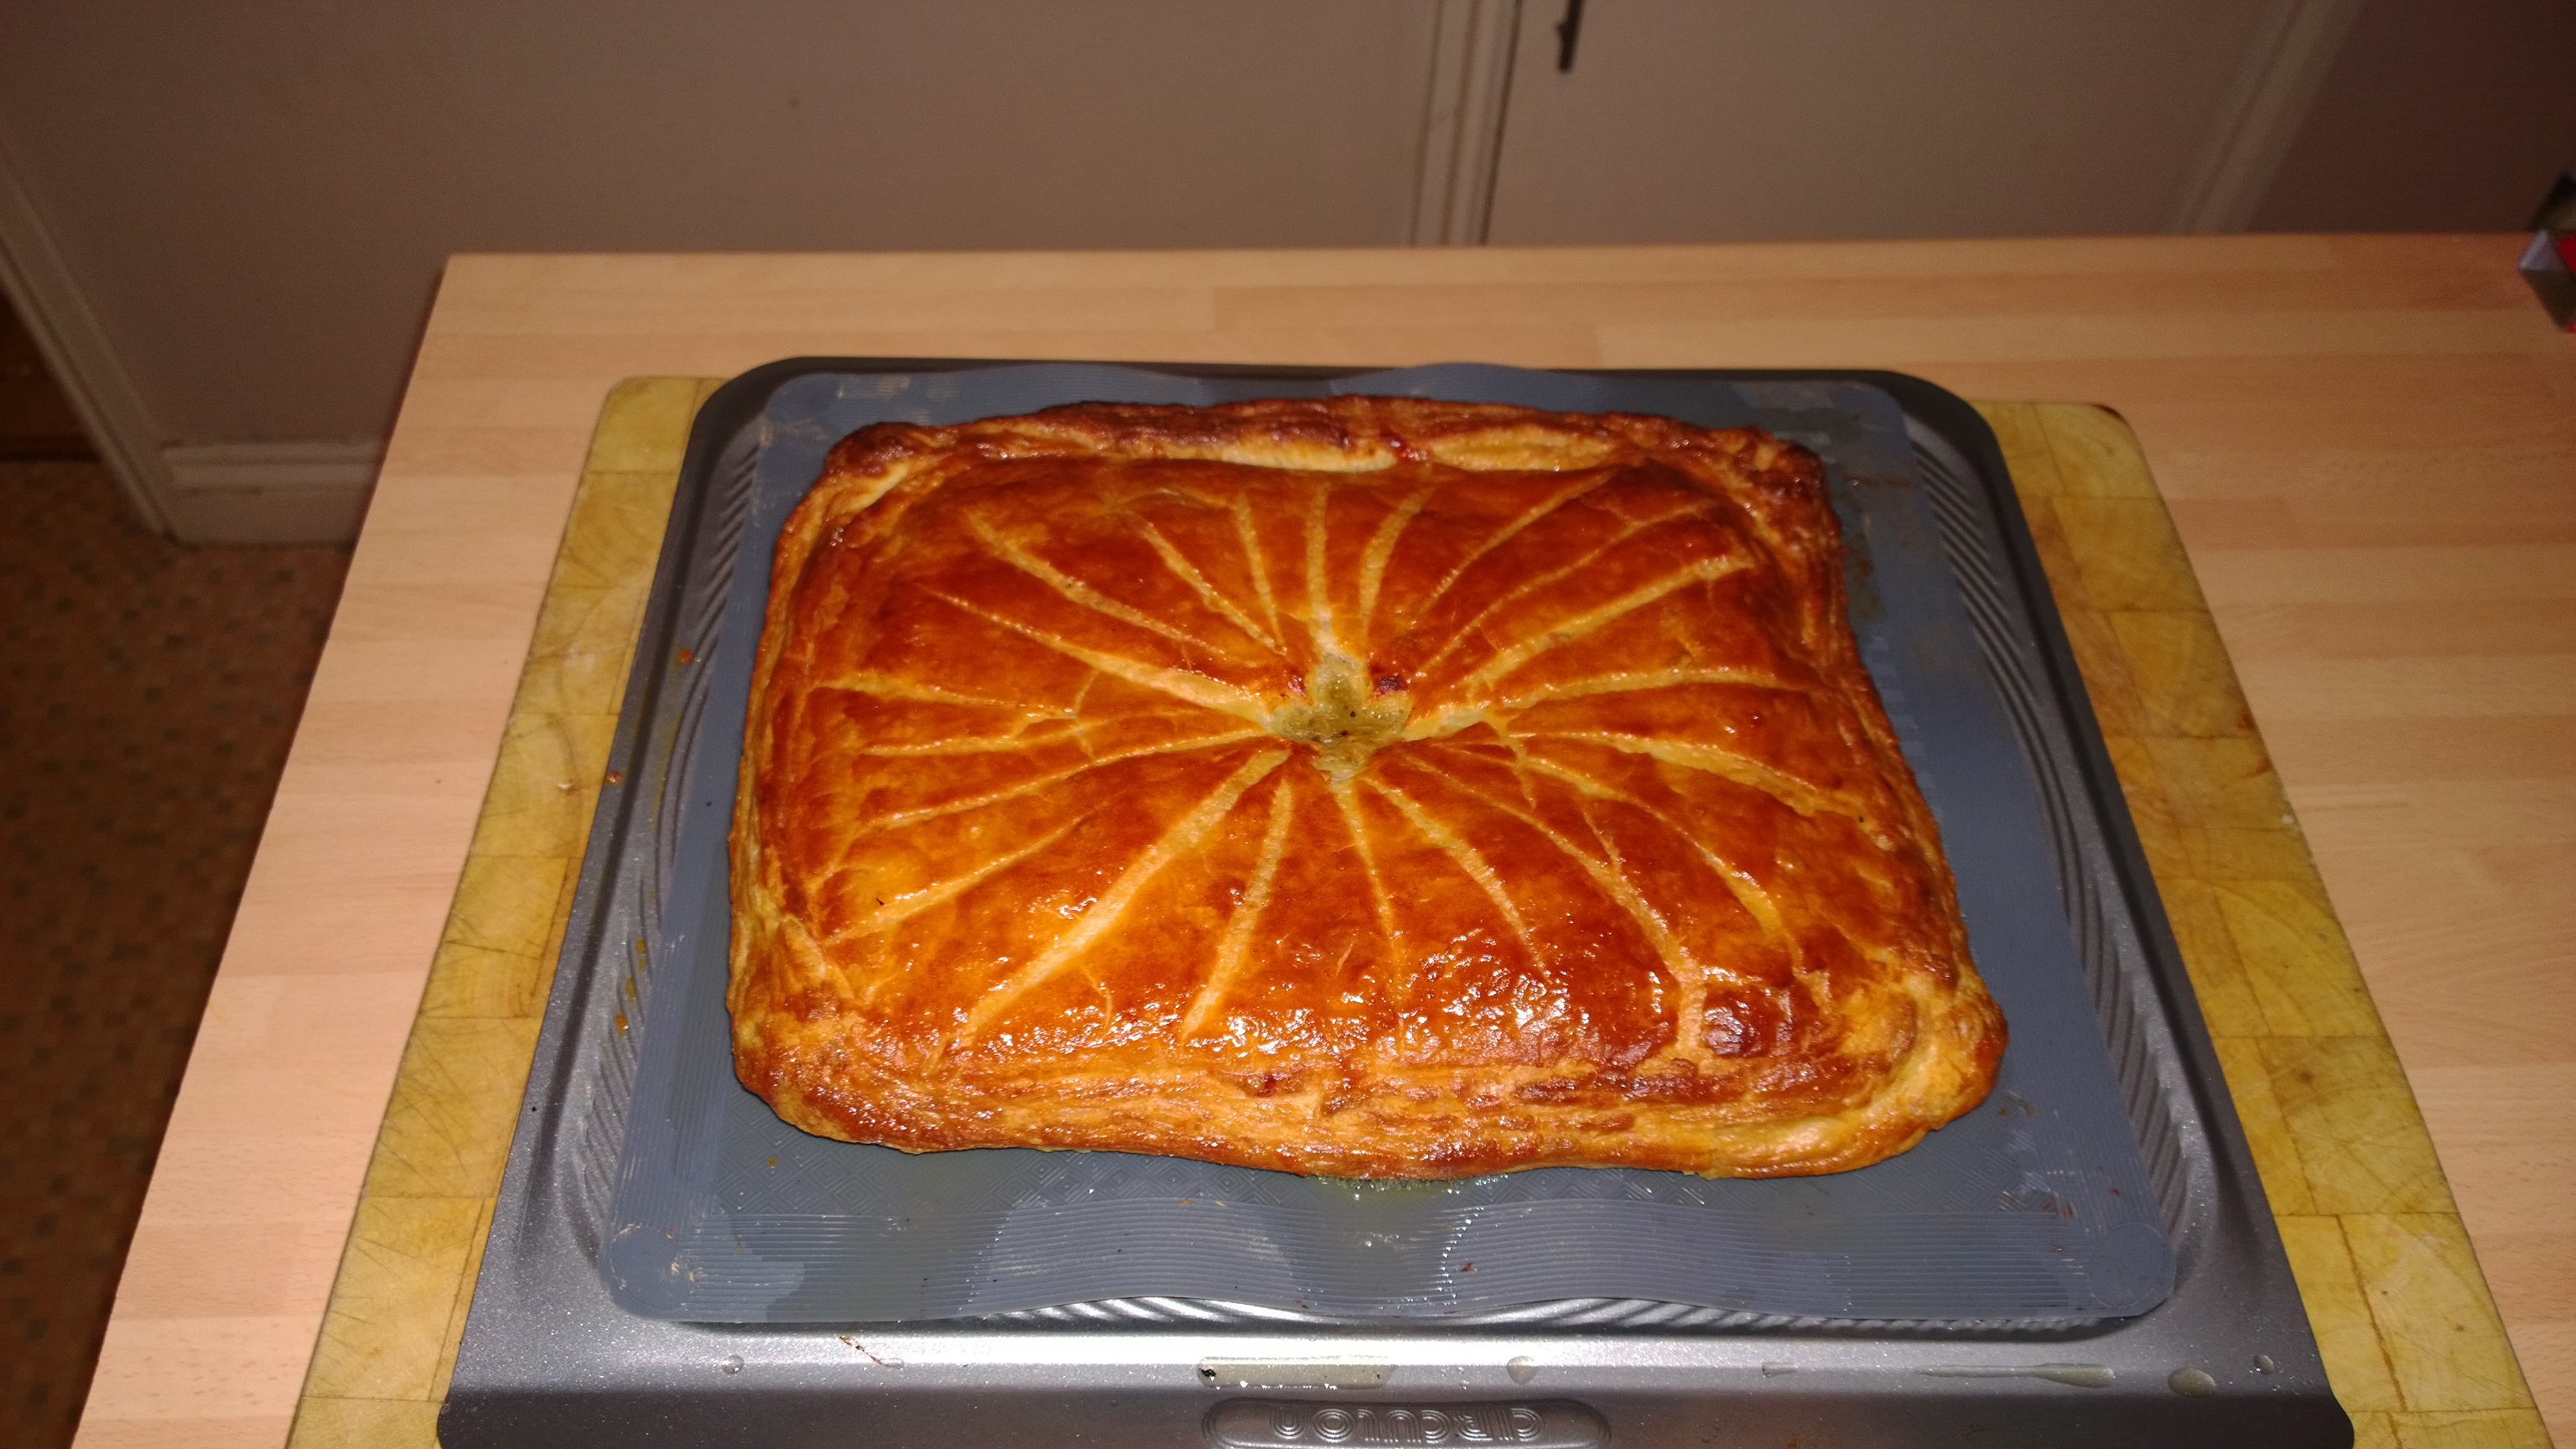
Approximately 45 minutes in a 180deg oven and you should end up with something like the above, be brave and turn the heat up a little during the last 10-15 mins, you want a deep brown and nearly caramelised colour and finish. The pastry should be flaky and crispy, the filling succulent and flavoursome.

WP_20131222_19_59_46_Pro

I also fancied another favourite, Green Beans & Pancetta, cooked beans, rolled in the salty Italian Bacon and fried quickly for a few minutes to crisp up.

The Boss is generally not to fussed about pies, until she tried this one, it was stunning, tasty and there is plenty left over for tea on Monday. So here it is, my take on a Pie, you could use Beef or Pork if you don’t like Chicken, just make the appropriate Stock base to match the filling.

As an aside, I use a Camera Phone for the pictures on my Blog. Those very kind people at Nokia gave me the Lumia 1020 last week, a 41 Megapixel beast with Carl Zeiss lense, the pictures on this entry were taken on the new Nokia.

Previous entries were on either the Nokia 920, BlackBerry Z10 or Samsung S4. (Maybe you can guess what my day job might be?) Maybe you can see the difference, i’m not the best photographer or stylist but try to make the images ‘real’.

Hope you all have a very Happy Christmas.

L8ers….

Kookaburra Almonds & Tart! (Dessert Recipe Challenge No. 3)

One of the fantastic teams I support at work clubbed together and gave me £100 in John Lewis vouchers as a thank-you last week, they know I like cooking but were not sure what to get.  I have now added some baking  stuff to my cooking cupboard and was inspired to try some more recipes ready for the Christmas break over the weekend.

Bertinet pastryRichard Bertinet is one of my french food heroes, along with Stephane Renaud, the Roux’s, Daniel Galmiche and Raymond Blanc.  A while back I got hold of  Stephanes’ book ‘Pastry’, and thought it was about time I  had a go at re-creating one of  the recipes and attempting to improve my pastry skills, which are at best lacking in finesse. You can order the book HERE.

This fine volume has over 50 recipes, but more importantly some hints and tips on how to get the best from your pastry by resting, cooling etc.  Thumbing through the pages I found several ideas to inspire an adaption,  Sweet Pastry Amandine & Frangipane Mince Pies.

My version of this tart was to include Caramelised Apples, Sultanas, Ginger, Chopped Hazlenuts and Allspice as a base layer, with the ‘Frangipane’ as a topping.

When doing some research on Frangipane there is also a reference known as frangipani, a Plumeria tree as in John Vanderslice‘s song Kookaburra, hence the title of this post.

So onto the baking, the recipe list is quite simple with only a few ingredients needed to create a delicious and impressive dessert.

2013-12-14 17.11.40

For the Pastry I used the following quantities;

  • 125 grms unsalted Butter
  • 100 grms icing Sugar
  • 250 grms plain Flour
  • zest 1/2 Lemon
  • 2 Eggs and 1 Egg Yolk
  • Pinch Salt

Following the process in the book, the pastry was prepared in stages, crumbing, bringing together gentle kneading and resting.

20131215_123654

A fluted loose bottom tin was buttered and lined with the pastry once rested and blind baked at 165 deg (fan), I used my newly acquired oven thermometer to check the temperature and followed one of Richards tips, you will have to buy the book to find out what the tip is! It took approximately 25 mins to get the pastry to the dry stage, and a further 15 with the baking parchment and ceramic beans removed and brushing the base with egg wash to create a seal.

20131215_140429

The first filling was going to be Caramelised Apples, for this I took 4 – 5 Braeburn’s, cored, peeled and put them in some Lemon juice to stop them going brown, and added about 2 Tbs Kirsch, a teaspoon each of Ginger and Allspice. They were then fried in unsalted butter and liberally sprinkled with Vanilla infused Castor Sugar, you can see the result above. I added a small amount of cracked Black Pepper to gives the Apples some ‘Edge’!

20131215_141137

The Frangipane cream comprised the following Ingredients;

  • 200 grms Castor Sugar
  • 200 grms Ground Almonds
  • 200 grms unsalted Butter
  • 40 grms Plain Flour
  • 2 Eggs
  • 2 Tbs Almond Liquor

Soften the butter and cream with the sugar until pale, fold in the Almonds and Flour then add the Eggs and Liquor mixing well. Before adding this to the Apples, I added a further texture of chopped Hazlenuts and Sultanas, and then topped the Frangipane with flakes Almonds, you can see the Tart before cooking in the picture above.

20131215_144028

After 20 – 25 minutes in a 165 deg (fan) this was the result, a lovely smell filled in the Kitchen. So there you have my dessert recipe challenge No. 3, with No.4 as work in progress but here is a sneak preview of my prototype home made Jaffa Cake Dessert!

20131213_185028

#getcooking,

L8ers……..

Jacobs Ladder – Slow Braised Beef Short Ribs In a Fragrant Sauce

As you will notice, many of my recipes are a bit time consuming, mostly due to the complex flavours I like to experience on my palate, but also the cuts of meat I like to experiment with.

WP_20131130_005

Earlier in the week I had been thumbing through some cookery books trying to find something to make at the weekend and came across a couple of recipes, further bolstered by a trawl on the internet I headed out to our favourite meat supplier, who has never disappointed with unusual and different cuts of meat.

These bad boys (to use a Tom Kerridge phrase!), are Beef Short Ribs and are extremely good value if you can find a supplier. In this case £4.89 yes, that cheap for 1.25 KG’s of taste sensation. They are also known as Jacobs Ladder, which is a reference in the book of Genesis, and in my case, one of my favourite rock songs by the group RUSH, a Canadian rock band.

The dish I am about to describe will take a couple of days to complete, as the preparation and cooking is done in several stages, most of the time is spent cooking/resting, the hands on prep is about 30-40 minutes max. I started on the Saturday afternoon for a Sunday evening tea. You will need the following for two hungry people:

  • 1.25KG’s Beef Short Ribs
  • 1 Tbs Coriander Seeds
  • 1/2 Tsp Cumin Seeds
  • 1/2 Tsp Lampung Black Peppercorns (available from Steenbergs), or whatever is in your cupboard
  • 1/2 Tsp Muntok White Peppercorns (available from Steenbergs), or whatever is in your cupboard
  • 1 Black Cardamom
  • 1 Star Anise
  • 4 Whole Cloves
  • 3-4 Shallots roughly chopped
  • 4cm piece Lemongrass (bash with a rolling pin or knife to break apart)
  • 4cm piece Galangal roughly sliced
  • 4cm piece Fresh Ginger roughly sliced
  • 6 Red Chillis
  • 1 Head Garlic sliced in half
  • 2 Litres Chicken Stock (preferable Low Salt & Organic, Kallo is great and readily available)
  • 1 Tbs Fish Sauce
  • 1 Tbs Light Soy
  • 1 Tbs dark Soy
  • 2 Tbs Shaoxing Rice wine
  • 1 Tbs Rice Wine Vinegar
  • 4 Tbs Tamarind
  • 2 Tbs Palm Sugar
  • 4 Kaffir Lime Leaves
  • 1 Tsp Shrimp Paste
  • 1 Bunch Coriander
  • 1/2 Lime Juiced

Stage 1

Take all the dry spices and roast them gently in a frying pan without any oil until you can smell the evocative aromas filling the kitchen. This process causes the oils in the spices to develop, if you look at the Cloves, you will notice they will have expanded considerably.

WP_20131130_004

Now that the spices are toasty the next stage is to season the ribs with Salt & Pepper and seal in some flavourless oil such as Ground Nut or whatever you have available. We are trying to get some colour on the meat and also release some of the sugars which turns the meat brown. You can click HERE for a really geeky explanation of the Maillard reaction which is what we are trying to achieve.

WP_20131130_008Mine looked like this after this stage and took 10-15 minutes making sure you turn the meat and cook each side.

Stage 2

We now need to put some oil in a dutch oven or decent size saucepan, the Ribs’s are going to braise for 4 1/2 hours at 125 Deg (fan), 145 Deg (Convection) and the meat needs to be covered so use this as you guide as to the size of pan to use.

Firstly, fry the shallots until the develop some colour, about 5 – 10 minutes. Then, add the toasted dry spices and continue to fry gently, you will start to smell the heady aromas fill the air. Then add the sliced Galangal, Ginger and Lemongrass, continuing to cook gently, then the two halved Garlic heads, and Chilli’s.

WP_20131130_009

At this stage it should look something like the picture above. You want to cook the spice mix gently so nothing burns but hard enough to extract the flavour oils from the ingredients. Now set your oven to 125 deg/145deg to warm up.

After 10 – 15 minutes start to add the wet ingredients, starting with the Soy Sauce, Fish Sauce, Rice Wine etc. Then a bunch of coriander, finish with the sugar, then the Chicken Stock at the end and put the Ribs in, ensuring the are covered completely. Finally add the Lime juice.

WP_20131130_011

You now need to get a piece of Tin Foil, doubled in half, that covers, and overlaps your pan. This is going to be used to seal the pan with the lid firmly pressed on top. Then place in the oven, set the timer for 4 /12 hours and go and put your feet up!!

Stage 3

After 4 1/2 hours, remove the pan from the oven and take out the ribs and place in a container and stick in the fridge, covered with foil or a Plastic container with lid. Drain the remaining sauce through a strainer and also place in the fridge overnight.

You will have noticed in the 1st picture, there is a decent amount of fat on the ribs, the slow braising will have rendered the fat into the sauce and in the morning you will have a ‘fat lid’, sitting on the sauce. The following morning, take the meat and sauce out of the fridge,  gently remove the fat and strain the sauce to remove as much of the fat as possible.

WP_20131201_001

This is what mine looked like before sieving the sauce to remove the remaining bits of fat which you can see floating on the surface. The colour has changed significantly into a deep rich brown colour, partly as a result of the browning stage (Monsr Maillard again!).

Once this is done, the meat on the left needs to go into the sauce, to marinade for a few more hours to further develop the flavours. Cover the pot with cling film or foil and pop it back into the fridge until you are ready to complete the final stage. It will take about 45 – 60 minutes at 160 deg/180deg before the ribs are ready to eat, so you can plan when dinner is served and when you need to be back in the kitchen.

Stage 4

Almost done! Set the oven to 160deg/180deg and remove the meat/sauce from the fridge about an hour before you are ready to cook to bring it up to room temperature. To go with the beef I was going to do some equally fragrant Rice and Bok Choi.

Take a saucepan, and put some water on to boil, you will need a Jasmine Tea bag, 1 star anise, kaffir lime leaves (2) and a couple of slices of Galangal. I left the tea bag in the water for a couple of minutes before removing, the remainder of the spices had a good 30 minutes in the pan. Thats the infusion completed, just follow the instructions on the rice packet, mine needed about 10 minutes.

The Bok Choi was quartered lengthways, and put in a pan with a glug of hot oil, followed by a splash of water to create a steam. I chucked in a couple of cloves of garlic that had been bashed, a splash of Shaoxing Rice Wine, similar of light Soy sauce and a little sugar to counterbalance the salty Soy.

WP_20131201_008Finish the Bok Choy with a twist of fresh cracked pepper and you are done. The beef can be removed from the pot, and set aside in a covered dish and left in a warm oven whilst you finish off the sauce. You may find its still a bit thin so you can reduce it on a hob, and use a little Cornflour or Arrowroot and water to thicken. Drain the rice and you are ready to serve.

WP_20131201_005 To add some further texture elements I dry fried some Cashew nuts and Red Chilli for a bit of punch, and fried some prawn crackers and dusted with 5 spice powder to accompany the ribs. All you need to do now is serve the meat/rice/sauce and vegetable on a warm plate and experience a tasty, sumptuous exotic meal, all prepared by your own hands and not breaking the bank!WP_20131201_010

So there you have it, Beef Short Ribs, with  a fragrant sauce and assorted accompaniments, delicious.

Go on, have a go yourself.