Hola, buenos dias José Pizzaro – A trip to San Sebastián at Bertinets’ Cookery School

photo-04-02-2017-14-48-18San Sebastián in the Basque community of Spain has more Michelin starred restaurants per square metre than any other city in the world, in fact since 2002 Spain has been in the top 3 BEST restaurant in the world locations and had the number 1 spot SEVEN times. elBulli had held 5 of those but closed in 2011 with El Celler de Can Roca taking over the top spot in 2013 and 2015.

So it was with great excitement that I was to spend a day with José Pizzaro at Bertinets’ Cookery School in Bath, and learn some new skills and better understand the cuisine of the Basque region of France, something I have been keen to do for a while now. I booked this course last year and couldn’t wait for the day to arrive, I had purchased the book Basque last year too which José had penned, and already tried a couple of recipes with great success so I was hoping a day spent with this Spanish legend would improve my capability in the kitchen.dsc_0012The course was fully booked, 12 of us with  good mix of people of all ages and nice to see some other guys on a cookery course for a change. There were some friendly faces from previous events that many of us new, it was a bit like a school or family reunion and in no time at all we were all chatting about food and looking forward to settling down and getting stuck in.img_-x045twThings started with an introduction and a couple of demonstrations. After being told about Bacalao (Salted Cod), and preparing it for cooking, the art of making ‘Béchamel’ for the ‘Croquetas’ was shown as it’s a slow methodical process to produce a smooth silky base for the many ingredients you can add, ours being Goats Cheese and Spinach which was very nice too.dsc_0005We learnt a few hints and tips but you will have to try and get on a course to find out the tricks of the trade. Trying to manipulate a ‘Boquerone’ (Anchovy) into a pitted Spanish Gordal Olive can be quite challenging when the available space in the Olive versus surface area of the Anchovy don’t quite want to agree to work with each other!img_-2u7z65
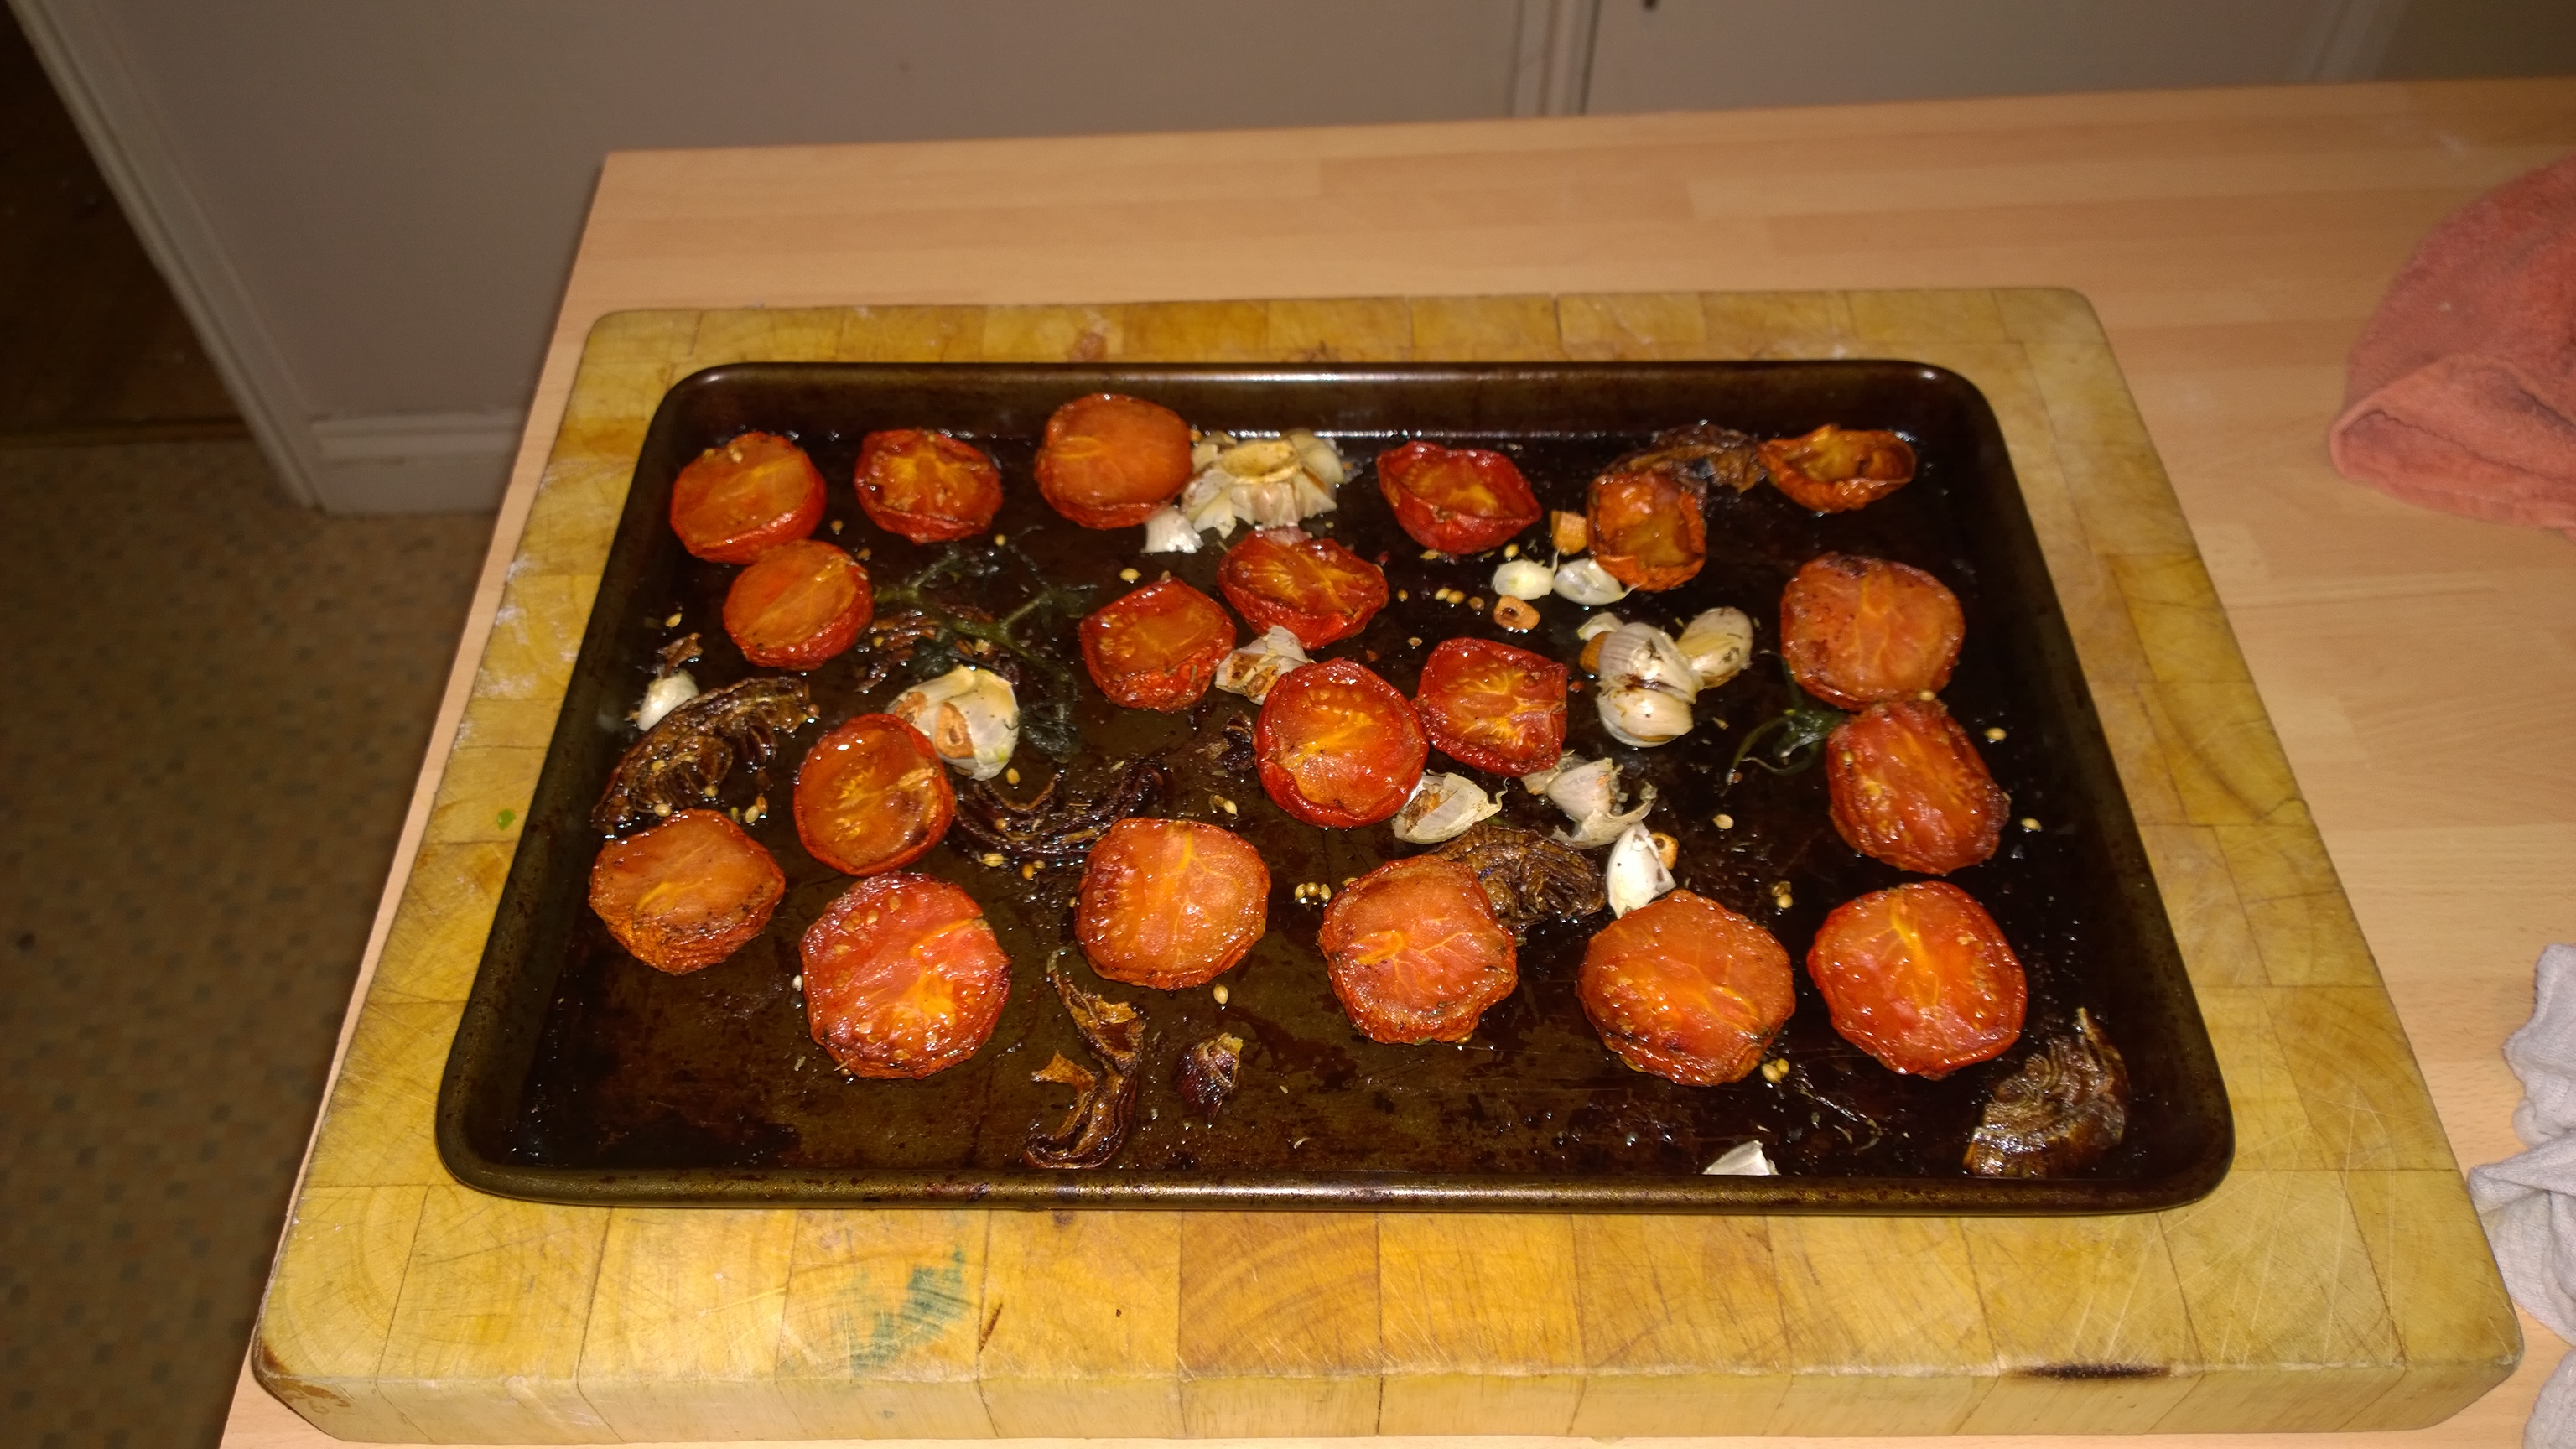
San Sebastián appears to have a lot going for it, apart from the Michelin starred restaurants it is one of the most famous destinations in Spain, which looking at the annual rain chart seems rather surprising! Along with some quality restaurants the area is also famous for pintxos a local Tapas or snack. The stuffed Olives were to be one such Pintxos, along with the Croquetas, and some Padron Peppers.dsc_0006We had a couple of Boquerone left (actually loads, José had bought along a big tub!) so also prepared some marinated, sprinkled with finely chopped Garlic and given a good douse in Extra Virgin Olive Oil which were divine on some of Richards famous bread, given a quick toast and sprinkle of Olive Oil too. We had a quick taster during one of the famous coffee breaks (well, more than a taster actually as they were delicious).dsc_0015To make this Cookery School so good, apart from having an awesome range of regular and guest Chefs, Richard Bertinet has a well organised and experienced team of smiley happy people who are on hand to help, guide, advise, fetch, clean, make me Earl Grey Tea and the others coffee! and fill in where we need to get things done. photo-04-02-2017-14-25-53Dessert was to be an absolutely delicious Caramelised Vanilla Pear Dish with Hazelnut Ice Cream and as we had to keep an eye on other dishes, two of the team made sure the Ice Cream was finished and the Hazelnut praline was suitably ‘crunched’ (sorry, these two lovely ladies were new and I did not get their names!). We were split up up into 3 groups of four for the day and ours decided to sneak in some of Richards famous Rum soaked Dates to add a bit of ‘zing’ to the dessert and glad we did too, very very tasty.
dsc_0019José Pizzaro, what a absolutely lovely teacher and thoroughly decent chap. As we were preparing the dishes (7 if you include the Pintxos) he would come round and assist, guide and chat, always with a big smile and lots of encouragement. During the numerous times he showed us particular techniques he prompted us to ask whatever questions we liked, and we certainly learnt a lot about his background, coming to England over 16 years ago and the restaurant trade in general.dsc_0028So, on the menu today is;

  • Padron Peppers (They were eaten pretty much during the break, 2 plates of them!)
  • Boquerones with Garlic & Extra Virgin Olive Oil (One plate of those also got devoured in the break!)
  • Gordal Olives Stuff with White Anchovies (They didn’t last long either!)
  • Spinach and Goats Cheese Croquetas (They made it to the dinner table)
  • Swiss Chard Stew with Pimenton
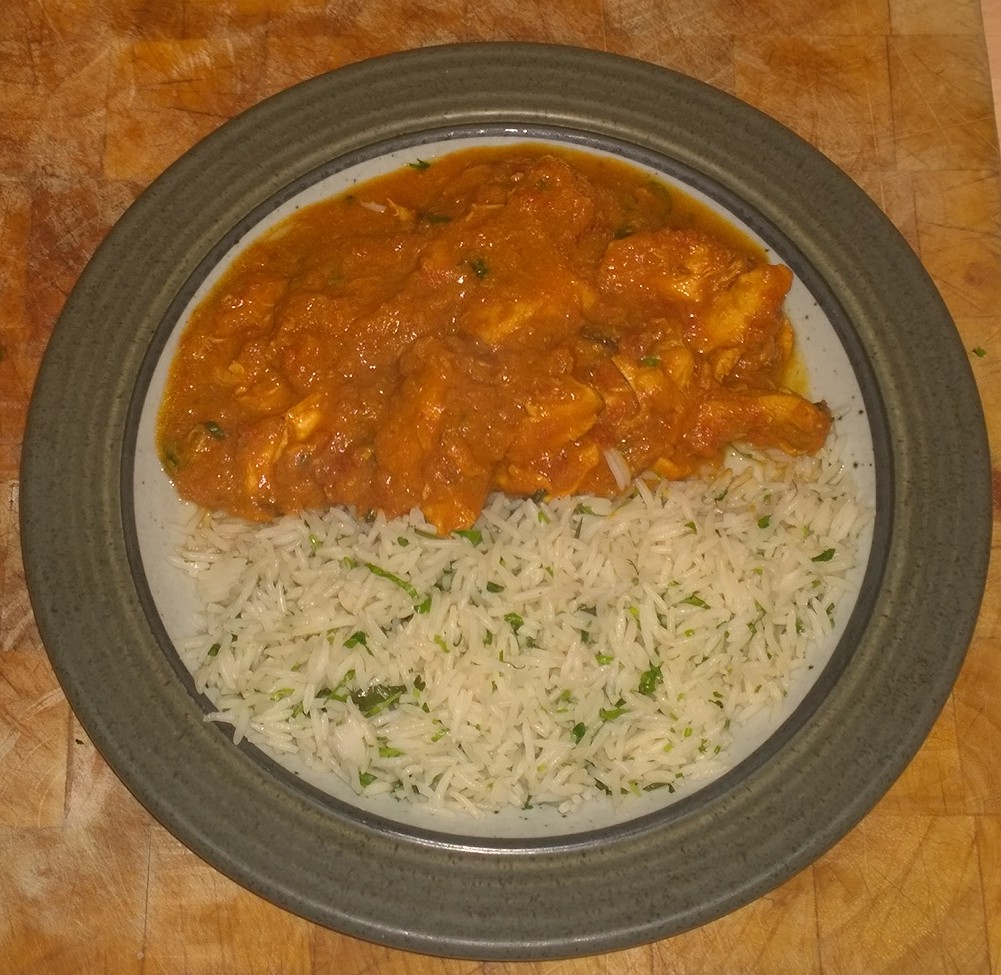
  • Bacalao a la vizcaina (A Basque dish using salted Cod)
  • Caramelised pears and vanilla, and Hazelnut Ice Cream (and some Rum infused Prunes!)

We cooked LOADS, if was really good fun and everyone learnt lots too. Some of the subtle things you pick up include how to plan menus and work out what needs cooking when. The Béchamel needs to cool right down, so get that done first, the Stew needs to ‘Stew’, and the vizcaina needs time to cook so get those on after the Béchamel, Ice Cream needs to Freeze etc. etc. etc.photo-04-02-2017-13-31-42The Day at the school always finishes with a communal meal, everyone sitting down to enjoy the labours of the day, copious amounts of wine on flow (unless you are driving like me) and chatting about the food, what we had learnt, what course we were going to book next etc. This was my Sixth visit, others had been on over 10 courses, it’s very good indeed.

Thank you José for sharing your extensive knowledge and experience and Richard again for making it happen.

So there we have it, another great day cooking and making new friends, take a look at Richard Bertinets’ School HERE (I don’t get a commission, I paid the same price as everyone else for this trip, the views are my honest opinion and I WILL be going back for more later in the year).


………………………….Until next time, L8ers………………………..

بهارات‎ (Bahārāt) and Squash!! More Middle Eastern Delight’s to Amaze You!

2016-03-19 13.22.22

This dish started life many months ago when I got hold of the cookery book ‘Persiana’, by Sabrina Ghayour (voted best new cookbook 2014). Thumbing through the pages there were lots of delicious looking recipes but one took my eye, Butternut Squash with Pistachio, Pesto, Feta and Pomegranate! It was apparently a firm favourite amongst the supper club attendees, so must be not too bad at all!

I have been trying to get this dish on the table but numerous times failed due to things like “I don’t fancy that” (not me but someone else!), “have you got time” (again not me!), “in hospital” (that WAS me)!

At last the stars must have been aligned, or Saturn congruent with a passing comet for a nano second and it finally happened, and what a spectacular event it was too! You need to read the WHOLE post as there are several processes needed to complete the dish, each with their own list of ingredients.

2016-03-19 14.25.06

My version does differ from Sabrinas, not that I did not think it wasn’t an excellent recipe (who am I to judge anyway), but I craved some protein, meat in fact, Lamb, I (we) both love Lamb.

So off to research some ideas and I decided to make a Bahārāt from scratch. Bahārāt is Arabic for ‘Spices’, and can be a heady mixture to take any dish to mars and beyond,  and for this recipe (for 2 people), you will need the following;

  1. 1/2 Tsp Allspice
  2. 2 Tsp Black Peppercorns
  3. 1/2 Teaspoon Cardamon Seeds (after outer green pods removed)
  4. 4″ Cassia Bark (like Cinnamon but less sweet)
  5. 1 1/2 Tsp Whole Cloves
  6. 2 Tsp Coriander Seeds
  7. 1 1/2 Tsp Cumin Seeds
  8. 1 Tsp Nutmeg (Fresh Grated if possible)
  9. 3 Tsp Aleppo Chilli
  10. 1 Tsp Rose Petals (The cooking variety!)
  11. 1/2 Tsp Ground Iranian Lime

Most of the spices are cupboard items (I always recommend Steenbergs wherever possible as the quality is SO good, and nothing like shop bought brands, which often are more expensive and have less flavour and character), the Iranian Lime and Rose Petals came from Ottolenghi’s, Aleppo Chilli from The Spicery.

2016-03-19 14.30.34

All the whole spices need dry roasting until they fill the kitchen with heady aromas. Be careful not to use too much heat and burn the spices as they will become very bitter and unpleasant. Then add the dried spices and whizz up in a blender to a powder, but don’t go as far as dust, we want some texture and character. You can see my result in the picture above.

2016-03-19 14.37.50

The Bahārāt is used to marinade 500 grms lamb shoulder, I left mine for about 2 hours using 5 heaped Tsp of the Bahārāt mixture which will leave you some left for another day.

2016-03-19 15.59.29
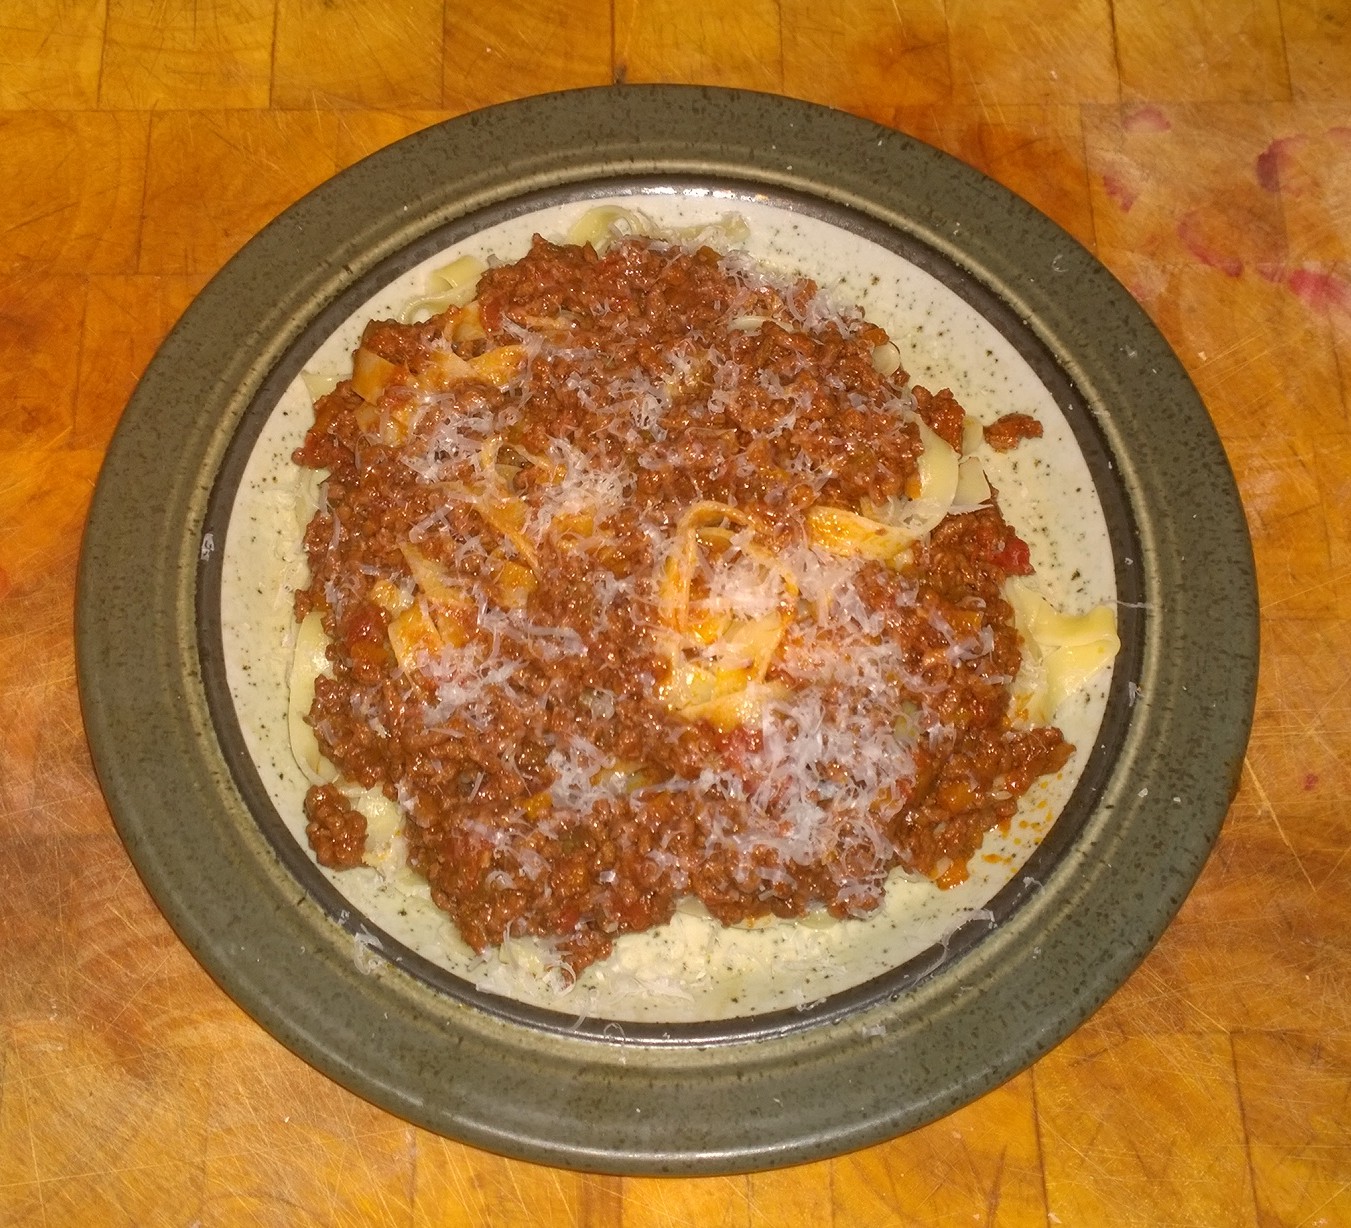
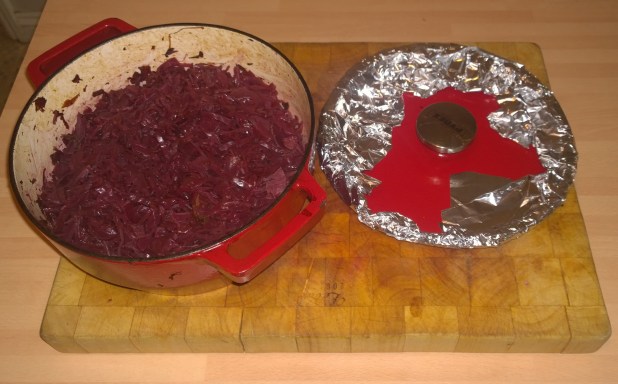
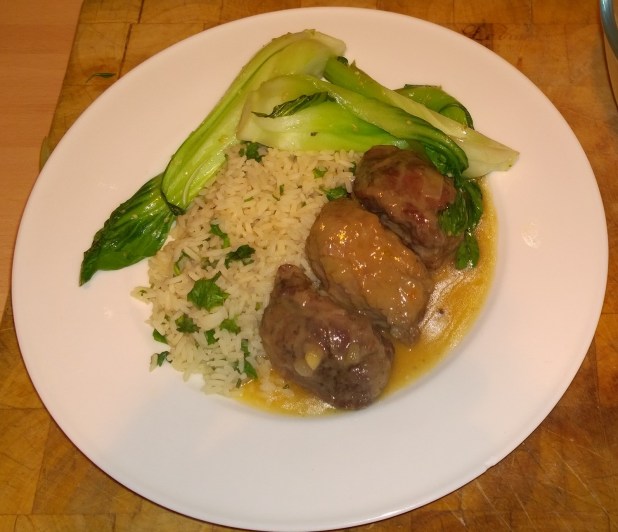
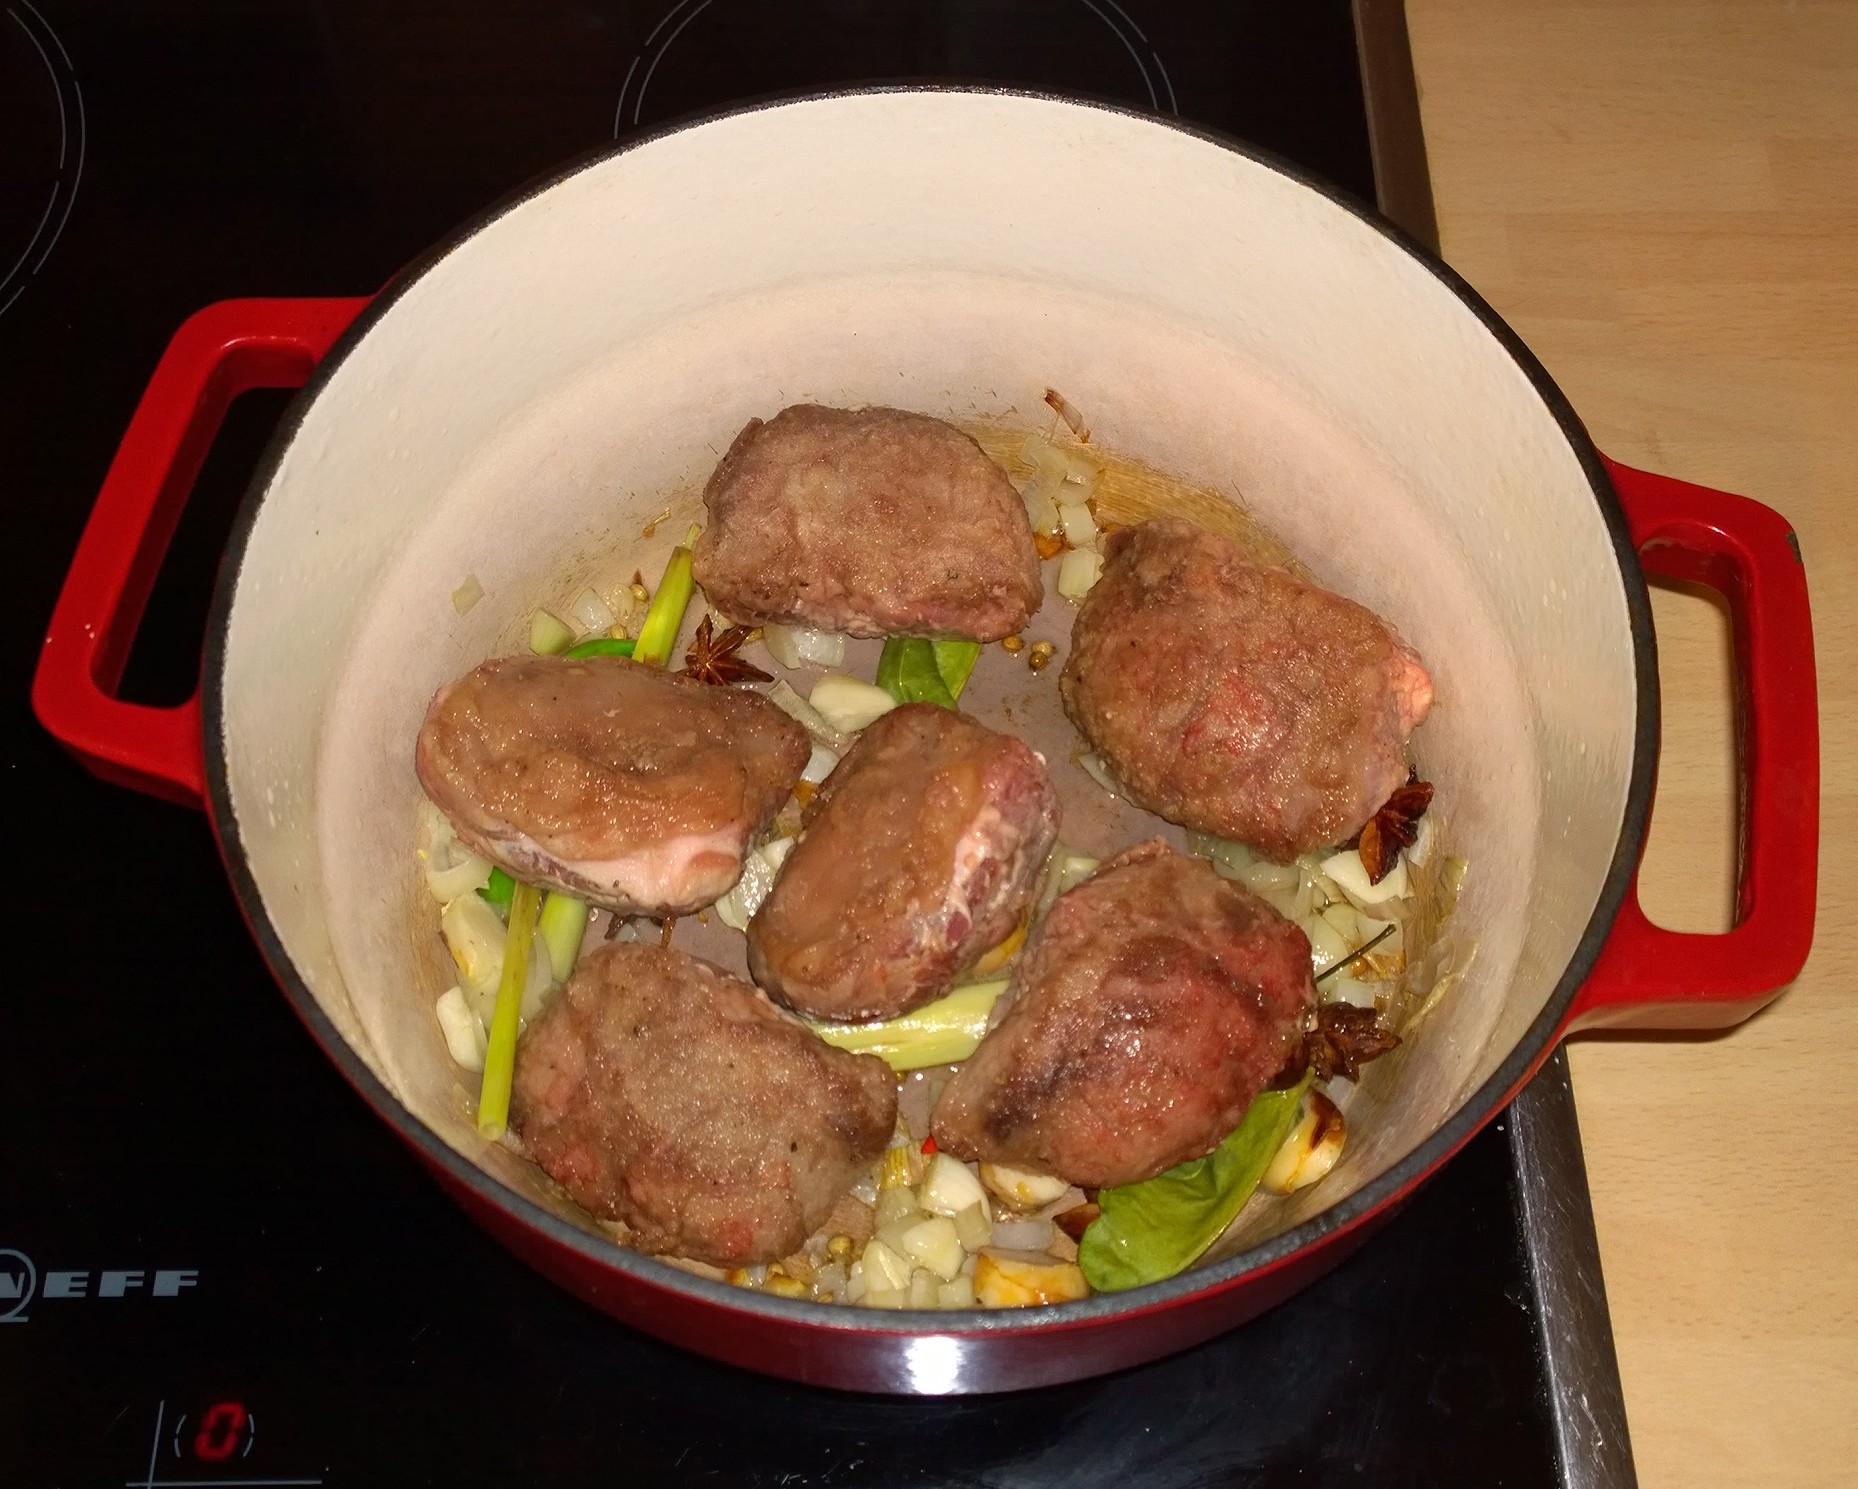
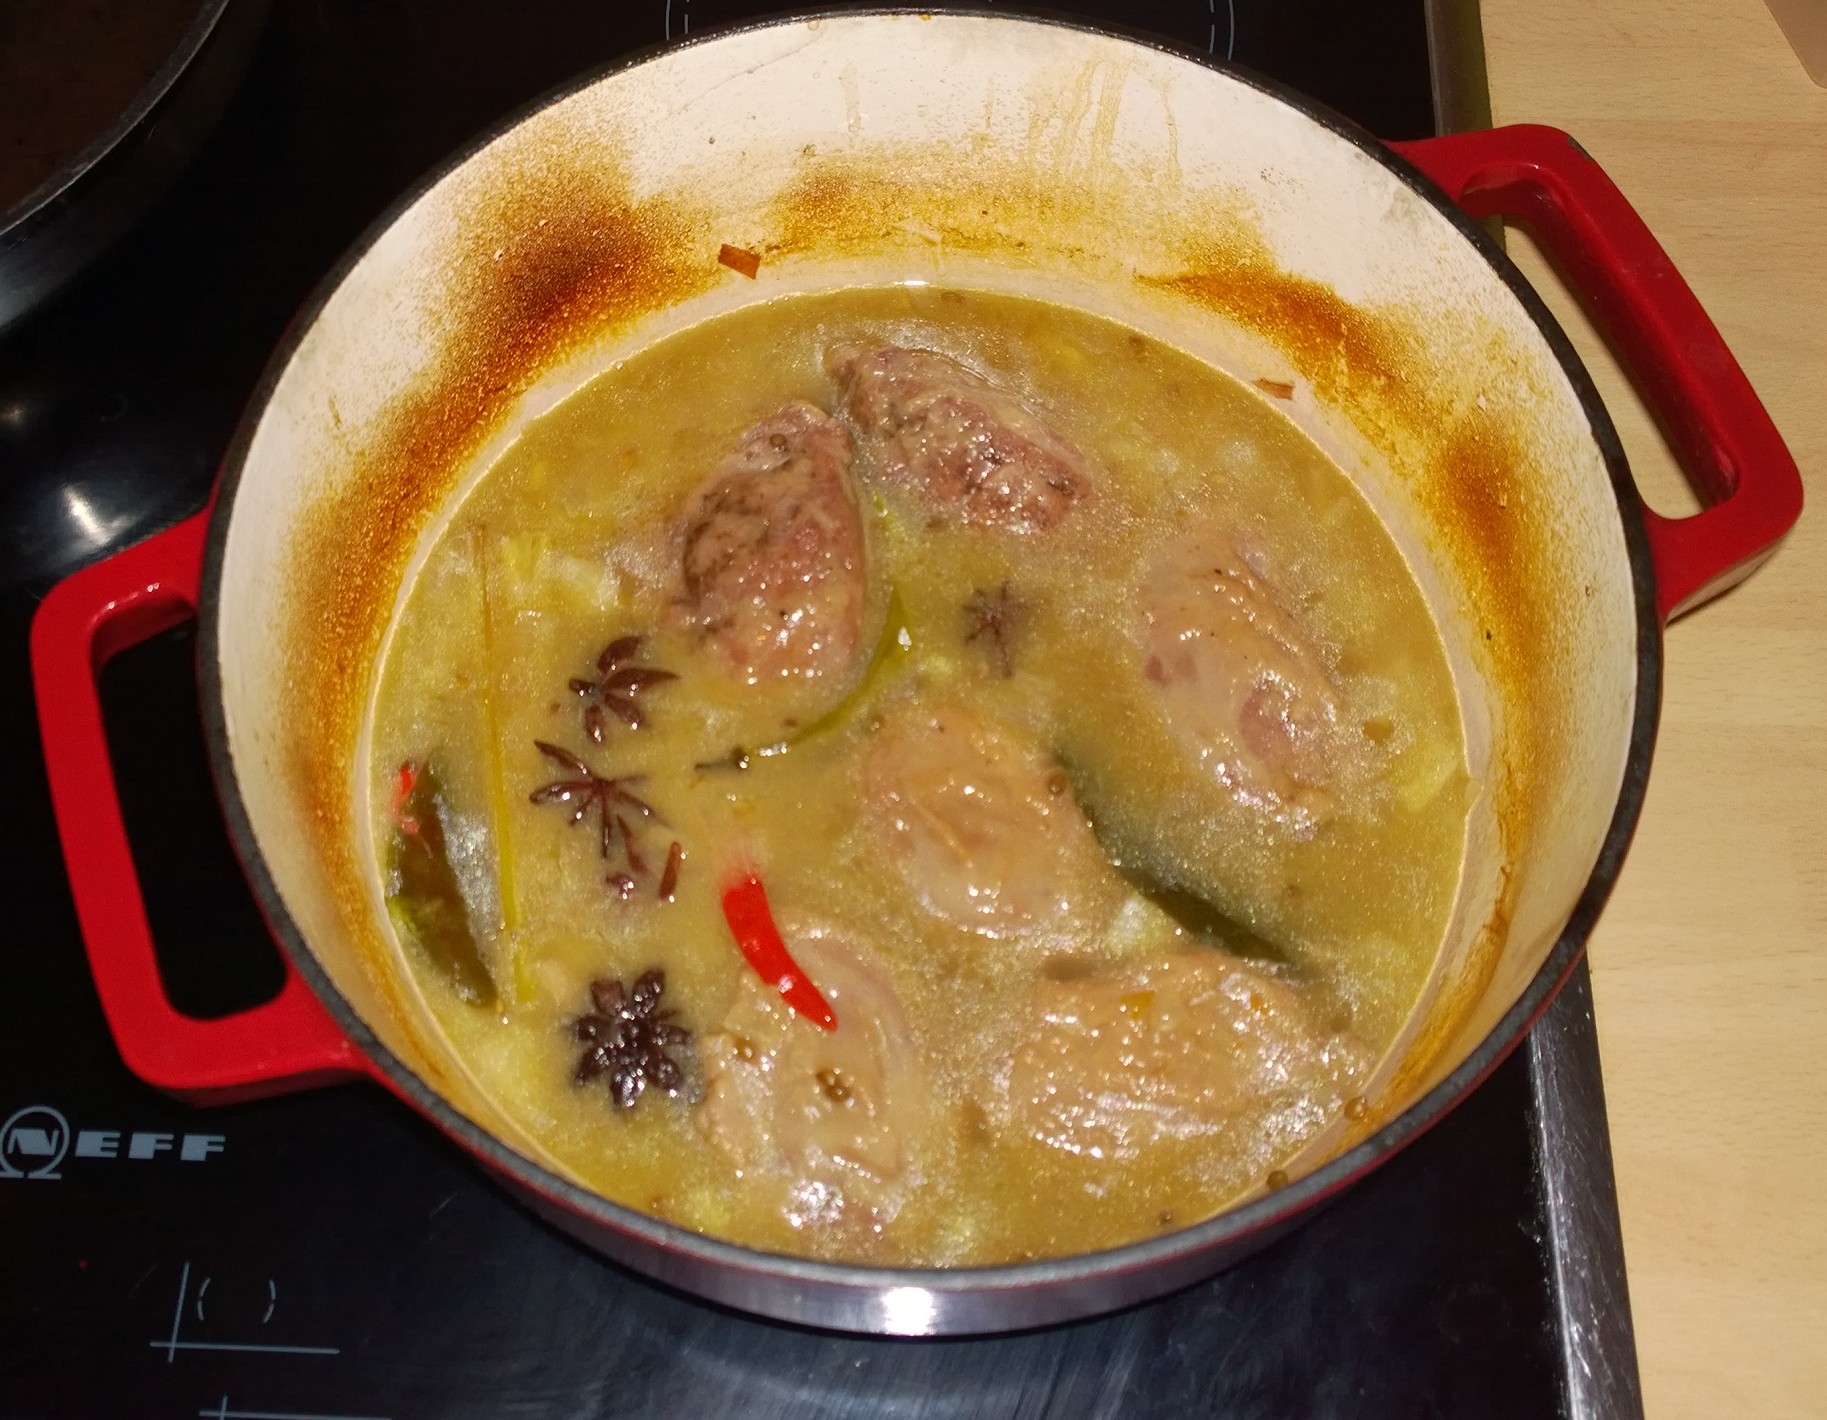
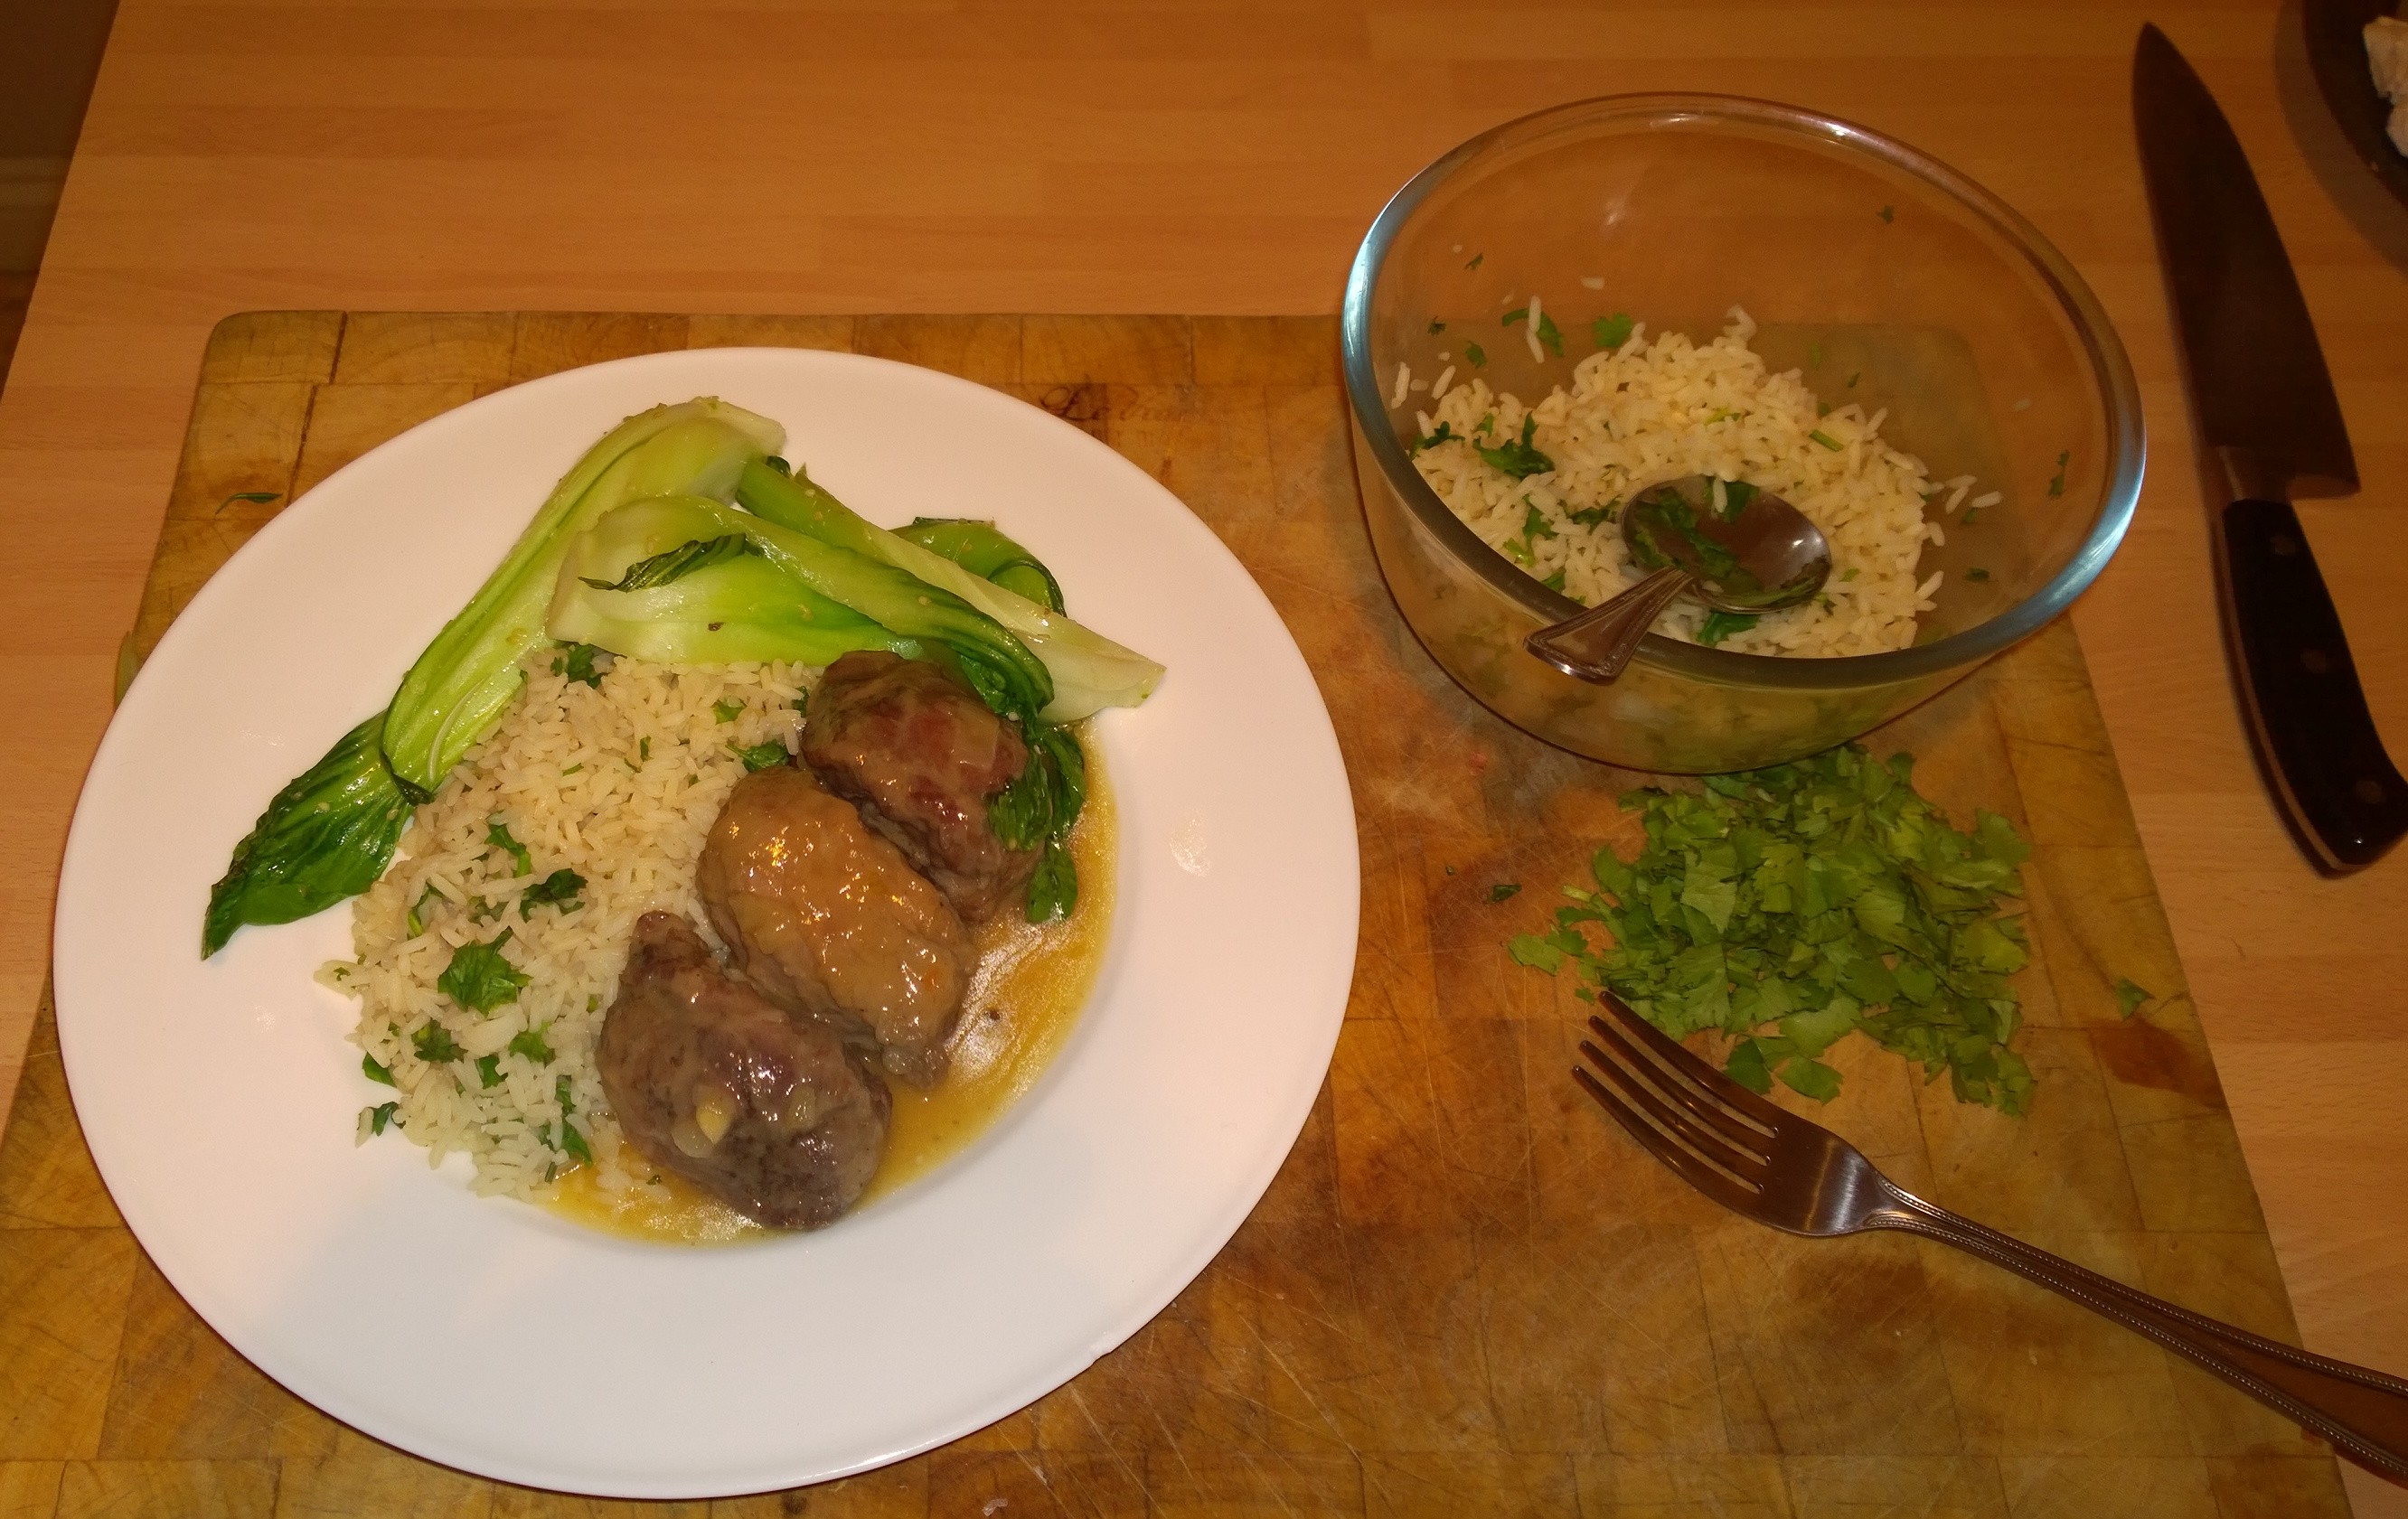
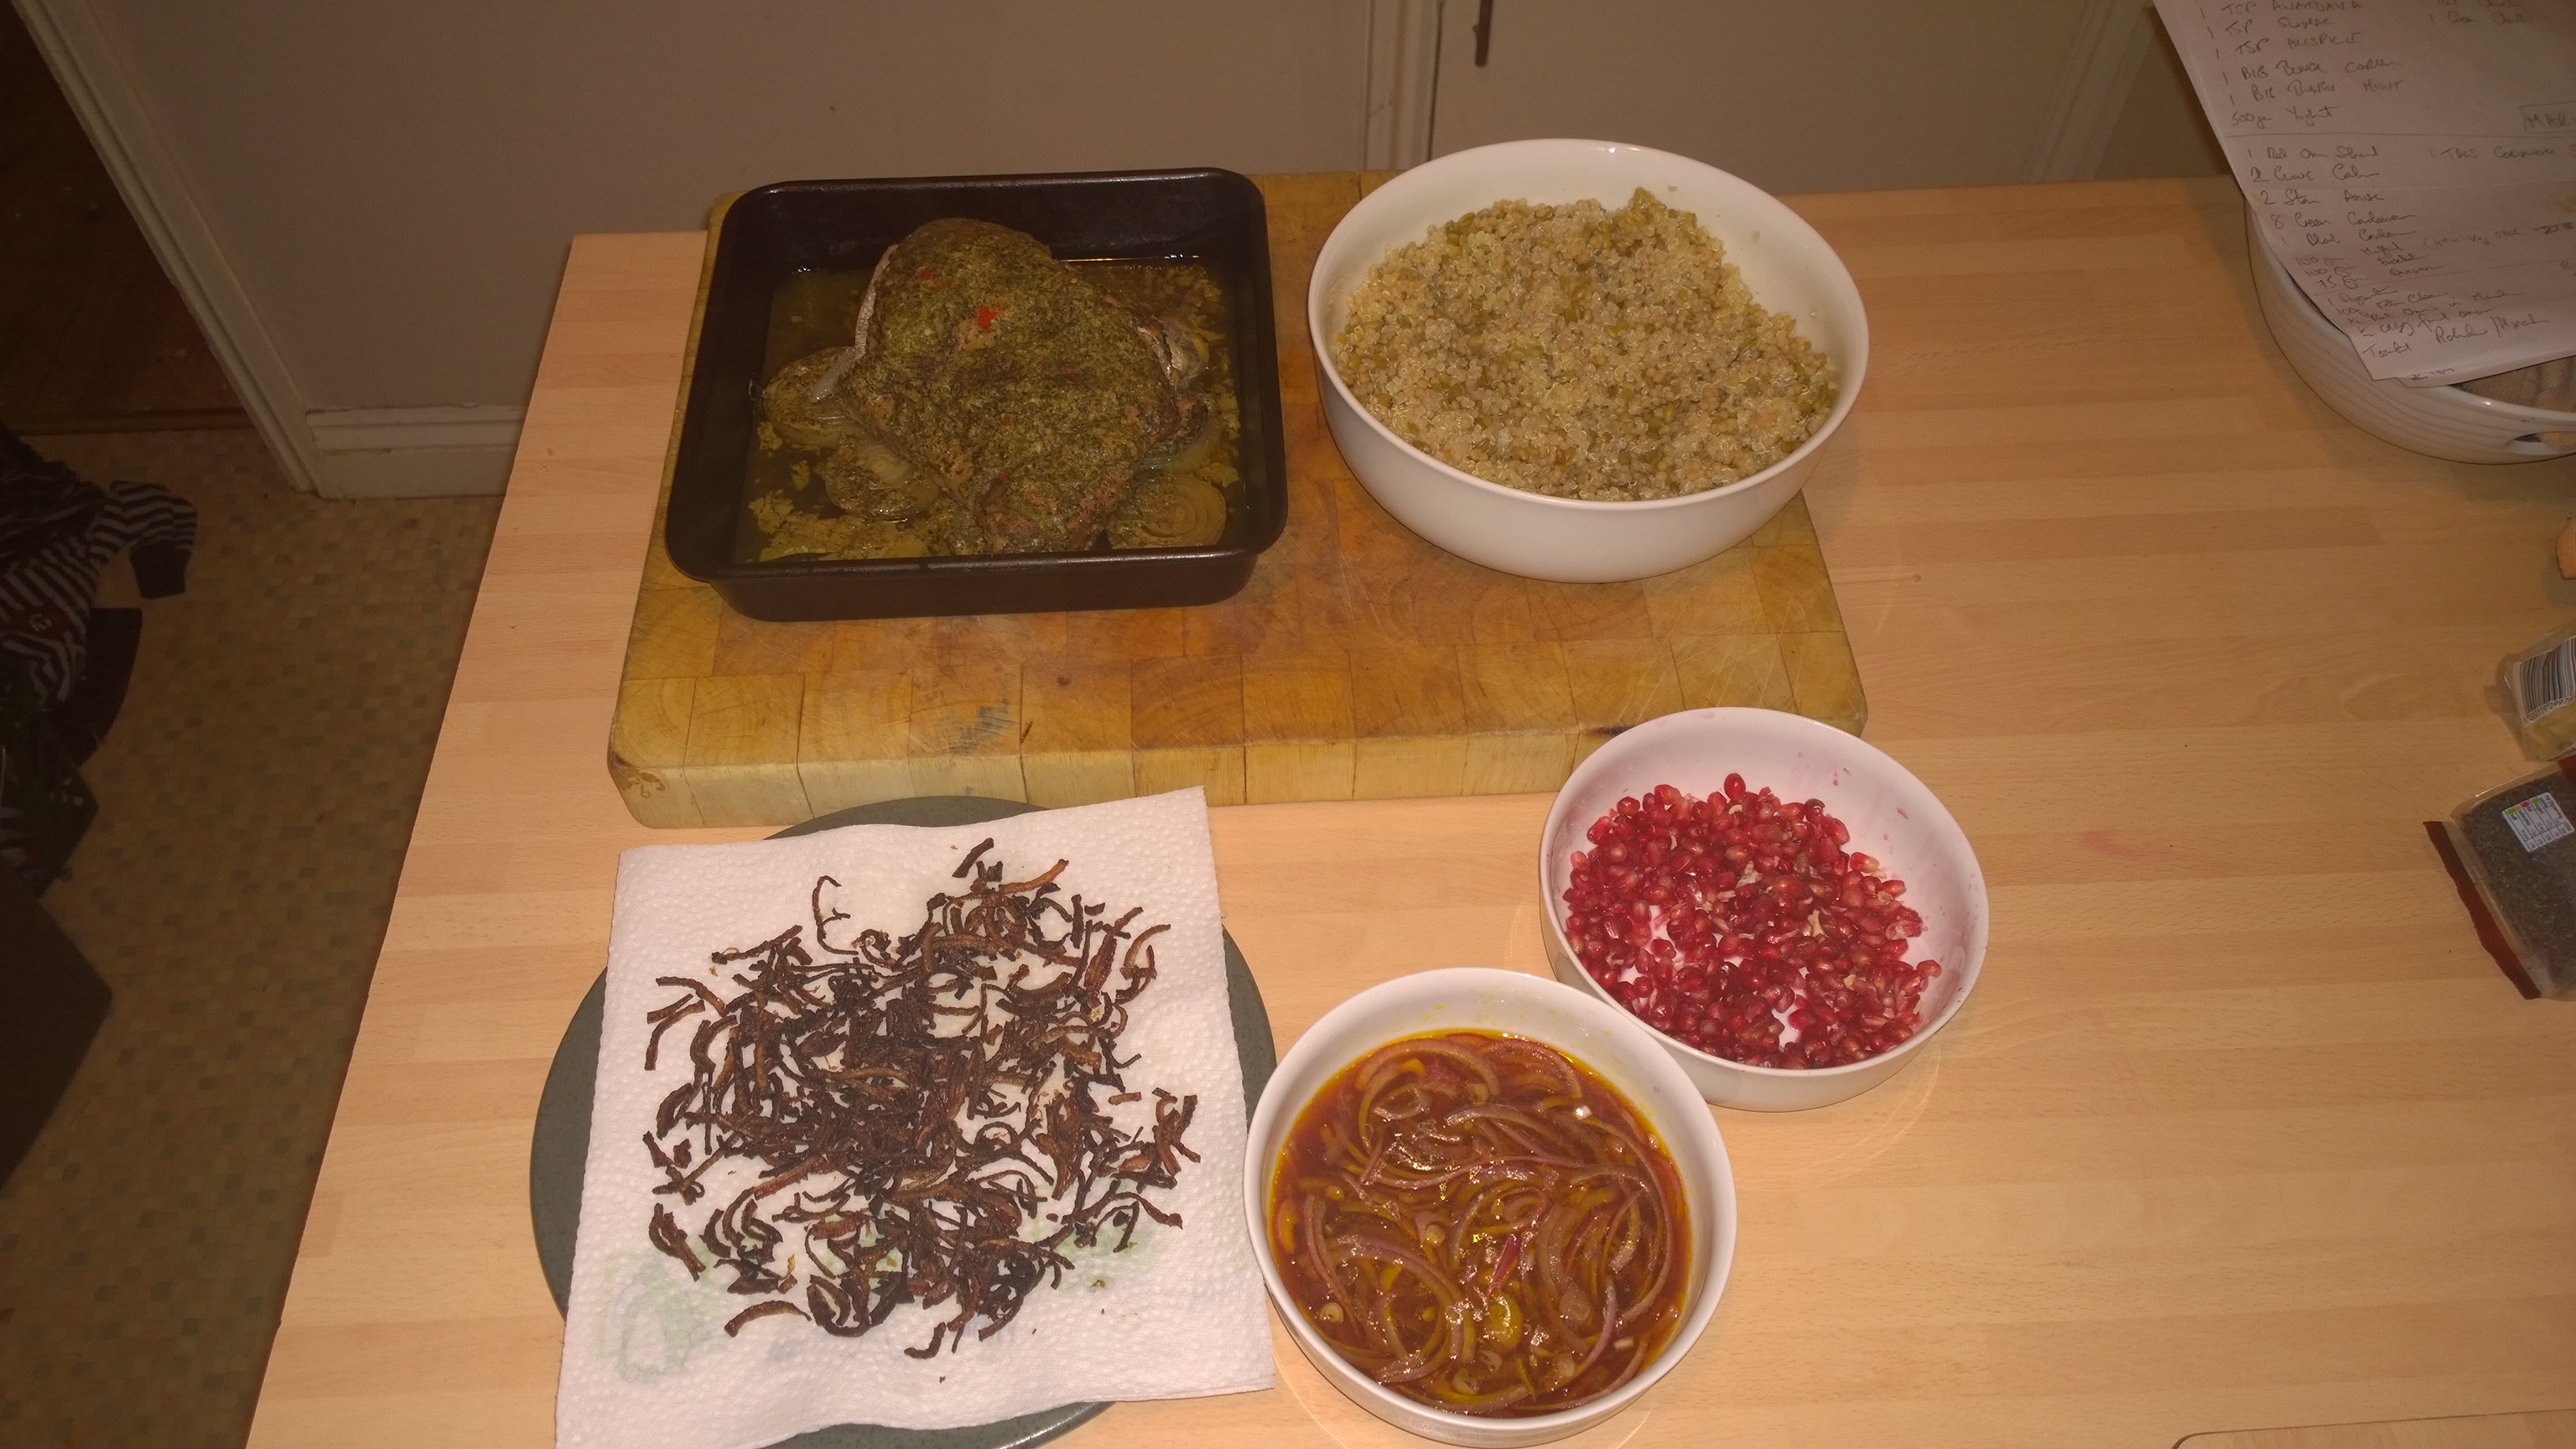
After marinating, the Lamb is browned in a frying pan in some olive oil, and put into a dish with 250 mls of HOT Vegetable Stock mixed with 2 tsp of tomato puree then into a 130 deg (centigrade) fan oven for 2 1/2 – 3 hours! I covered mine with tinfoil for the first couple of hours, and removed the foil allowing the stock to reduce for the last hour or so. You will need to keep and eye on it and stir from time to time to make sure things don’t dry out.

A quick interlude whilst the Lamb is doing its stuff. I was rushed into hospital a few weeks back, diagnosed with Type I Diabetes and now doing what many thousands of people have to do, inject Insulin daily and sample my blood 4 times a day!

I had a 1 day course booked at Bertinet’s Cookery School in Bath some time ago, with Ghalid Assyb (he partnered with Yotam Ottolenghi to open the 1st of the Ottolengi eateries in London), bl@@dy Macaroon’s as well, so two weeks after release from those lovely people dressed in white and green with a limited/no sugar diet, I was whisking, mixing and piping all sorts of sweet delights full of sugar.2016-02-27 15.02.22The 1 day session was awesome, we all learnt loads and despite my fears of piping and making a complete fool of myself, the end results were really very good (according to wife and family who can consume more sugar in a day than I can in a month)! Some of the end product are pictured above, I managed a couple all day!

I would recommend any of the Bertinet courses, I am taking my nine year old on a children’s one in July, and I am booked on a 1 day Bread in April and have a day with Mark Hix, the well known restaurateur in October! I am not a share holder and don’t get freebies, they are just good so I am happy to say so.

2016-03-19 16.32.15

So we are back with the next process and a Pesto, no Pine Nuts in sight, or Basil! This one is made with Coriander, Parsley and Mints leaves, this is a variation from Sabrinas which uses Dill instead of Mint ( I am not a Dill fan and thought the Mint and Lamb would match nicely).

For 2 people I used 50 grms Pistachio nuts, about 30 grms of Gran Padano cheese which are whizzed up with some Olive Oil to slacken, then add the ‘leaves’ of a bunch of Parsley and Coriander (I left the stalks behind). The Mint was added in stages, so as to not overpower the Pesto, you just want a hint as its very strong. You will need to add some more Olive Oil to get the consistency loose enough.

2016-03-19 17.01.42I am not sure how the Lime managed to get into the picture earlier, you need to add Lemon Juice to taste, a good squeeze or two and for salt, I used some Hebridean ‘Smoked’ Sea Salt, it is a really good product and brings another dimension to the Pesto, test the flavour and adjust as necessary to your liking. You can see what mine looked like above.

2016-03-19 18.23.41

We are nearly done prep wise, You need a nice Butternut Squash, to be honest I suspect any will do but the nice ‘hole’ where the seeds normally reside was to be my ‘bowl’ for the spiced Lamb. Cut to about 1c.m. thick, brush both sides with Olive Oil and season with Salt (unsmoked!) and Pepper, and into a 165 centigrade (fan) oven for about 45-50 mins, turning over halfway through the cooking. You need to time this process in line with the Lamb cooking so they both complete at the same time (roughly).

2016-03-19 18.29.40

Here we go, another variation on a fantastic recipe, sorry Sabrina. So I wanted another textural component and a flavour “whack”, sorry seems better than a hit under the circumstances, cook this and you will see why.

We are going to coat some more Pistachios with Ras Al Hanut, and Salt using Olive Oil. Warm the pan, add some Olive Oil, you want heat but not enough to burn so if you are not confident, just try a couple of nuts until you get it right. Add the Nuts, warm a bit add the Salt (Maldon Sea Salt rubbed between fingers), then the Ras Al Hanut, shake the pan, leave for 15 seconds and add some more Ras Al Hanut. We are talking a couple of decent pinches, no spoons involved, that’s it. This is a finishing touch and adds a great texture and flavour element to the final dish.

2016-03-19 19.36.27

I said you would need to read the whole post to get the complete recipe, forgot the Feta and Pomegranate, its an integral and important part of the finished delight.

The picture above should give you enough detail, if not, leave me a message and I will answer any questions as soon as I can.

Take a warm plate, lay the squash, fill the hole in the Squash with the Spiced Lamb. Dot ‘blobs’ of the Pesto with a teaspoon around the plate and on the Squash, lay pieces of broken Feta into the Pesto. Scatter the plate with Pomegranate seeds, then the spiced Pistachios and a ‘few’ Rose Leaves, which will warm and give a floral hint.

This dish is delicious (the boss said so), I think so too, its amazing. The original is probably also amazing but I have not tried that version yet, I had the craving for some protein and ’embelished’ the dish a little bit changing Dill to Mint, adding the spiced nuts and the home made Bahārāt with exotic spices.

I hope you enjoy it as much as we did.

Until next time…………………………….L8ers…………………………

Firming Agents & Ragù alla Bolognese – Proper Italian!

WP_20150807_15_56_11_ProI was in two minds as to whether I should/would post this particular recipe but looking on the internet and in the shops I decided I would do so. Driven by authenticity, ragù alla bolognese appears to have been changed out of all recognition with jars of artificial tasting sauces lining the supermarket shelves. One item that seems to appear in all the varieties I checked is SUGAR! yet the original 18th century recipe does not contain Sugar, nor Basil, nor Thyme, nor Oregano nor a ‘Firming Agent’, which seemed to feature in some of the jarred varieties.WP_20150807_16_26_48_ProThis version of ragù alla bolognese is not exact, there is one ingredient I missed out (well forgot actually), the milk. I believe that adding the milk would have balanced the acidity from the Tomatoes but the judge of my cooking creations said it tasted fantastic, so I managed to get away with it!

This dish takes a MINIMUM of 2 hours to make, mostly in the slow cooking but the starting point is preparing a Soffritto or Mirepoix, a mixture of finely chopped Onions, Carrots and Celery. You can see how fine you need to go in the picture above, I used approximately 1 stick of Celery, half a Carrot and half a large white Onion. You also need to chop up 6 slices of smoked Pancetta, Italian cured Bacon.WP_20150807_16_29_06_ProThe Pancetta needs frying first in some Olive Oil, we use it a lot in our household and have found that the Organic Olive Oil from Riverford is very good value for money, originating from Puglia we use it quite a lot. A recent study has proved that next to Lard, Olive Oil comes 2nd in the ‘good for frying’ league with other oils such as vegetable coming lower due to their production of aldehydes when heated, you can find the details HERE, its really interesting.WP_20150807_16_38_55_Pro
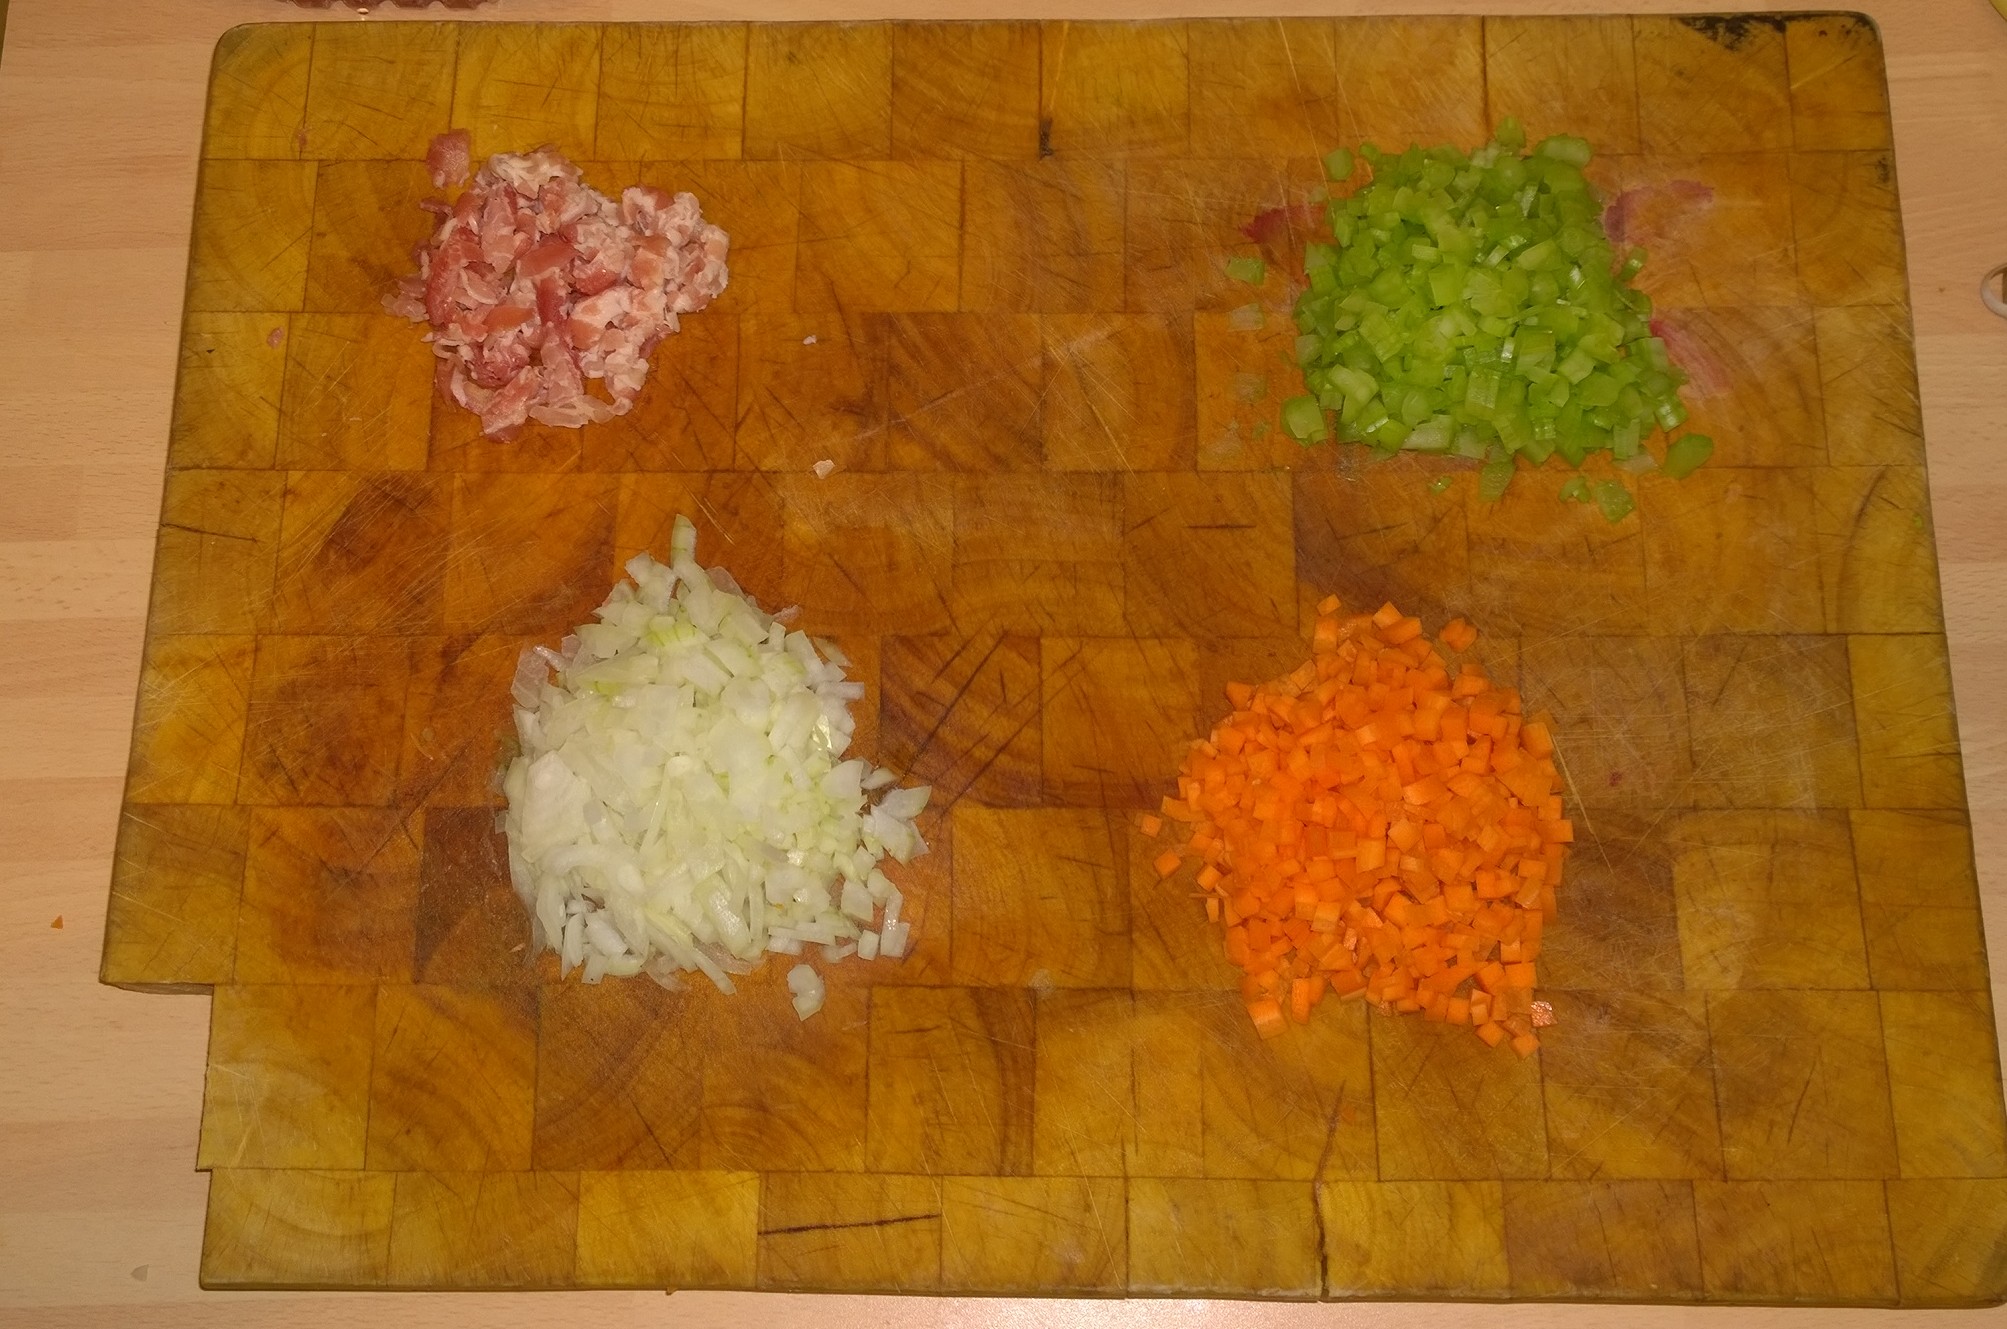
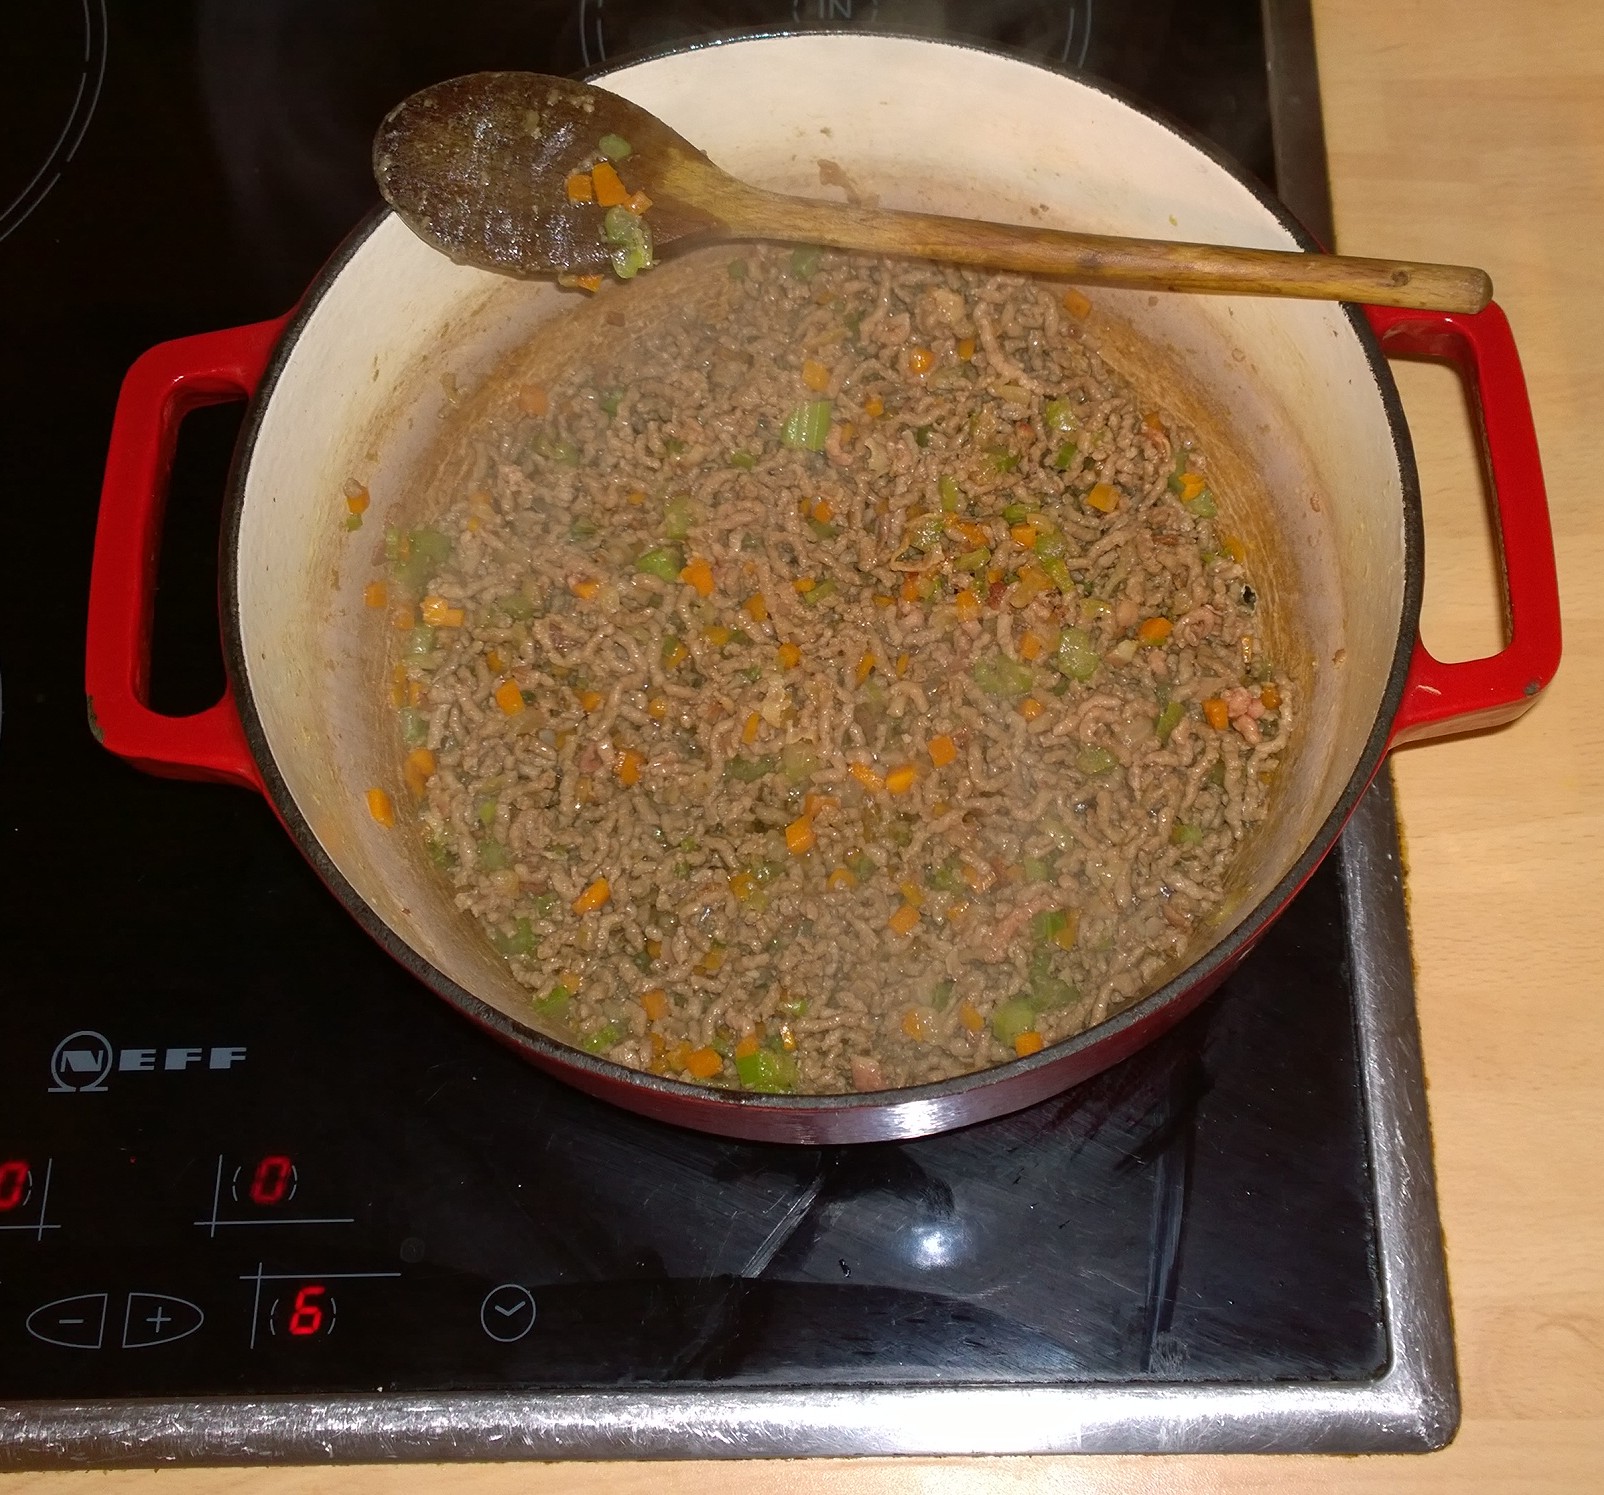
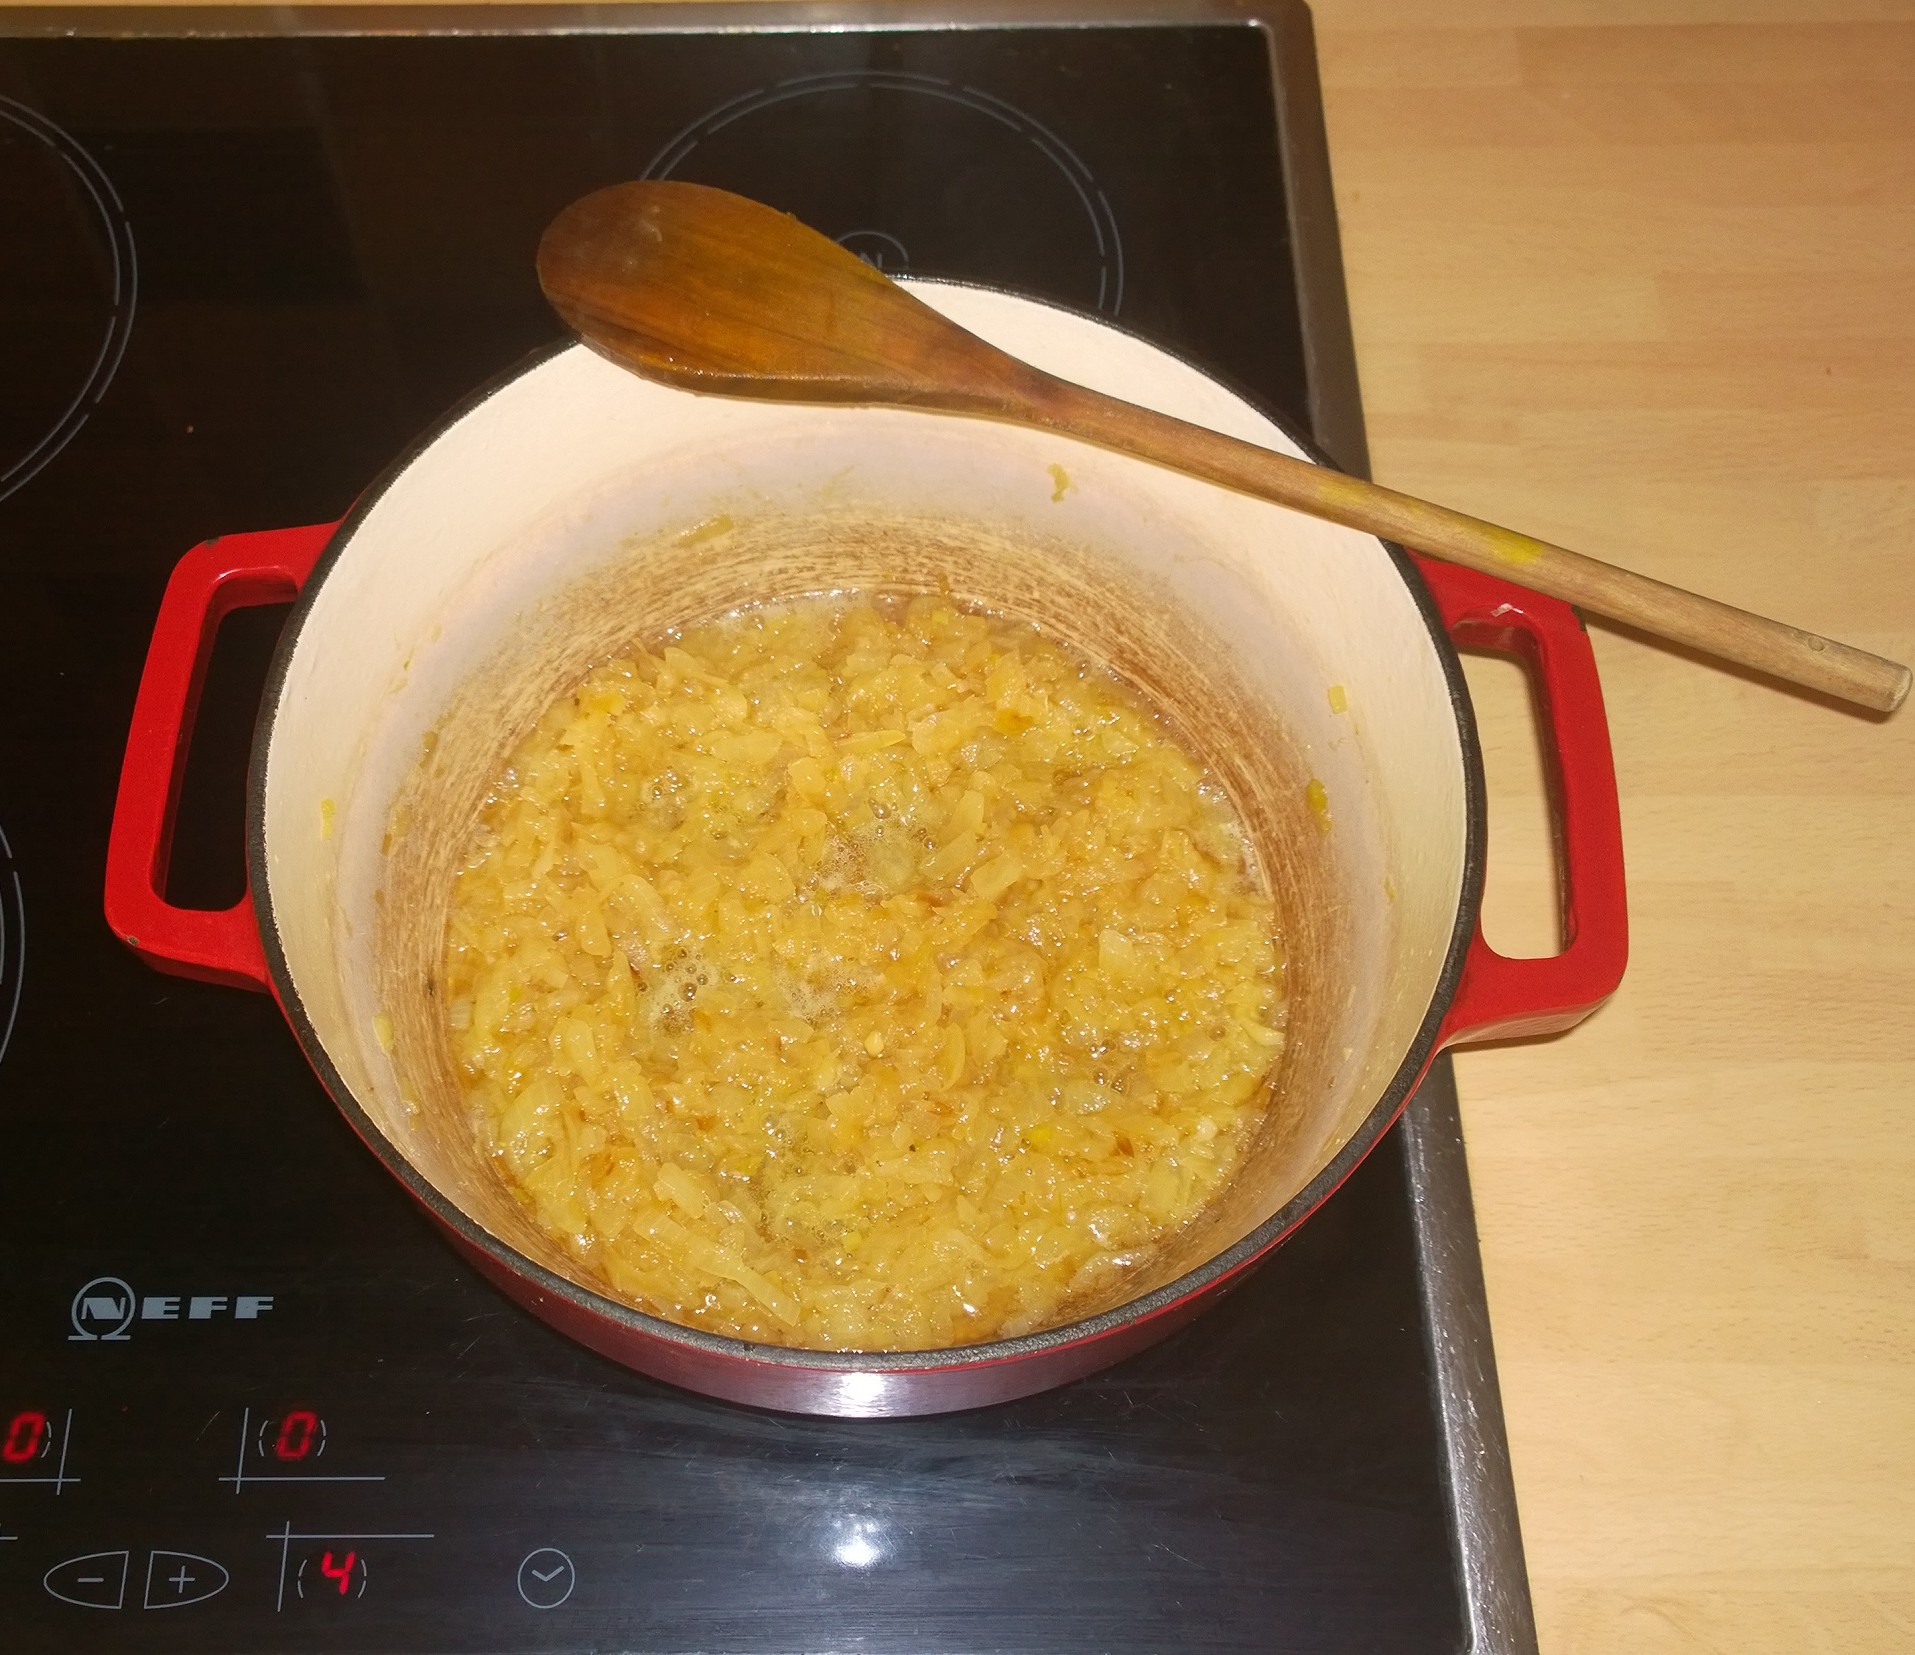
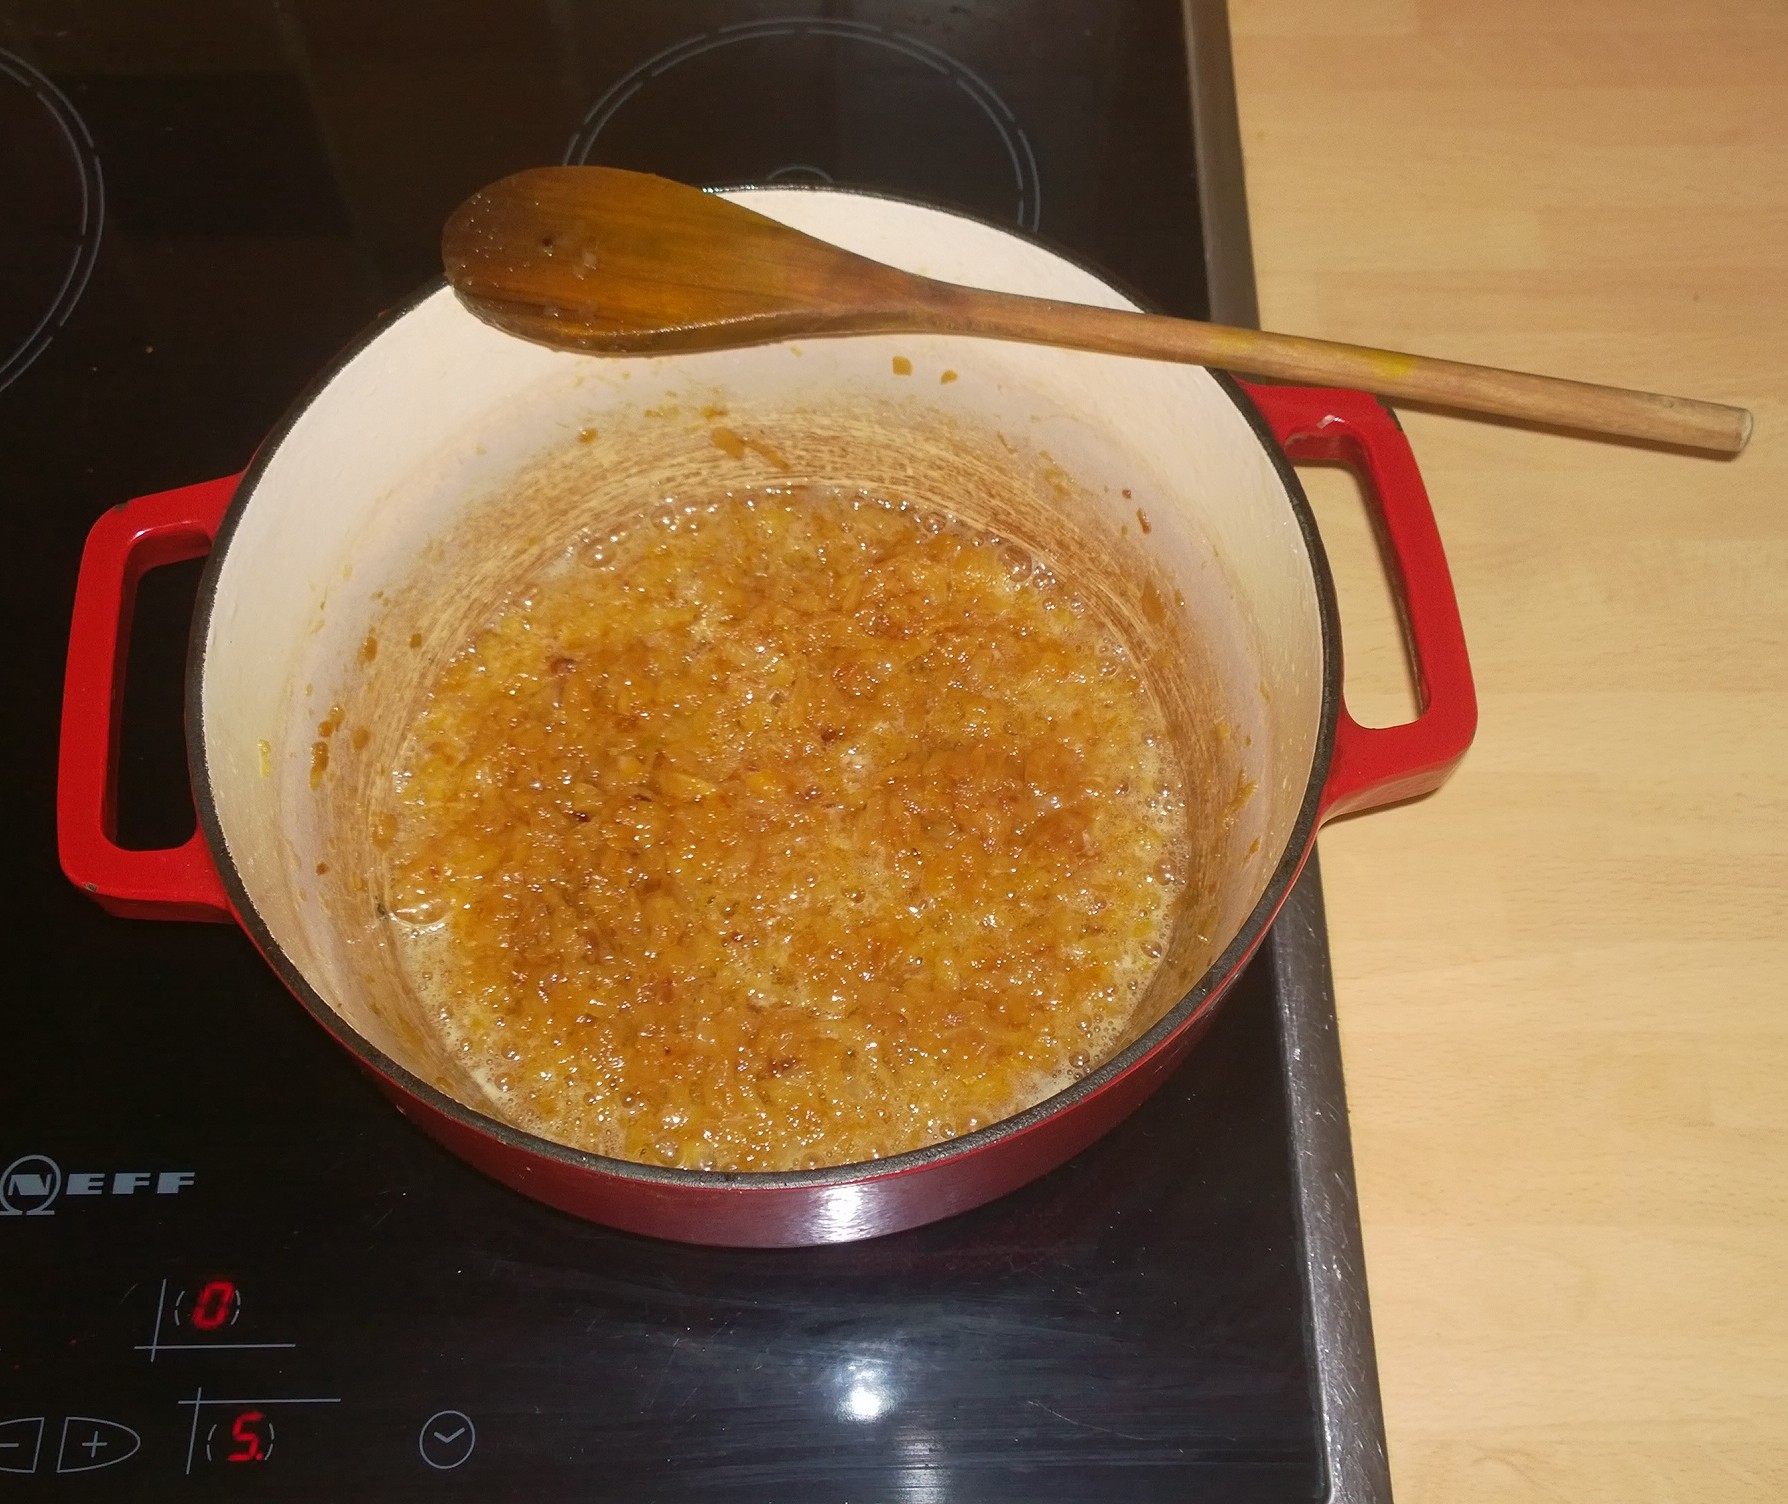
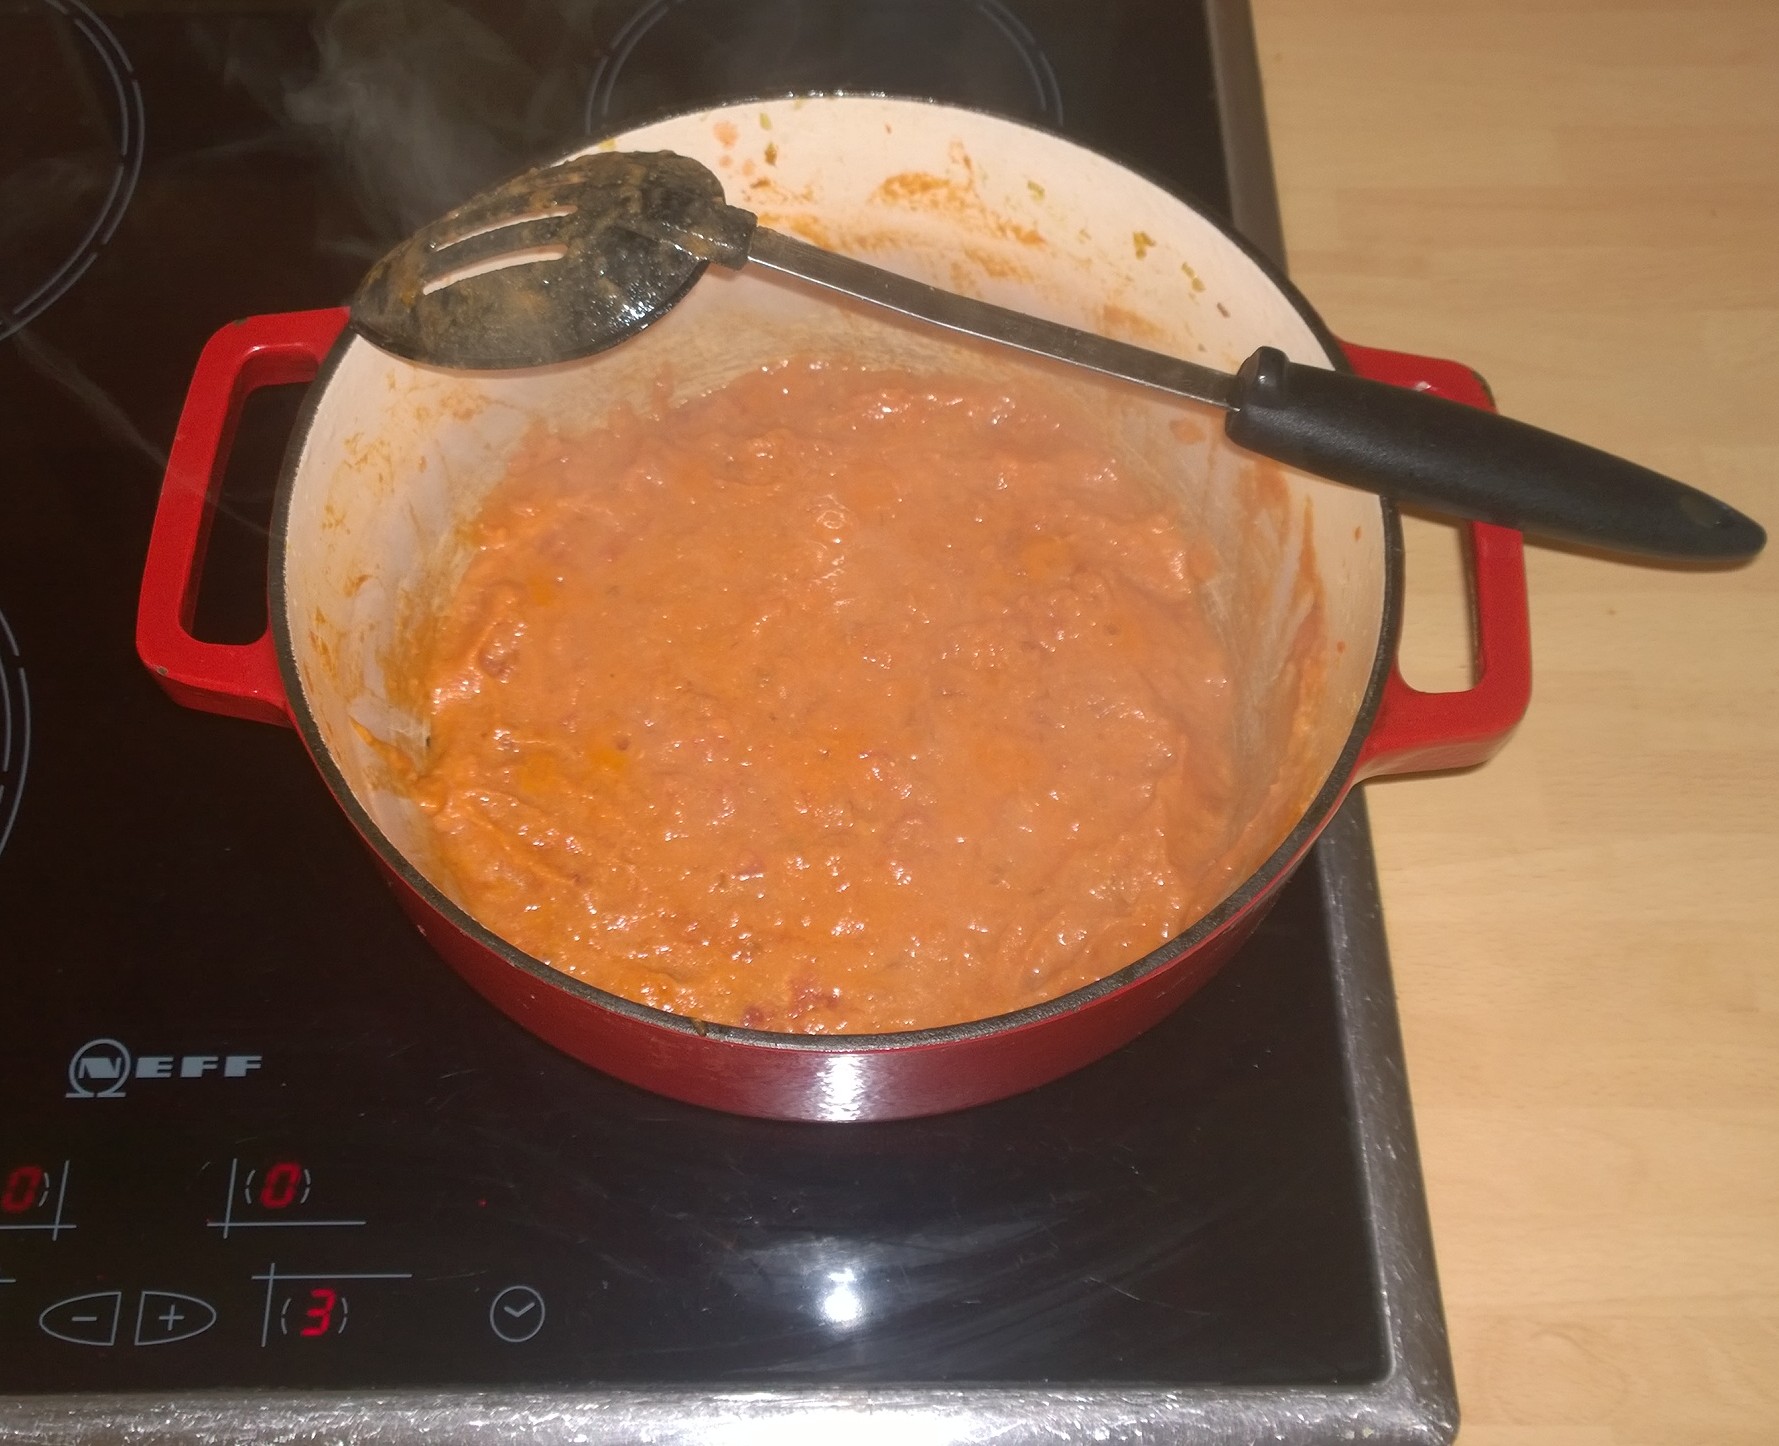
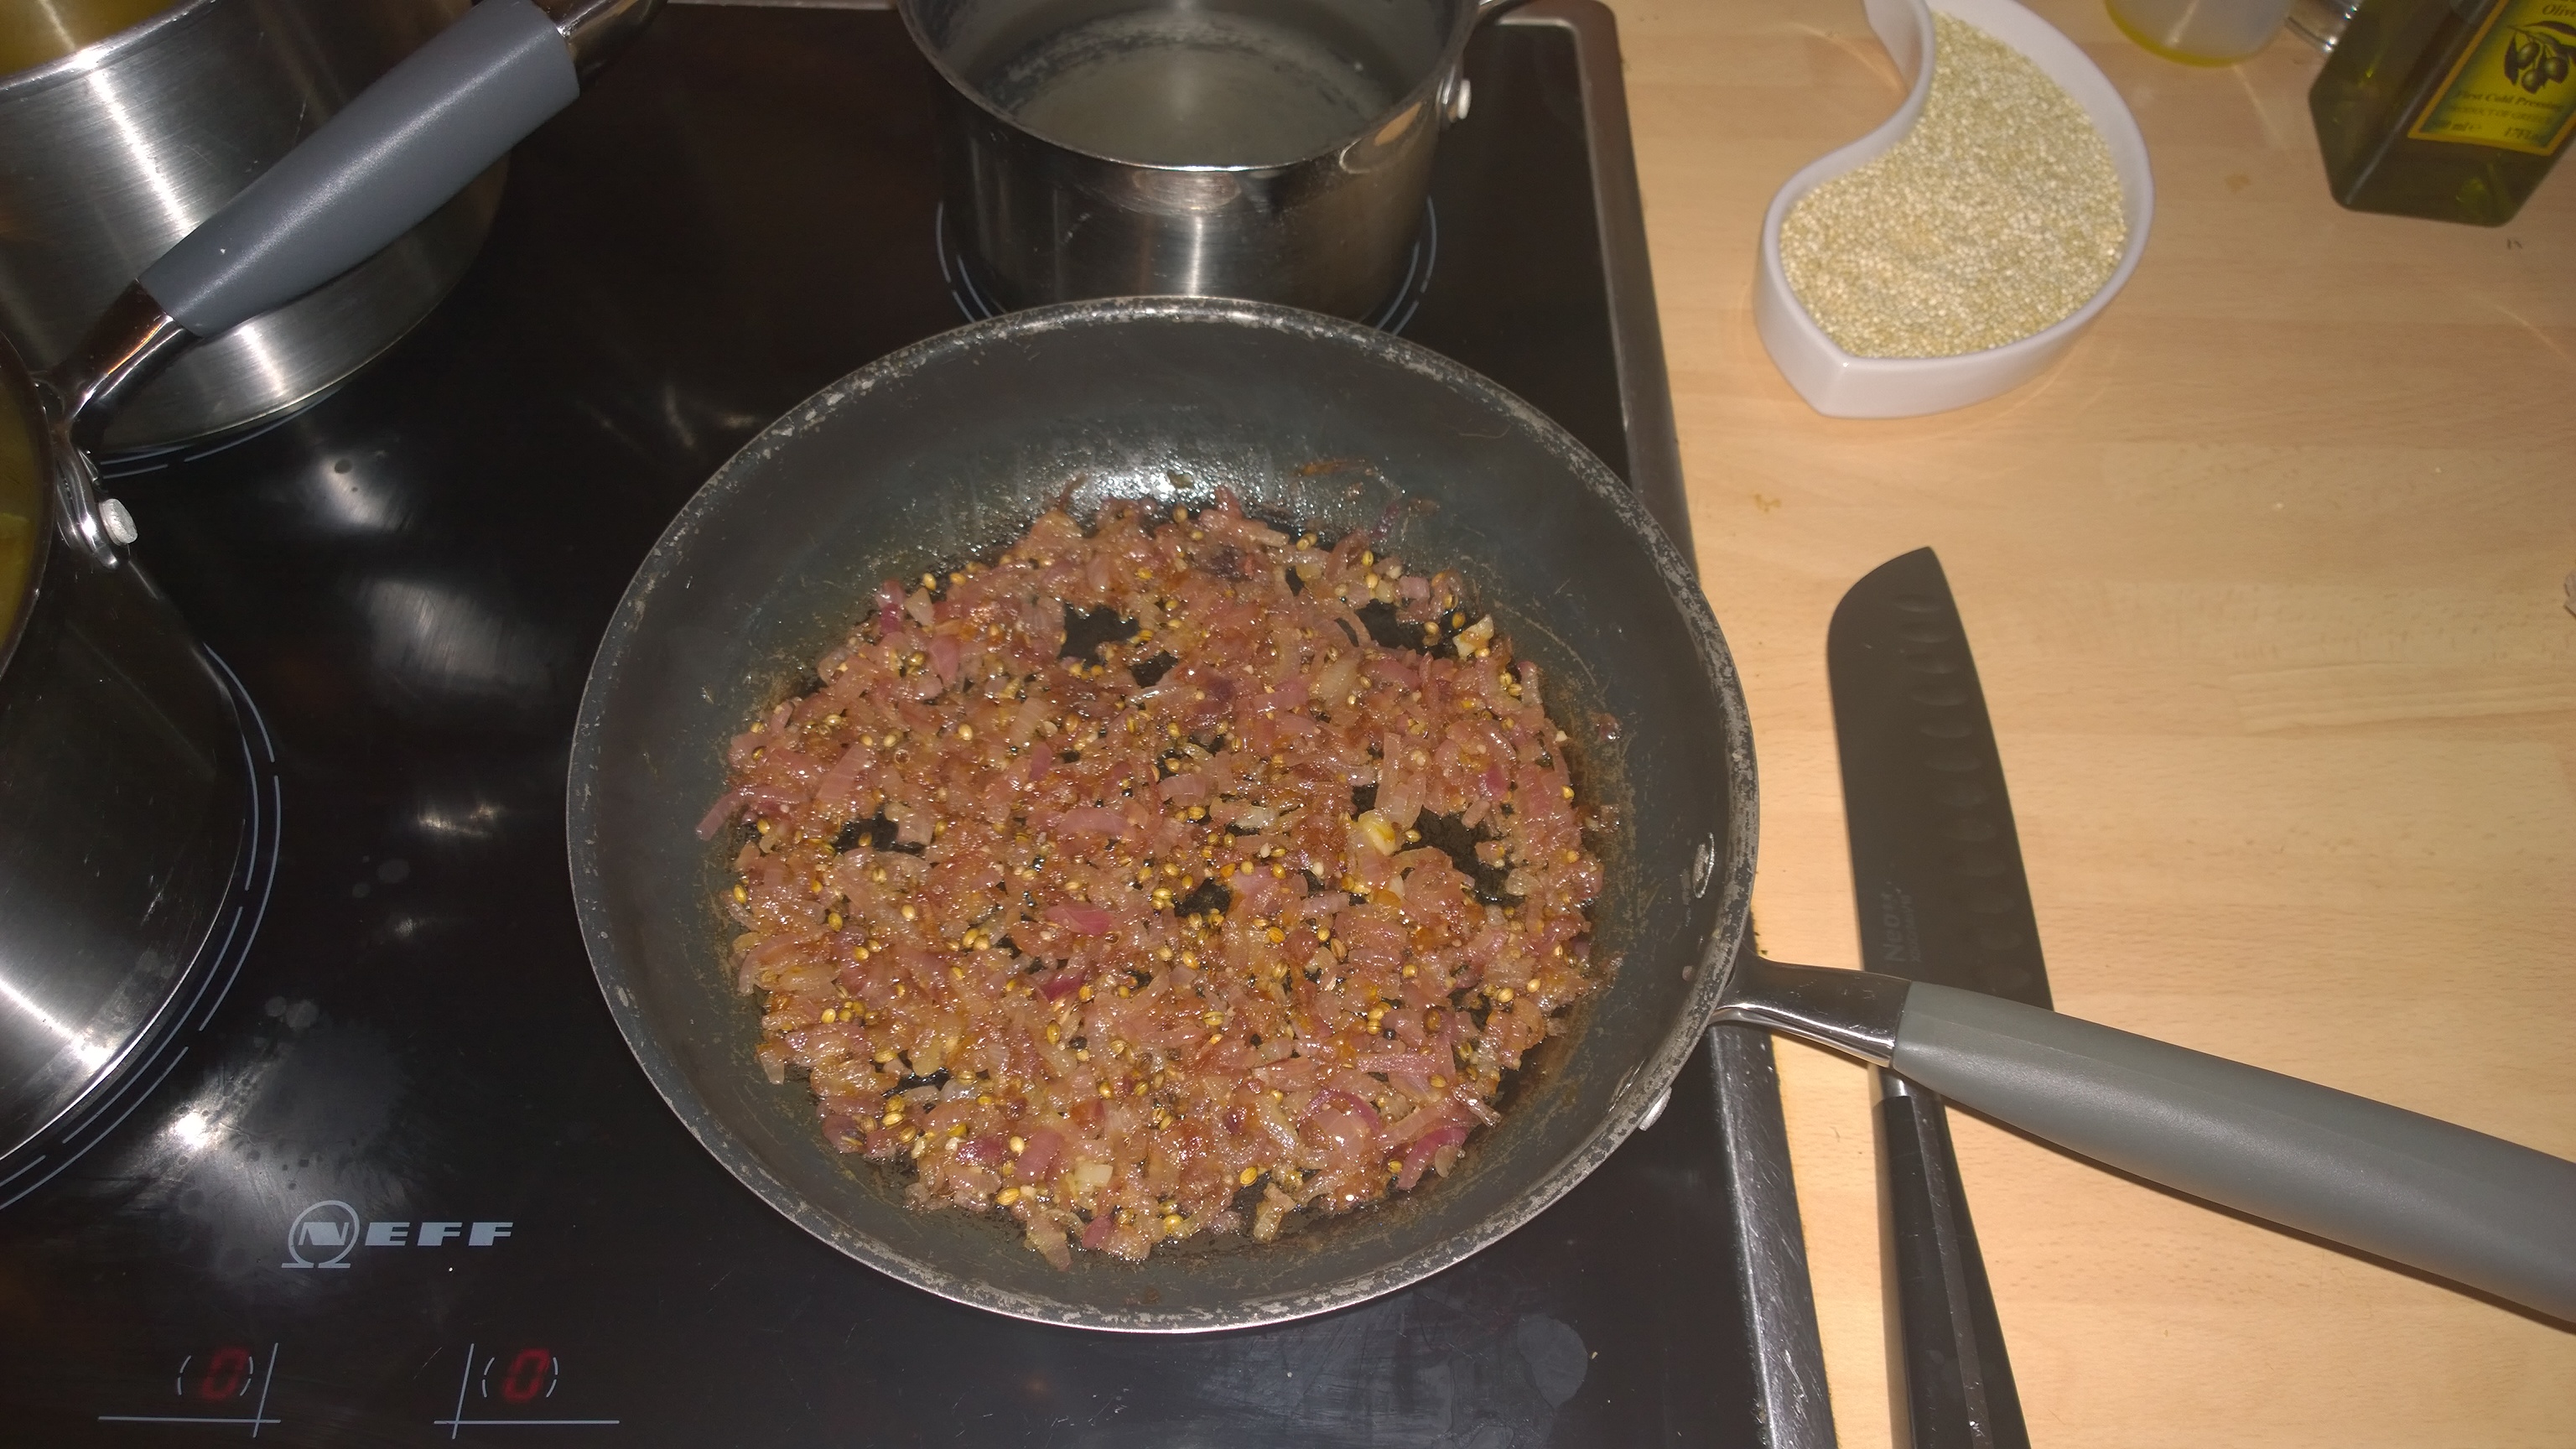
Once the Pancetta has crisped up, add the Onion and cook slowly for about 5 minutes , you want just a bit of colour as in the picture above, before you add the carrot continuing to cook on a medium heat.WP_20150807_16_46_44_ProFinally add the Celery and 2 Cloves of Garlic, I tend to grate my on a long Microban, which usually results in the skin being left behind and works better than any crusher I have tried, alternatively you can use some sea salt and a knife if you prefer.WP_20150807_16_54_46_ProI strongly believe food and cooking needs a lot of respect, what you put in, in terms of effort will repay you with great results.  So when you come to add the Mince (I used 1/2 Kg of Beef), please don’t ‘whack it in and mush it up with a spoon’, it only takes a few minutes to gently separate the grains and cook a bit at a time so you don’t get any clumps, it’s much nicer. Then add a tablespoon of Tomato Paste and cook out for a few minutes.WP_20150807_17_00_42_ProNow for the Wine, I chose a really nice Primitivo from Puglia, two decent sized glasses are needed, turn the heat up high to enable the alcohol to burn off, which should only take a minute or so, then turn the heat back down and add a tin of chopped Tomatoes, then season with Salt and Black Pepper.

You want a slow simmer, for about 2 hours in order to enable the sauce to thicken, I left my pot covered for the first hour with a cartouche over the ragù and uncovered for the second hour.WP_20150807_20_04_50_ProThis meaty rich sauce is NOT served with Spaghetti (we are not making Spag Bol, it’s a British invention), the reason is because it does not have the surface area for the sauce to stick, you should be using Tagliatelle which is what is used in the traditional dish.

Mine took about 7 minutes to get to just ‘al dente’ which is what we are looking for, not soggy and sloppy.WP_20150807_20_18_49_ProTo serve place about 2/3 of the Tagliatelle on the plate, pile some ragù on top and then grate some Parmigiano-Reggiano on top, then add the remainder of the Tagliatelle, some more ragù and then grate some more Parmigiano-Reggiano to finish, job done.

So rather than use a shop bought jar of ‘stuff’ that bears no resemblance whatsoever to a ragù alla bolognese,  have a go at the real thing and delight those taste buds. Apart from some knife work and a slow cook it’s really easy and VERY VERY tasty so please give it a go, next time I might remember to add the touch of milk at the end……..

…………………………….Until next time………………………..L8ers………

Desi, Native, Traditional Yardbird (Chicken, Murgh) – Confused, read on?

WP_20150516_15_43_02_ProYou would think making a Chicken Curry would be simple, Nah……..

I had planned to make some Paratha’s to go with a Desi Murgh I was going to attempt, hence the flour in the picture above, it never happened but I promise to re-visit Paratha’s another day.

The week was rather busy, I meet a new bunch of people I am supporting in my day job and ended up in a fantastic Greek restaurant in Weston-Super-Mare called Demetris, the ‘Sheftalia’ was delicious and the ‘Stifado’ was that good, I got several pats on the back for finding such an amazing restaurant with 5 minutes notice.

The following day I was at a RNIB (Royal National Institute for the Blind) home with some other team mates, doing a days charity work helping get the garden in pristine condition, a really worthy graft albeit left with aches and pains in places I did not know existed.

WP_20150516_15_55_53_ProBack to the kitchen and Desi Murgh, a traditional dish from Southern India. According to the research I did whilst preparing this beauty it used to be a dish for a special occasion, as large scale chicken production did not exist and Chicken was expensive. The reference to ‘Yardbird’ in the title, is that in the Deep Southern states of America, a Yardbird was another name for Chicken, but elsewhere it was a term for a prisoner!!

I have been fortunate enough to attend two 1 day cookery courses with the Lovely Sumayya Usmani of My Tamarind Kitchen, she is currently writing her first cookery book which is due to be published later this year. I learnt to cook Onions the proper way on this course, which you need to do for this dish.

WP_20150516_16_30_55_ProThe recipe is easily available via google, mine came from a book from Indian Chef Vivek Singh, its purely a co-incidence that he is appearing on Sunday Brunch as I am writing this post, he is one of the UK’s best in Indian cuisine!!

The Onions take about 30-40 minutes to cook, its not a five minute job. The trick is to use your eyes, and cook until you see the Oil separate and then add a little water and carry on cooking, stirring to make sure the Onion does not burn on the base of the pan.

WP_20150516_16_49_01_ProYou need to hold your nerve with this process, it seems as if you are cooking the Onion to within an inch of its life, I used two large Onions and by the time the cooking process has finished and you have essentially cooked all the moisture out of the Onions, there is not that much left.

WP_20150516_16_55_46_ProOnce you have passed the ‘Deep Brown’ stage, set aside to cool down and then blitz in a food processor or use a ‘Stick Blender’. You will have a delicious deep sweet base for the Desi Murgh, and many other Indian dishes as this technique is used a lot.

WP_20150516_17_09_42_ProDuring the Onion cooking stage take your Garlic and Ginger and make a paste, I used about 5 Garlic Cloves and 1 1/2 Inches of fresh Ginger, delicious.

This needs cooking out, see above, before adding the Onion Mixture and cooking for 5- 6 Minutes making sure the ingredients are thoroughly combined.

WP_20150516_17_13_41_ProThe kitchen will start to fill with amazing aromas by now, adding the rest of the spices like Coriander, Cumin, Turmeric, Black Smokey Cardamon, Kashmiri Chilli, cooking each one out to remove the powdery taste. A Bay leaf finishes this stage of the cooking.

WP_20150516_17_19_49_Pro Next, Tomatoes are added cooking the sauce base until the Oil splits from the rest of the mixture. I did not have fresh so used a tin of chopped tomatoes which were in the cupboard. Finally add some Yoghurt as per the recipe.

WP_20150516_19_14_00_ProChicken is the protein in this delicious dish, slow cooking for about 45 minutes use whatever you have to hand, Thighs, Breast (cut into chunks) or Legs its up to you. I put mine on the oven on about 150 degrees with the lid on. Make sure the Chicken is cooked if you are using larger cuts with the bone in.

WP_20150516_19_24_22_ProAt the end, add some fresh Coriander and cook on the hob for a further 10 minutes until the Oil splits out again.

I served the Desi Murgh with some Basmati rice that had been flavoured with Clove, Cinnamon, Green Cardamon, roasted Coriander Seeds, I guess it was Pilau Rice without the colouring, a ‘flourish’ of fresh Coriander was also added, I love the stuff!!

It takes a while to prepare this Desi Murgh but the results are delicious, if you like your food a bit hotter, add extra Chilli Powder as the dish is mild and fragrant. Its supposed to be quite a ‘wet’ curry so some Indian bread would go well, I was too tired after a busy week so fried some Popadoms instead!

…………………….Until Next time L8ers………………

3 Interesting months and Braised Red Cabbage

WP_20141120_11_54_42_ProA series of unforseen circumstances and events, and its been 3 months since my last post. Acute Bronchitis, infected leg after an amazing trip to Tunisia, and a health scare with the Mrs knocked my mojo for six. Things started to get better after a work event in late November, driving tanks in wet muddy fields, it was awesome, the antibiotics also had started to do their thing!

WP_20141224_11_28_29_ProSo my last post of 2014 is a twist on the Christmas staple of Braised Red Cabbage.  This is a dish I always cook at least one day in advance as the flavours develop when left to rest in the fridge, well covered in cling film and foil. This year, I added some more unusual additions in the form of Ras Al Hanut spice mix (I use the Steenbergs variant which is awesome), some Ginger, and Pomegranate Molasses, along with some Kirsch soaked Barberries at the end, which definitely added an extra ‘Christmas’ element to the dish and Middle Eastern influence.

The Ingredients

  • 1 Red Cabbage thinly sliced
  • 2 Onions, thinly sliced
  • 3 Apples (Cox’s work well), randomly cut to form different sized pieces!
  • 30g butter
  • 1 Orange (or 2 Satsumas), juiced
  • 150 ml Port
  • 3 Tbsp Moscatel Vinegar (Red wine will do but its sharper)
  • 3 Star Anise
  • 1 5cm Cinnamon Stick
  • 3 Tbsp Brown Sugar
  • 1 Clove Garlic
  • 2 Tsp Ral Al Hanut
  • 1 1/2 Tsp Ginger
  • 1/4 Grated Fresh Nutmeg
  • 50 g Barberries steeped in Kirsh for 24 Hours
  • 2 Tbsp Pomegranate Molasses

Thinly shred the Cabbage, Onion and slice the Apple into pieces about 3-4 mm thick, we want them to retain some texture during the cooking process and not break up and go mushy.

Put some butter and Oil into a Dutch Oven or decent sized oven proof pot, and heat on the hob, adding the Onion first, then the Cabbage and stir for a few minutes. Add the rest of the ingredients (except the Barberries and Kirsch),  and keep stirring ensuring all the ingredients are well mixed.

I put a layer of foil on the Dutch oven before adding the lid and placing in a pre-heated oven at approximately 130 degrees (fan). Cook for about 2 hours, stirring every 1/2 hour.

After the 2 hours, remove from the oven, stir once more, replace the lid and let cool, before transferring to a dish that will fit in your fridge, covered with cling film, and then tin foil.

The dish just needs to be reheated on Christmas day (or whenever you decide to have a go!), and add the soaked Barberries for the last ten minutes, which add the occasional ‘zing’ of Christmas spice.

Hope you all had a great Christmas and Happy New Year.

See you in 2015…………..L8ers……………..

Back to Belgium, Memories of my 40th Birthday – Carbonade Flamande

WP_20140826_16_56_29_ProAbout a week before my 40th Birthday (nearly 10 years ago!), nothing was planned so anything organised was most definitely last minute dot com! I had been to Belgium quite a few times on Business many years before but never had a chance to sightsee. Minutes later, the Eurostar was booked, along with a room at the Metropole Hotel in Place De Brouckere, a 5 minute walk from the famous Grand Place and some interesting restaurants.

WP_20140826_17_19_01_ProCarbonade Flamande is a traditional Belgian dish, a variation on a Beef Stew and quite delicious. Made with Onions, Bacon Lardons & Belgian Beer, its a nice slow cooking winter dish, or one when the weather turns such as the gap in the summer we seem to be having at the moment. I used St. Stefanus Blonde  an interesting brew dating back to the year 1295, and followed the recipe in David Lebovitz’s excellent Book ‘My Paris Kitchen’.

WP_20140826_17_28_57_ProTo get both colour and flavour, the Chuck Stuck is coated with seasoned flour and fried until deep brown and removed from the pan. Then the Onions and Bacon Lardons get a similar treatment, but without the flower!! All the ingredients then go in together and the Beer is added, time to relax.

WP_20140826_18_30_28_ProThe next stage, after things have been bubbling for a while is to add the Pain D’Épice (details in previous post), which has one side coated with Dijon Mustard, this adds some subtle spice and background heat to the dish. The mixture is stirred a couple of times during the 2nd stage of cooking to break up the Pain D’Épice and let it meld into the mixture.

WP_20140826_20_15_10_ProThe completed dish was served with a very rich, very Buttery Mash Potato, and some Green Beans, that had been cooked with some Garlic and finished with Tomato Concasse and Butter.

Quite delicious, a very nice meal on our Silver Anniversary, and fond memories of an amazing weekend in Belgium nearly 10 years ago, where our son Justin was conceived and made in Brussels, (and we had some amazing food)!

Till next time……..L8ers…..

Rượu táo om má thịt lợn phong cách Việt – Cider Braised Pork Cheeks Vietnamese Style

Back to to the Far East and a new recipe that evolved as I was driving back from Casey Fields farm Shop! This one is most definitely my own and came about as I was looking for a different spin on braised Pork Cheeks, read on to find out about a new addition to my repertoire.WP_20140506_17_24_59_ProThe last time I cooked Pork Cheeks I prepared Carrilleras Estofadas, a Spanish Braised dish, rich with Red Wine, Beef Stock, Tomatoes and Carrots, ideal for Autumn and Winter, but not necessarily a Spring or Summer Dish. Wanting to develop something lighter, I looked to the Far East for further inspiration and thought about what goes with Pork…………CIDER!

For this little beauty you will need the following ingredients, as with the last couple of recipes, you will need to adjust some of the flavours by taste, to get the right balance.

Cider braised pork cheeks Vietnamese Style (for 2 people)

  • 4-6 Pork Cheeks
  • 2 Inch length of Galangal, sliced
  • 1 Lemongrass stalk, bashed with a rolling pin and cut in half widthways
  • 1 Tbls Coriander Seeds
  • 2 Cloves Garlic chopped roughly
  • 3 Kaffir Lime leaves
  • 2 Red Thai Chillis (Leave Whole)
  • 1 Green Thai Chilli (Leave Whole)
  • 3 – 4 Shallots, roughly chopped
  • 4 Star Anise
  • 1 Tbls Rice Wine Vinegar
  • 1 Tbls Nam Pla (Fish Sauce)
  • 1 Tbls Light Soy Sauce
  • 1 1/2 Tbls Palm Sugar
  • 500 ml Chicken Stock
  • 300 ml Tutts Clump Special Reserve Cider (if you can’t get Tutts Clump, then a DECENT dry – medium cider)
  • 2 Servings Plain White Rice
  • 1 Bunch Coriander
  • 2 Pak Choi (quartered)
  • 1 Tbls Sesame Seeds
  • 8 – 10 Drops Sesame Oil
  • Plain Flour, Sea Salt & Pepper to Coat Cheeks/Season
  • Cornflour/Water (Slurry)

WP_20140506_17_31_04_ProThe first step is to put some flour and liberal amounts of Maldon Sea Salt and Pepper in a dish, and coat your Pork Cheeks, then fry them off in some Ground Nut or Vegetable Oil until brown and sealed, set aside on a plate whilst you make the braising liquor. Set your oven to 140 deg (fan) 160 deg (convection) next, this baby is going to slow cook for at least 2 1/2 hours.

WP_20140506_17_41_09_ProPut some Oil into a Dutch Oven or suitable casserole and gentle fry the Shallots, Galangal, Chillis, Garlic, Star Anise, Lemongrass and Coriander Seed until the aromas start filling the kitchen, then place the Pork Cheeks on top, and add the Chicken Stock, Cider, Rice Wine Vinegar, Nam Pla, Palm Sugar and Kaffir Lime Leaves and gentle stir to dissolve the Palm Sugar.  You then need to make a CARTOUCHE, a scrunched up piece of greaseproof paper that you put on top of the meat/liquor pressing down gently so it touches the surface of the liquid, acting like a close fitting lid. Put the lid on top and place into the oven and set the timer for 2 1/2 hours.

WP_20140506_20_04_21_ProFingers crossed, when the timer pings, you should have something that looks like the above, the brown line around the surface of the liquid is where the cartouche was sitting during the cooking process. Remove the Pork Cheeks gently from the liquor, they should be very tender and could fall apart, put them in a dish, cover with foil and put back into the oven, turning the temperature down to under 100 degs, you just want to keep them warm. Strain the liquor into a saucepan and put onto a high heat to reduce for 5 minutes, in the meantime make a Slurry from 50/50 Corn Flour and Water about 2 Tsps worth and add, stirring continuously until the liquor starts to thicken, it should stick to the back of a spoon.

Turn the temperature down to low, we are nearly ready to finish the dish. For speed, I used quick cook Rice, which only takes 90 seconds in the Microwave (Gasp, oh no, surely not….Its quick!). The Pork Cheeks are to be served with Plain Rice, that has chopped Coriander mixed through it, and Pak Choy, with Sesame Seeds & Sesame Oil, really easy to do.

WP_20140506_20_19_21_ProTake a frying pan with a lid, add some Oil on a medium heat and put in your Sesame Seeds to cook for 30 seconds, add the Pak Choy which has been quartered, add a little water to create some steam and put the lid on quickly. I cooked mine for about 2 minutes maximum, remove the lid and CAREFULLY add about 10 drops of Sesame Oil all over the Pak Choy and gentle turn to mix, that’s it done!

WP_20140506_20_20_48_ProSo all there is to do now is plate up, nappe the thickened sauce over the Pork Cheeks and serve with the Rice and Coriander mix. The great thing about this dish is the fact that it is very light, very fragrant, and does not have the fiery kick of other dishes I have recently posted, so suitable for younger mouths if you want to introduce them to unusual cuisines.

WP_20140506_20_26_08_ProIf you want it spicier, then rather than adding whole Thai Chillis, chop them up to release the heat, you can play with the balance of Sour, Bitter, Sweet, Spicy & Salty, the Ying and Yang of Vietnamese cuisine by adjusting the quantities of Fish Sauce, Soy & Rice Wine Vinegar, the Pak Choy adds a slightly bitter iron dimension and some crunchy texture if you don’t over cook it.

Hope you have a go, it was great fun thinking this one up, cooking it, and finding another way to enjoy my local Tutts Clump Cider.

Until next time,

L8ers……………………………..

Fragrant Gnocchi, Slow Roasted Tomatoes, Chocolate Mousse, More Courses & Glasgow’s Finest!

WP_20140309_10_26_26_Pro

The weeks are flying by at the moment, the trip to France is booked, a week at the Gascony Cookery School in early June is something to look forward too. Being impatient and keen to add to my culinary knowledge I spent another day in London with the ‘Pukka Paki’, Sumayya and what an event it was! I had recommended the school to a colleague at work and by sheer coincidence he decided to pick the same day as me to attend. Glad you enjoyed it Tom.

WP_20140315_12_59_08_Pro

You HAVE to attend the cookery school to appreciate the subtle techniques involved in cooking Pakistani food, its mostly hands-on and you would not get anywhere near the same from reading a book. There were four of us on the course, all keen foodies (and blokes!!) and we had great fun learning new skills and understanding the differences between Indian, Bangladeshi and Pakistani cooking.

On the menu was Beetroot & Beef Curry – Chaukandar Gosht, fragranced with Cardamom and Cinnamon, Green Masala Chicken Biryani – infused with Mint, Coriander, Lemon and Green Chilli’s and whole garam masalas, Channa Daal with Takra of Curry leaves, red Chilli, Cumin and topped with Tamarind, Homemade Naan breads with Poppy Seeds & Qawami Seviyan – sweet Vermicelli with Cardamom, Saffron, Cloves and Pistachios.

WP_20140315_13_47_16_Pro

After time spent learning and cooking we all sat down to a hearty (and very tasty) lunch. I cannot recommend Sumayya enough, her courses are also available through the Divertimenti Cookery School in London, if you want to learn some new skills her courses are money well invested and great fun.

Moving away from the exotic spices of Pakistan, last weekend saw my 1st attempt at Gnocchi which were surprisingly straight forward.

WP_20140309_17_13_34_Pro

The potatoes were boiled in their skins from cold, about 30 minutes and then peeled with the back of a knife, SIFTED flour to keep things light was added after the potatoes had been through a ricer. If you are careful, you end up with soft pillowy (if there is such as word) Gnocchi, which are rolled on the back of a fork to create furrows for the sauce to stick.

WP_20140309_18_08_58_Pro

As you can see the final presentation needs some more practise. they are very soft so might benefit from some time in the fridge before finishing off. Unlike the usual sauces that accompany such delights, I went for a more unusual (in my mind) combination to go with the Gnocci, Slow roasted Tomatoes, Feta & Middle Eastern Flavours!

WP_20140309_18_42_38_Pro

This element needs starting early, the Tomato’s are going to be SLOW roasted for about 8 hours at 100 degrees. Take about 10 Tomatoes, cut them in half and place on a baking tray that has had some half decent Olive Oil spread on the surface. Sprinkle with some Sea Salt and make sure they are well coated in the Oil, they should be CUT face down. Add to the tray a halved head of Garlic, a chopped Onion and sprinkle everything with some Thyme, Coriander Seeds, Sumac and Pepper! Stick them in the oven and wait for the aroma’s to fill the kitchen, this does take a while (8 hours of course). Keep an eye on them as ovens do vary.

WP_20140309_18_46_44_Pro

To add to the interest, a vegetable medley was prepared consisting of Onions, Peppers, Garlic, Aleppo Pepper, Thyme and some more Sumac. The Gnocchi was put into boiling water (but not moving, so they don’t risk breaking up), until they popped to the surface and then drained briefly on some kitchen paper.

WP_20140309_19_02_21_Pro

The Gnocchi were then lightly fried in some Butter and Ras Al Hanout sprinkled on top , ensuring an even coating and imparting the ‘exotic’ element of the dish. The presentation could do with  a bit more work but I was preparing for a trip to Glasgow so rushed. Place a bed of the vegetables on the plate, then surround with the roasted Tomato’s and place the Gnocchi on top. The final flourish is some Feta Cheese, broken up and distributed around the plate. Finish off with some cracked black pepper it was really tasty.

The Shandon Belles – A taste of Glasgow

I had a couple of days in Glasgow last week, and a couple to come this week so an excuse to try some new restaurants. Looking at Trip Advisor there were a few that caught my eye, the 1st being The Shandon Belles, in Argyle Street, WHAT a find. The place is steeped in history and sits below another famous landmark, The Buttery where Two Fat Ladies is situated.

WP_20140310_20_16_35_Pro

Dishes on the Menu included Whole grilled Sardines, dressed leaves, soft herb dressing, pink Prawns, sweet Chilli & Coriander Mayonnaise for starters and mains, Pepper filled with vegetable Cous Cous & smoked Mozzarella, dressed leaves (v), Meat loaf, Chive Mash, Tomato Jus.

I decided to go for the Fish of the day special, which was Ling, with cheesy Mash and Soft herbs. Never had Ling before, will certainly order it in the future, cooked to perfection and utterly delicious, the fish was served with roasted vegetables and certainly hit the spot. To be honest I was that tired I only managed the one course but plan to re-visit at at later date.

The service was impeccable, the place is steeped in history and when I was chatting with the waiter and talking about the blog, he presented me with a folder to look at, with pictures from the past and menu’s going back to the 70’s which was fascinating. Imagine Steak Tartare being more expensive than Lobster, and Tongue and Sweetbreads on the menu, delish!

Highly recommended, great value and well worth a visit.

The Tiki Bar & Kitsch Inn – Another taste of Glasgow!

WP_20140311_19_38_37_Pro

The following night I was in a different part of Glasgow, my own fault and due to some confusion with hotels! I am really lucky to have some great technology at my disposal, which includes several smartphones with integrated GPS and some useful software. I use them to good effect when away, searching for places to eat that are within walking distance, but also linking to Trip Advisor to get a view of quality.

The Tiki Bar and Kitsch Inn was one such find, a 15 minute walk from the hotel it promised some interesting Thai flavours, freshly cooked and no bottled sauces in sight (as stated on the menu!).

While I was choosing what to eat the lovely waitress bought me some water, and delicious Spicy Crackers with a Sweet Chilli dip to munch on, a really nice touch. They were very crisp and  not at all greasy like some of the Prawn Crackers you usually get served in oriental establishments, they certainly got the taste buds dancing.

WP_20140311_19_33_46_Pro

I was pretty hungry so thought I would go for a starter, the divine (and spicy) Crying Tiger Beef Salad, Grilled marinated beef, served cold with a Thai style green salad (beef is cooked medium rare). YUMMMMMMMMMMM, the beef was cooked perfectly and the starter really set the evening off beautifully.

WP_20140311_20_09_30_Pro

Mains were Pla Tod Yum, Crispy fillet of Coley dressed with fresh Mango and Cashew Nuts in roasted Chilli, Lime and Lemongrass sauce with Jasmine Rice, another stunning dish and another 1st as I had not had Coley before either. Dessert, yes I WAS hungry, was a delicious Coconut & Mango Panna Cotta, which slipped down and did a great palate cleansing job.

Like The Shandon Belles, I cannot recommend this restaurant highly enough, awesome food, fantastic service and another lovely evening. Give it a try if you are in the area.

Back to the kitchen for one final flurry, Chocolate Mousse. Never made it before so onto the Internet to look for some guidance and another well known chef and food blogger, David Leibovitz came to the rescue. David is a Pastry Chef originally from the USA but now living in Paris,  has written a number of books and also has a fantastic blog, (click on his name above to take a look).

WP_20140309_14_36_45_Pro

The recipe I went for is originally from Julia Childs, details can be found HERE. My version added some Mandarin segments, I like the fruity tang against chocolate, and I did not add the alcohol (didn’t have anything appropriate in the cupboard at the time).

WP_20140309_15_03_51_Pro

The process is like making a Sabayon, whisking Egg Yolks and Sugar over hot water to create a light and airy mixture, just follow the instructions in the link above and you shouldn’t go wrong, I went technical and used an electric whisk rather than the hand method.

WP_20140309_15_13_42_Pro

The chocolate is melted over a ‘Bain Marie’, hot not boiling water with a bowl over the top (NOT touching the water as the chocolate will burn), with the butter. Use the best you can get, my preference is Willi’s Cacao, you can get it online or in Waitrose. In this recipe I used the Rio Caribe 72% Chocolate Drops, really tasty, rich and sublime.

WP_20140309_15_18_38_Pro

The final process is to whisk the Egg Whites to soft peaks and gently combine with the Chocolate/Butter mixture, folding gently combining the two and loosing as little air as possible.

I placed the Mandarin Segments in the bottom of Martini glasses and spooned the Mousse on top, then popped into the fridge for a few hours to set.

The feature image for this post shows the results, to find out what they taste like have a go yourself, they were Mmmmmmmmmm.

That’s it for now, flying back to Glasgow tomorrow for a couple of days so looking forward to trying another eatery. I am hoping to get some time to test a Danish Pastry, Kringles in the near future.

I stumbled across them on a Twitter post by Yotam Ottolenghi, so have been researching recipes so I can have a go. They take a few days to make and the diary has been pretty full recently but look really interesting as there does not seem to be a huge amount written about them.

Till next time, L8ers……………….


Pakistan meets Japan in the Middle East!

I am just about to book this years cooking vacation, my original plans have had to be suspended due to local challenges and I will be heading off to Gramont, in Gascony in early June for a weeks course and some r&r. The bad news is a clash with FBC2014, the international food bloggers convention which is taking place in London at the same time!

I was driving up to the fave farm shop to buy some meat recently, and my mind was thinking of what to cook over the weekend. With the rubbish weather we have been having, and the boss being full of cold for several weeks something tasty and wholesome had to be on the cards.

WP_20140302_10_12_00_Pro

The wholesome is a blend of three grains Quinoa, Maftoul, a Palestinian Cous Cous, and Freekeh; two of these grains are regarded as super foods so this has to be good for you! The protein is a half (or whole) shoulder of lamb that is marinaded for at least 8 hours in a mixture of Yoghurt, Coriander, Chilli’s,  Mint, AnardanaSumac, All Spice and Garlic, and then slow cooked for about 4 hours until tender.

WP_20140302_10_19_44_Pro

This recipe uses a considerable amount of fresh Coriander and Mint so if you have a oriental supermarket near you, its probably best to buy from them,  I got a massive bunch of Coriander for 70p, the supermarket equivalent would have been at least a fiver!

The following ingredients are needed to create this dish, ideally start the day before you cook to allow the meat to soak up all the marinade flavours.

Marinade

  1. 500g  Natural Organic Yoghurt
  2. 1 Big Bunch fresh Coriander
  3. 1 Big Bunch fresh Mint
  4. 4 cloves Garlic
  5. 1 Red Chilli
  6. 1 Green Chilli
  7. 1 Tsp Anardana
  8. 1 Tsp Sumac
  9. 1 Tsp All Spice

This mixture is an adaption of Sindhi Lamb Biryani, a dish I learnt to cook on the Pakistani cookery course I attended last year and the Pakistan element of the title above, with some subtle Middle Eastern influence. Place it all in a food processor or blender and whizz till smooth and blended it should look like this.

WP_20140302_10_21_02_Pro

Take your half/shoulder of lamb and pierce with a sharp thin knife to enable the marinade to penetrate into the meat, pour some of the marinade into a suitable bowl, put the lamb in and pour the rest over the top making sure its well coated. Cover with cling film and place in the fridge for at least 8 hours or overnight. Its worth turning the meat over every few hours just to make sure the marinade is doing its stuff.

WP_20140302_10_23_14_Pro

This is how mine looked before the final marinade was added to cover the exposed lamb shoulder.

For the next step you will need the following;

Pakistan Meets Japan In the Middle East

  1. 1 Red Onion finely sliced
  2. Vegetable Stock
  3. 2 cloves Garlic, crushed
  4. 2 Star Anise
  5. 1 Tbls Coriander seed
  6. 8 Green Cardamon (crushed)
  7. 1 Black Cardamon
  8. 2 Tsp Pomegranate Molasses
  9. 100g Maftoul
  10. 100g Freekeh
  11. 75g Quinoa

When the lamb is marinated, place in a roasting dish and cover with tin foil, stick in an oven set to 130 deg (fan) 150 deg (convection) and cook for 4 hours till meltingly tender. An hour before the lamb is finished cooking you can start to prepare the rest of the ingredients. Check the cooking instructions on each of the grains, the Maftoul can either be boiled or steamed, the other grains are usually boiled until just tender.

I cooked the Maftoul (9 minutes) in Vegetable stock and 2 Tsp Pomegranate Molasses, the Freekeh (40 minutes) in Vegetable stock and Quinoa (20 mins and 10 to rest) in plain water.

The Onion and hard spices need frying until tender, adding the garlic towards the end so it does not burn, it should look like the picture below at this stage. The Onion/Spices are gentle mixed with the grains when both are cooked removing the Cardamon and Star Anise to prevent tooth issues!

WP_20140302_18_59_26_Pro

To complete the dish and introduce the Japanese element,a modified Ponzu dressing is used that has had some Rapeseed oil and Grape Molasses added, and used in conjunction with some thinly sliced red onion.

The Finishing Touch

  1. 1/2 Red Onion, fried until brown and crispy
  2. 1/2 Red Onion finely sliced
  3. 3 Tbls Rice Wine Vinegar
  4. 2 1/2 Tbls Mirin
  5. 2 Tbls Yuzu
  6. 3 Tbls Soy Sauce
  7. 2 Tsp Grape Molasses
  8. 1 Pomegranate (seeded)
  9. 25 g Toasted Almonds and/or Pistachios to finish

WP_20140302_19_56_56_Pro

This recipe developed over several hours, and tasting each stage to make sure the balance was right. The final touches need you to mix the Rice Wine Vinegar, Mirin, Soy Sauce (to taste) and Grape Molasses. One 1/2 of the finely chopped Onion is added to the mixture and set aside in the fridge for an hour or so. The other 1/2 of the Onion is fried until crispy and stirred into the final dish. You will notice in the heading picture some Feta cheese, I forgot to add it at the end, DOH.

WP_20140302_20_05_51_Pro

So here you have it, a nutritious and tasty meal that is full of goodness and a flavor punch to match. Just finish off with the Nuts and Pomegranate. It takes a bit of effort but as the boss said, scrummerlicious.

This dish was influenced by Bethany Kehdy, Yotam Ottolenghi and Sumayya Jamil who continue to inspire my food direction. Spices from Otolenghi’s and Steenbergs, and the meat from Vicars Games @ Casey Fields Farm Shop.

Go on, have a go, its worth it.

L8ers…..

Carrillada, Guancia, Schweinebacke, Pork Cheek or لحم الخنزير خده

Before Christmas I was in my favourite place to buy meat, Casey Fields Farm Shop and eyed a pack of Pork Cheeks which quickly found their way into the basket. The lady in front starting to ask what I would do with them and before you know it, she had the other packet in hers, I love that place!! I was saving them for a rainy day, and having had far two many of them recently decided to put something tasty together. In 2007 we were flooded, I mean the whole ground floor and it took 6 months to rebuild the place so have a lot of sympathy for those suffering at the moment, we’ve been through it too.

WP_20140209_15_12_14_Pro

You will see these beauties only cost £2.49 and 4 of them are plenty for 2 people as they are very rich and umptious, served with a variety of sides such as Mash, Cabbage, or maybe Freekeh or Mograbieh for a Middle Eastern touch. You will need the following ingredients to knock up this beautiful winter warmer. The Pork Cheeks are going to braise long and slow, in fact 4 1/2 hours in a deep and mouth watering stock, despite the Chilli, it’s not a hot dish at all.

  1. 1 pack Pork Cheeks (or 2 per person)
  2. 4 Cloves Garlic
  3. 2 Sticks Celery
  4. 1 Red Onion
  5. 2 Carrots
  6. 3 Star Anise
  7. 9 Juniper berries (or maybe 10 if you prefer even numbers!) lightly crushed by hand
  8. 1 Tsp dried Thyme
  9. 1 Tbsp Coriander Seeds
  10. 1 Tsp Yellow Mustard Seeds
  11. 1 Black Cardamom pod
  12. 1/2 Tsp Aleppo Chilli flakes
  13. 1/2 Tsp Chipotle Chilli flakes
  14. 1/2 Tsp dried Sage
  15. 2 Bay Leaves
  16. 2 Sprigs fresh Rosemary
  17. 1 Large Glass Red Wine (I used Merlot)
  18. 1 Tsp Aged Balsamic Vinegar
  19. 1 Tbsp Tomato paste
  20. 1 Tin chopped Tomatoes
  21. 1/4 Litre Beef stock
  22. 1 Bunch Coriander
  23. White Pepper (I used Muntok from Steenbergs) to taste
  24. Maldon Sea Salt to taste

Firstly chop the Onion and cook for 10 – 15 minutes in 50/50 butter and Oil to soften, then add chopped Celery and Carrot and the Mustard Seeds and continue for another 10 – 15 minutes. Then, add all the spices and Tomato paste and ‘cook out’ for another 5 minutes.

WP_20140209_15_41_38_Pro

Then add the glass of red wine and cook reducing by about 1/3. You braising liquid will look something like the picture above. After about 15 minutes, add the chopped Tomatoes and Beef Stock and cook for another 15 or so minutes, you should have some heady aroma’s in the kitchen by now.  Set you oven to 130 deg  (fan) 150 deg  (convection), the cheeks are going to cook long and slow, about 4 1/2 hours.

WP_20140209_15_52_34_Pro

While you are reducing the braising liquid, coat the Pork Cheeks in seasoned flour and fry in butter and oil until brown, about 3 minutes each side and then ‘nestle them in the braising liquid after chopping up the whole bunch of coriander and adding first.

WP_20140209_15_55_25_Pro

The picture above should give you an idea of what you are aiming for. To go with the Pork Cheeks I prepared buttery Mash Potato, I prefer to cook the potatoes in their skins and gently peel with the back of a knife after about 35 minutes In the boiling water. Passing the potatoes through a Ricer and adding a decent load of butter produces fantastic results. I also added, in this case about 1 TSP of English Mustard which ‘lifts’ the Potato and enhances the Pork. Potato NEEDS Salt, so season to taste.

WP_20140209_19_51_47_Pro I also braised some Cabbage in Butter and White Wine, and at the end seasoned with some Anardana (Ground Pomegranate Seeds), it worked surprisingly well.

WP_20140209_20_00_22_Pro

As you can see from the close-up, the Pork is just melt in the mouth tender, the mash was soft and buttery and the Cabbage added a different texture to the meal. This is worth the effort and during these wet and miserable days, gave us some pleasure in the food department. Waitrose sometimes stock Pork Cheeks if you don’t have a butcher nearby, herbs & spices from Steenbergs and Ottolenghi, please try this one as you won’t be disappointed.

Till next time…

L8ers…………………………………………..