A Brownie or not – You decide!

I’m very fortunate to have a great team supporting me at work, doing admin booking hotels and flights as I travel up and down the country. With this in mind, and as a way of saying thank-you I decided to bake them something nice, so what to cook.

I remember watching Willie Harcourt-Cooze on television in 2008, when the series ‘Willy Wonka’s  Chocolate Factory’ appeared on Channel 4, and told his story of buying a chocolate plantation, setting up a processing factory in the UK, and persuading Waitrose to range his specialist chocolate. I have used ‘Willie’s Cacao’ several times, its fantastic chocolate for cooking and was going to be the star ingredient in my treat for the team. I purchased his first book around that time, it has some great recipes in it including one for brownies. My attempt is a variation on his recipe with some subtle changes, so read on to see what I did..

As your saw from the heading picture this is not a slimming treat, Organic Unsalted Butter, Unrefined Golden Sugar and lots of eggs being needed, but I was determined to include one of the ‘5 a day’ so fresh Raspberries were going to be a hidden surprise.

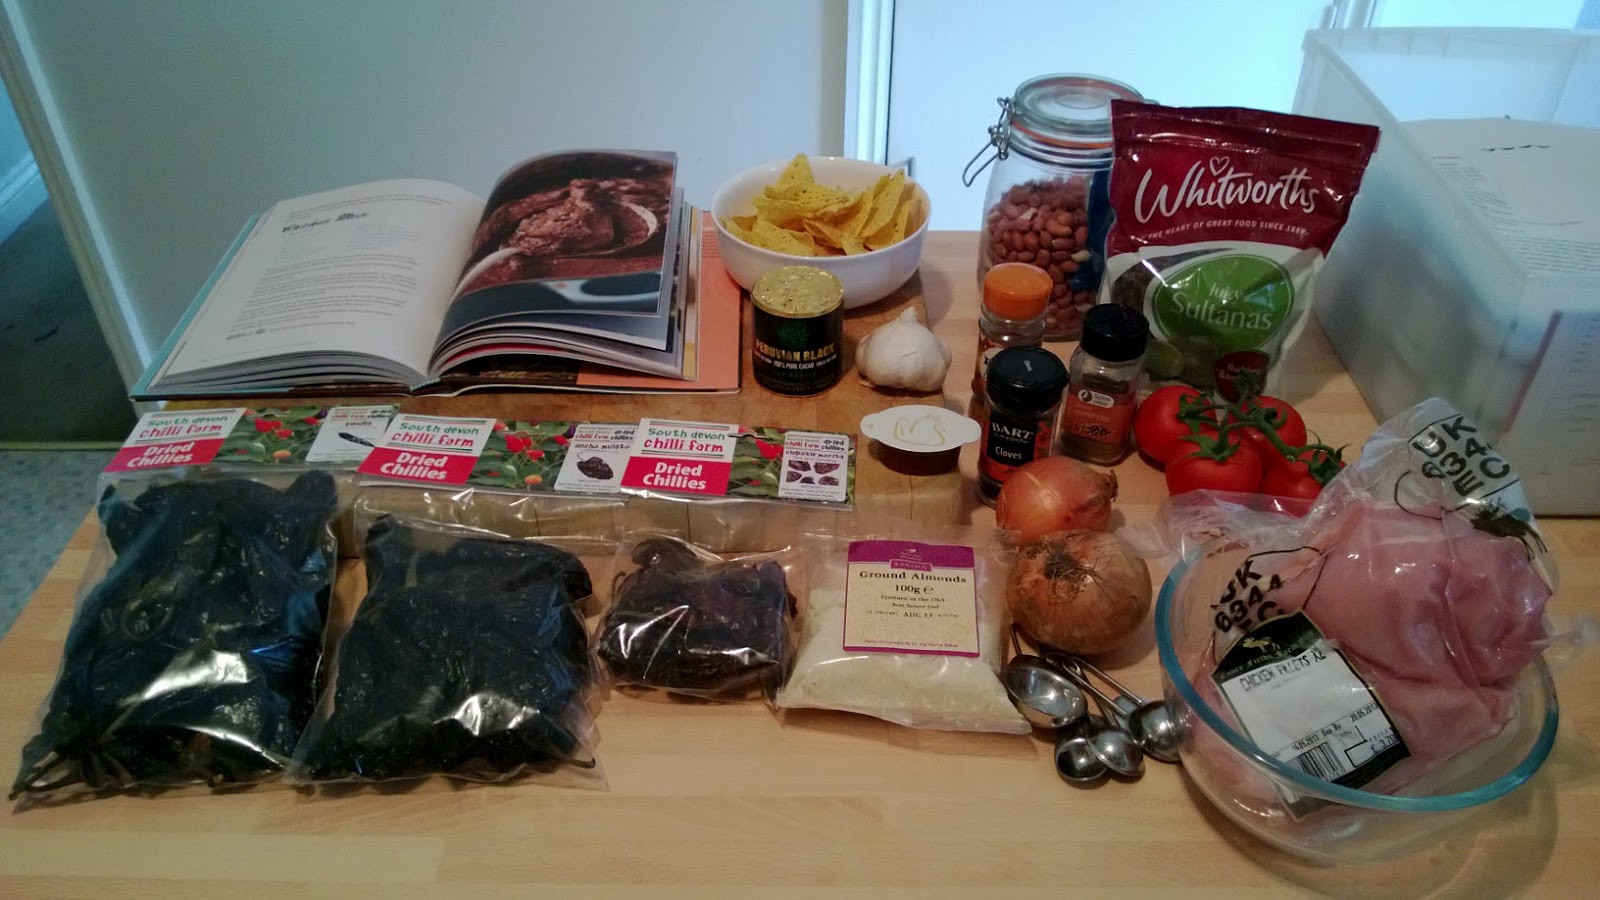
Before starting gather all the ingredients, a habit I have got into as it makes cooking so much easier. Switch the oven on and set to 175deg (fan),  then line a 20cm x 20cm square baking tin with butter and parchment paper, this makes removing the final brownie so much easier.

WP_20130821_002

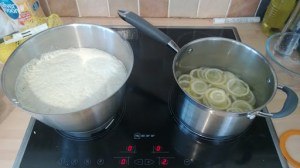
250g of Willie’s Drop’s are placed into a bowl over simmering water with 300g of unsalted butter and slowly melted, you can see the glossy mixture in the picture above, silky smooth and decadent. I used the 71% Sambirano Single Estate Madagascan which is beautiful and readily available.

WP_20130821_003

6 Eggs and 3 Yolks were added to 300g of Golden Caster Sugar and processed by the trusty Kenwood Chef using the Balloon Whisk attachment. I set the beast going at full speed to create a very light, pale and airy mixture, this helps to lighten the final brownie, it took about 6-8 minutes and significantly increased the volume of the mixture.

WP_20130821_004

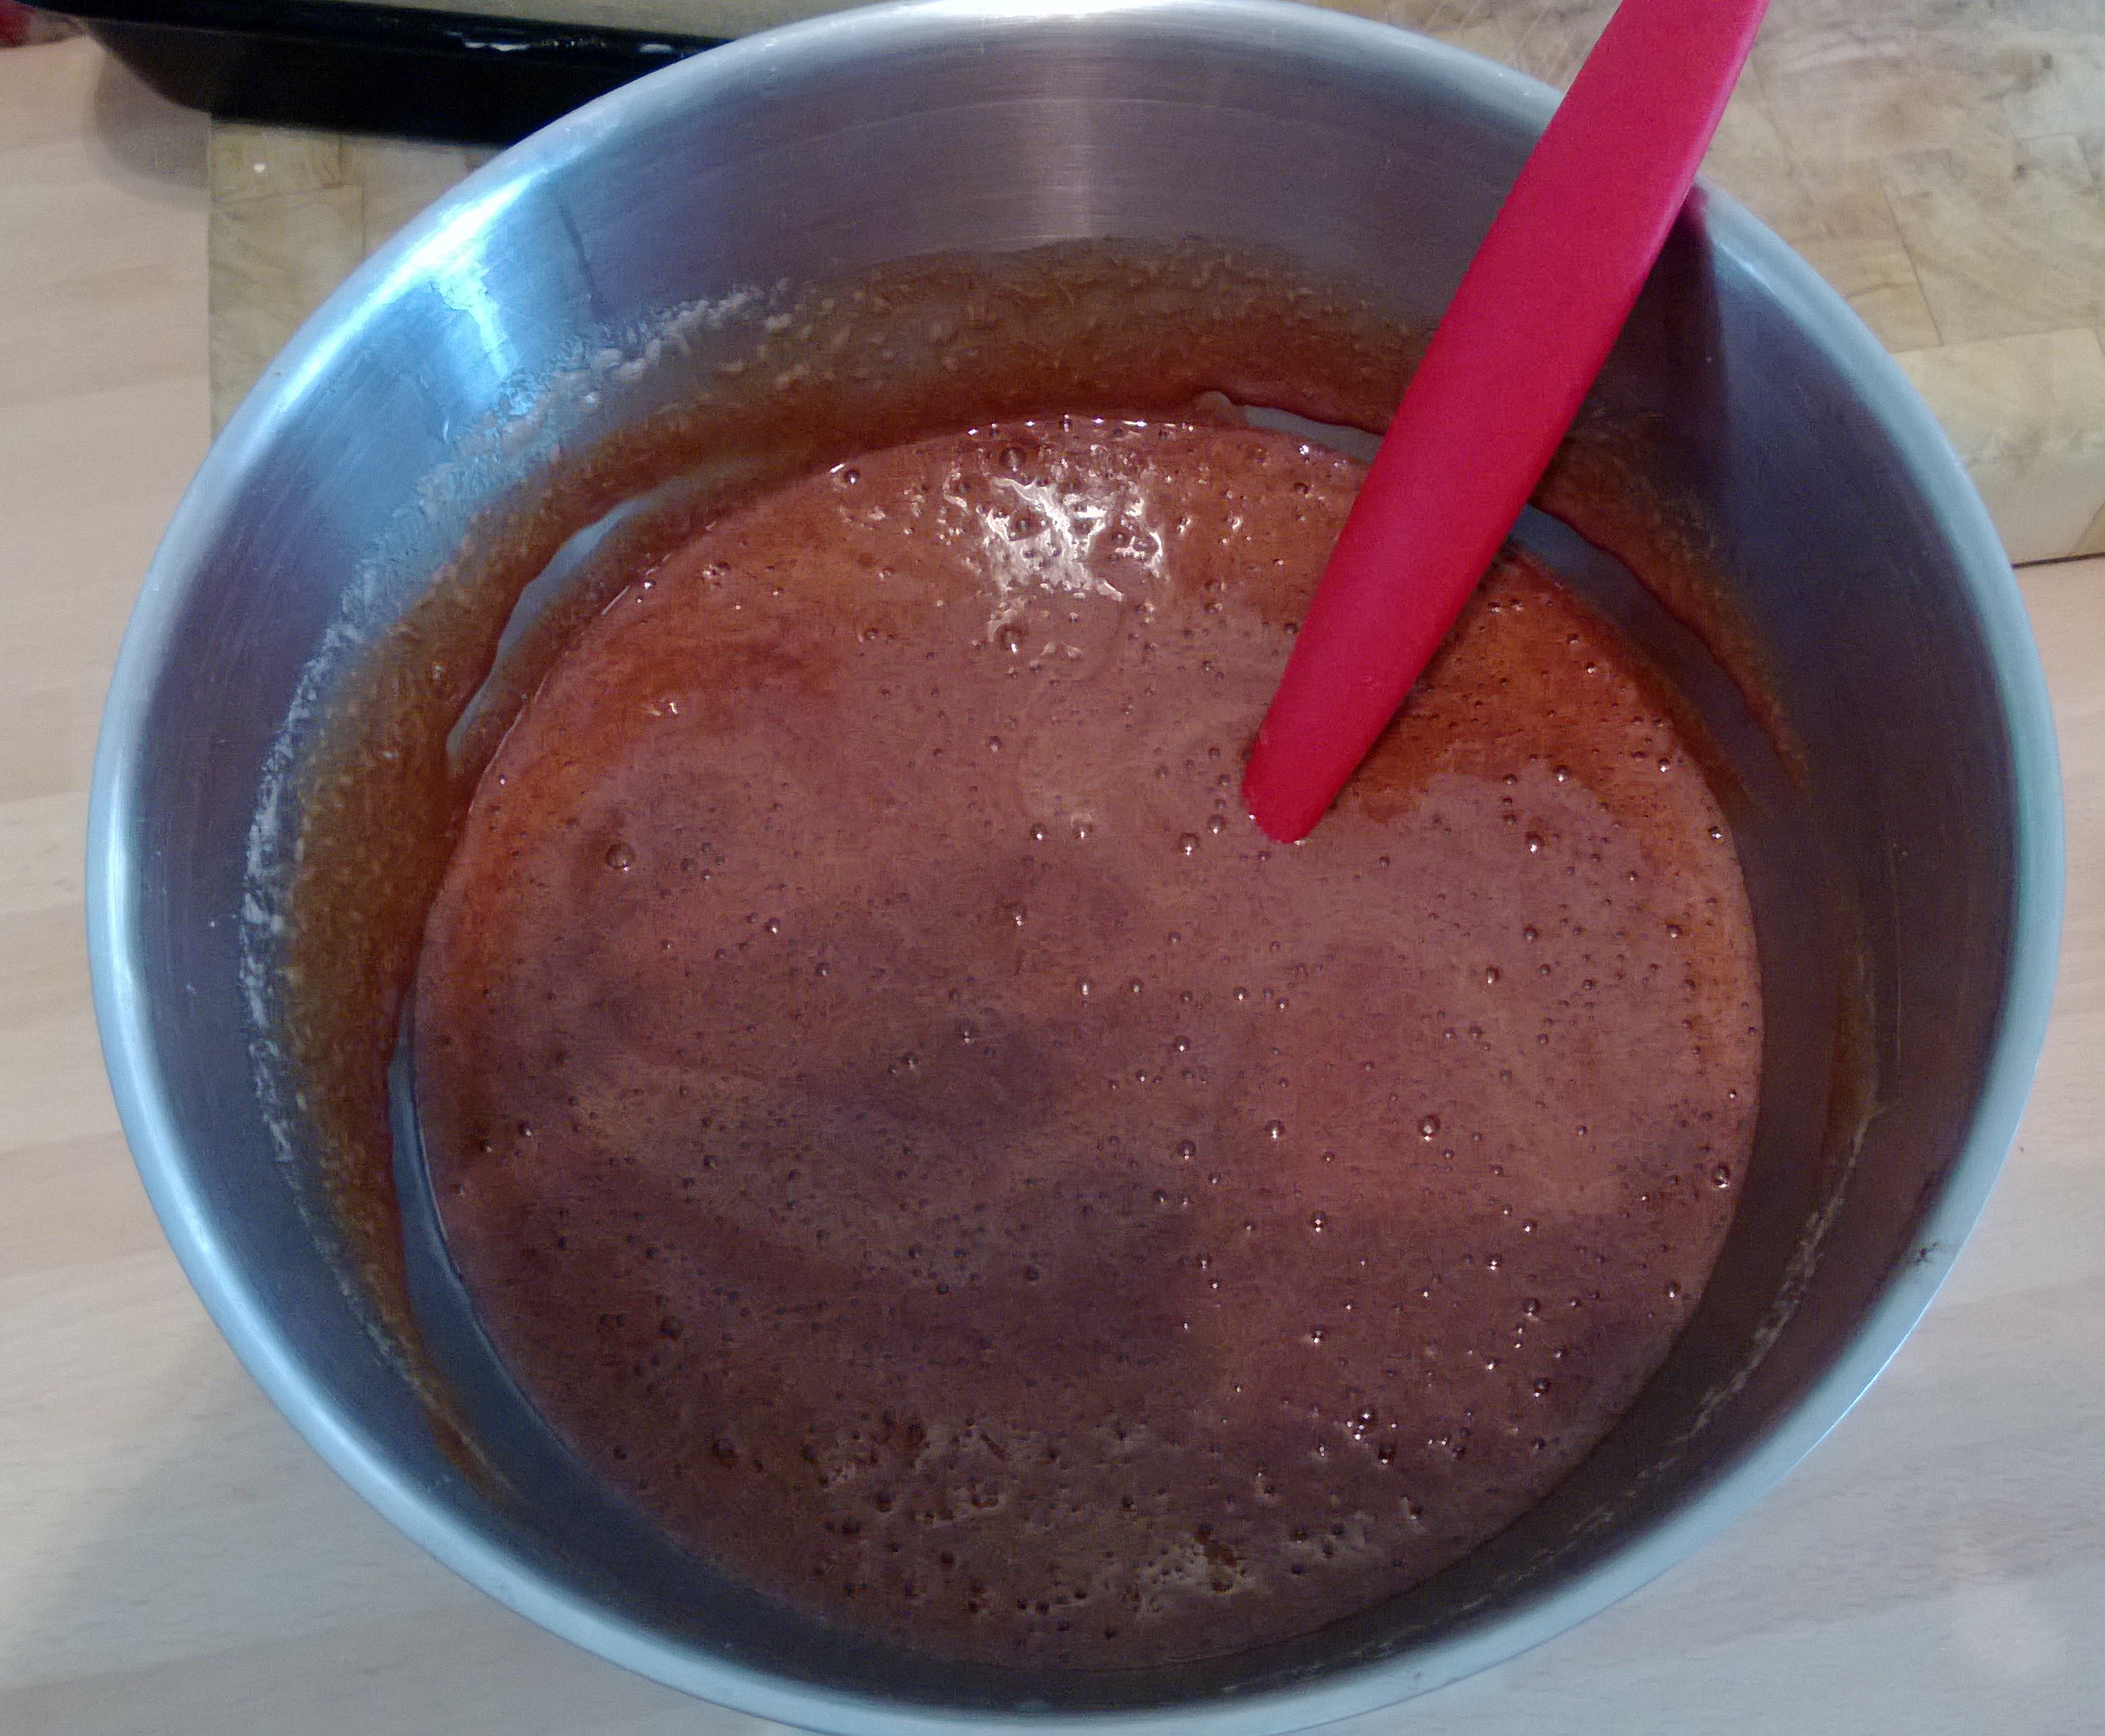
With the Chocolate/Butter mix melted and combined, add to the Egg/Sugar mixture and gently fold in 100g of Plain Flour, this is more than the original recipe as is the extra Egg Yolk. You should end up with a smooth batter like the picture above. The next stage is to pour in about 1cm’s worth of mixture to cover the base of the tin, then place the Raspberries  as seen in the following picture.

WP_20130821_006

Pour the remaining mixture gently into the tin, the mixture can dislodge the fruit so go slowly, then add more raspberries pushing them into the mixture so that they are just below the surface of the batter mix.

The Brownie/Cake mixture needs baking for about 30 minutes, then remove from the over and LEAVE IT ALONE TO COOL DOWN SLOWLY……..  If you don’t do this, when you try and remove from the tin, you will end up with  mess.

WP_20130821_011

When the Brownie has cooled down, you can remove from the baking tin by gently lifting by the parchment paper, then dust with Icing sugar.

It was absolutely delicious, quite light and moist for a Brownie, I think its more cake like but the team loved it, as did several other people who where in the office at the time.

If you like chocolate, you should have a go at this, its quick to make and just scrummy……. Enjoy

Burgers in Brighton – Lucky Beach Cafe

Another week of exploring flavours, both from a cooking perspective but also the chance to tuck into a 35 day aged burger, care of ‘The Lucky Beach Cafe’ on the Promenade in Brighton. I had looked at Trip Advisor over the weekend and ‘The Trolls Pantry’, another highly rated specialist Burger Cafe was closed mondays so the choice was made for us.

We were in Brighton a few months ago on a day trip, and as we were walking towards Palace Pier I noticed the words, ’35 Day Aged Beef’ above a Cafe sign. On that trip we had set our hearts on ‘good ol’ Fish and Chips’ so continued to walk along the promenade, not even stopping for a gaze at the menu.

Back in Brighton over the bank holiday and as we wandered along the seafront, Junior playing on the Big Slide, Bumper Boats and other amusements I suggested it was time for a break and something to drink.

Aha, there was that sign again, 35 Day Aged so we grabbed a table and got some drinks ordered, knowing full well this was going to be our lunch stop!

2013-08-19 12.33.18The ‘funky’ menus listed some interesting choices, I opted for the ‘LB Royale’ whilst ‘the boss’ went for the ‘Green Chilli’ Burger, both with ‘Skin-on Chips’. The tables were also funky in that a ‘single wine bottle box’ was used to hold Napkins, Salt ‘n Pepper, refined Golden Sugar and Sarsons Vinegar. The service was fantastic too, friendly and welcoming which is what you would expect from a hip seafront cafe.

Freshly cooked to order the burgers arrived in good time and my god, it was worth the wait. The 35 Day Aged Beef was Longhorn and perfectly cooked, succulent and juicy, the Brioche style buns the perfect size to match the burgers (its a pet hate of mine where the buns are too big or the burgers too small), the ratio here was spot on.

I have had some decent burgers in my time, mostly in London at ‘Meat Liquor’, which started life as a ‘pop-up’ in a van until the van was stolen, and Dollars who serve amazing Wagyu Burgers, the Lucky Beach was up there with them. The Lucky Beach has been voted one of the top six burger cafes in the UK in ‘Red Online’, I know why and I will be back again.

2013-08-19 12.47.02

I also like the food presentation, enamel bowl with simple paper…. You gotta eat here

Huevos Rancheros meets Shakshuka, Wookey Hole & Cheddar Gorge

This weekend I am having a couple of days extra off to spend time with the family,  spend time in the kitchen cooking, enjoy some good food and update the blog. 1st stop was Wookey Hole to go ‘Witch Hunting’.

Wookey Hole cave was formed through erosion of the limestone hills by the River Axe. Before emerging at Wookey Hole the water enters underground streams and passes through other caves such as Swildon’s Hole and St Cuthbert’s Swallet. After resurging, the waters of the River Axe are used in a handmade paper mill, the oldest extant in Britain, which began operations circa 1610, although a corn grinding mill operated there as early as 1086.

wookey hole

Having finished the guided tour, had some food in ‘Captain Jack’s Restaurant’ and played ‘Pirate Island Adventure Golf’,  number one son let off some steam in the ‘Pirate of the River Axe’ whilst we decided what to do next!

The village of Cheddar and Cheddar Gorge is about 8 miles from Wookey Hole, and the region is famous for Cheese, one of my favourite artisan products. Both the ‘boss’ and I adore cheese with a passion, and are very lucky to have a fantastic cheese specialist nearby who supplies some amazing product, not available in the usual retail ‘chains’. If you have never tried cheese from an artisan supplier please do, you will be amazed at the difference in taste, texture and longevity if looked after carefully.

The land around the village of Cheddar has been at the centre of England’s dairy industry since at least the 15th Century with the earliest references to Cheddar Cheese dating from 1170.

Next stop was the ‘Cheddar Gorge Cheese Company’, the only producer of Cheddar Cheese in the village of Cheddar!

WP_20130818_003

If you arrive before 15:30 you can see see the cheese being made, unfortunately we arrived after this time so could not spend time in the viewing gallery watching the process.  I was lucky enough to visit an Italian Cheese Factory in May this year as part of a cooking holiday and its more interesting than you might think.

In the shop you can taste sample’s of their products, and they even have mini cool boxes with ice bags, so you can buy the cheese with confidence if you have a long distance to travel home.

I ended up buying several different cheese’s, some artisan biscuits, chutney and their own special cheese straws, the two pictured above were completely different, the ‘Cave Aged’ having more texture and being quite crumbly, whilst the ‘Vintage’ was strong in flavour, but more creamy and close textured.

WP_20130818_004

Huevos Rancheros meets Shakshuka!

Saturday was chill out day, reading cookery books, watching cooking programmes and not thinking about work. Lunchtime was fast approaching and an excuse to spend time in the kitchen. Thomasina Miers had appeared on ‘Saturday Cookbook’ on ITV in the morning and my mind drifted to Mexico, Tommi is famous for winning MasterChef in 2005 and subsequently opening her chain of Mexican Restaurants called ‘Wahaca‘.

I fancied a bit of experimenting, so turned to the Middle East for my spice inspiration, but basing the dish on Mexican influences.

Starting off with some new potatoes of the ‘Agata’ variety, they were quartered and put into a frying pan with some Olive Oil and butter, cooking slowly for around 10-15 minutes. Then, finely chopped onion was then added with a good sprinkle of dried Thyme,  an Orange Pepper, pith removed and cut into small dice, a teaspoon of Aleppo Chilli Flakes from Ottolenghi’s, which I find has some citrus notes and decent heat,  some Ras el Hanout spice mix, mine is from Steenbergs.

Cook for a further 10- 15 minutes to soften, then add a couple of fresh chopped tomato’s and season with sea salt and pepper, mine looked like this;

WP_20130817_002

The next stage was to take a couple of Tortillas, on one drizzle some olive oil, place the other on top and move round to ‘spread’ the oil on both Tortillas. Then, place the Tortillas oil up and sprinkle with Dukkah, the oil helps the spice mix stick. I then put the spiced faces together and fried the Tortillas in a mix of oil and butter until they puffed up.

These can then go on a plate in a warm oven whilst you finish the dish, which just needs a fried egg and some chopped parsley to finish.

WP_20130817_003

The fried Tortilla base with the Dukkah adds some crunchy texture to the final dish, the Aleppo Chilli and Ras Al Hanout a Middle Eastern theme, and it was really delicious.

The ‘boss’ was out when I cooked this, but I reserved some of the vegetable mixture and folded the Tortilla into a quarter, and it was devoured when she came home!

Thanks must go to Thomasina Miers, Yotam Ottenlenghi and Bethany Kehdy for the inspiration for this dish.

Enjoy………….

الفارسي الأرز جولد Persian Jewelled Rice (with an AMAZING Aubergine Veal & Yoghurt Crumble)

Continued inspiration from the Middle East this week, it amazing how many new flavours and techniques I am discovering as I work through the various cook books on my shelf.

This weeks organic veg box, courtesy of Riverford contained some ‘Graffiti Aubergines’, an amazing looking variety that was going to be the star performer in another Bethany Kehdy recipe that was going to accompany the Jewelled Rice.

WP_20130813_003

There are quite a few ingredients in this particular feast, and some interesting cooking processes. Both recipes are contained in one of my fave new books The Jewelled Kitchen, don’t take my word for it, the food blogging world is awash with praise for Bethany’s new book and clicking on the title above, will take you one such blogger.

The Rice (Basmati), is washed several times until the water runs clear, this removes surface starch, and helps make the final dish light and fluffy. You then soak the rice in warm salty water for a maximum of 30 minutes, and wash again removing more starch. You then add to boiling water, bring back to boil and cook for 3 minutes over a HIGH heat, and DON’T STIR, it will break the grains up.  Then you gentle cool down using tepid water and thats the 1st stage complete !!!

The 1st stage of preparing the rice can be done a day in advance, and the rice can be put in the fridge, covered, until ready to finish.

WP_20130813_004

The picture above is the rice at the 30 minutes resting stage, with the Graffiti Aubergines waiting patiently for their makeover!

Adwiya (Persian: ادویه‎), or Advieh is a mix of spice typically used in Persian cuisine, you can read more about it HERE. Mine was the number 2 variety in the back of the book and contained Pistachios, Edible Rose Petals, Saffron, Cardamon and Cinnamon. When ground and mixed, the smell and flavour is amazing. If you need a source of specialist ingredients I use Ottolenghi, Steenbergs, and have just subscribed to a new supplier ‘The Kitchen Nomad’, that provides a monthly service based on a particular country, which is well worth a look.

As well as the Advieh other ingredients include Barberries, (never used those before), flaked Almonds, Pistachios, Seville Orange rind (blanched 2-3 times), fresh Mint and Currants. The final cooking process involves steaming in water, with a cloth covered tight fitting lid to prevent the rice going soggy, before this is started, some oil is heated in the pan and a layer of rice is placed in the bottom of the pan and then sprinkled with some of the fruit, then Advieh, then another layer of rice, fruit, then Advieh etc. with the final layer plain rice.

Jewelled Rice

The cooking process produces a Tahdeeg, a crispy base which has to be tried, it’s delicious. If you click on the picture above it will enlarge, and you can just see the light brown Tahdeeg on my rice, which I placed on top after breaking up into smaller pieces.

If you like what you see go buy The Jewelled Kitchen, its a beautiful inspiring book, and the recipes are just stunning.

The Aubergine, Veal and Yoghurt Crumble accompanied the Jewelled Rice, and introduced some more new ingredients not used before.

WP_20130813_006

You can see the vibrant Pomegranate Seeds, and flecks of fresh Mint, Barberries are also used along with Aleppo pepper and Pomegranate Molasses.  The dressing is a mix of Yoghurt, Tahini and Lemon Juice.  The two dishes looked resplendent on the Moroccan table in the lounge and tasted just absolutely stunning.  It did take some time to prepare both dishes but the results were well worth the effort, the ‘boss’ being very pleased with this weeks efforts.

I have just placed my advanced order for Rachel Khoo’s new book due for release in October, and also ordered a Vietnamese cookery book which I am looking forward to trying.

The final finished meal, Jewelled Rice with Aubergine, Veal and Yoghurt Crumble.    Enjoy…

Middle Eastern Chicken on Flatbread with Fattoush

Another busy week this week  included William Curleys‘ Patissiere, awesome Massamam Curry at Chaophraya in Manchester, amazing Arnavut Cigeri (Albanian Style Lambs Liver) & Kaniyarik (Aubergine stuffed with mince meat, onions, peppers, tomatoes cooked in the oven and served with rice), at Meze in Darlington. Oh, and a couple of full english breakfasts!!

It’s me and the ‘Bosses’ 25th wedding anniversary this year, and to do something a bit different we are planning a trip to Padstow, to attend a two-day Indian course at Rick Stein’s Cookery School, watch this space for a review if we manage to make it.

Back to the kitchen and more middle eastern inspired food, this time chicken….

WP_20130804_001

WARNING, ITS GOING TO GET GORY AND MESSY, SPATCHCOCKING A CHICKEN IS NOT PRETTY

Every time I am in the kitchen I try to do something new or different (or both!), this time was the art of spatchcocking. Before dealing with the Chicken, I prepared a marinade.  A pot of Yeo organic Yogurt is put into a bowl with a good generous handful of chopped fresh Thyme, the same of coriander, 4 tablespoons of Harissa paste, a teaspoon of Sumac, a teaspoon of Coriander powder, 1/2 a teaspoon of Cumin. Add the grated zest of a Lemon, and its juice and mix together well. Set aside whilst we prepare the chicken.

WP_20130804_002

Take your chicken and turn it over so that its Breast side is facing away from you and the open cavity is on the top. Take a sharp knife (Or kitchen scissors if you have them), and cut close to the bone that runs down the centre of the chicken. You should end up with a cut like above. Turn the Chicken over so you can finish the cut safely.

Next, place the Chicken with the open flesh face down on the chopping board with the breast side up. Put your hands on the body, pushing down to flatten and ‘break’ the spine firmly.

WP_20130804_003

It should look like the picture above, I was a bit nervous about this process but its actually quite easy to do if you take it steady and be careful with the knife!

So that’s the Chicken and marinade sorted, you now need to cut through and ‘slash’ the Chicken in several places to let the marinade penetrate and impart its flavour.  Mine looked like this after the next element of butchery!!

WP_20130804_005

The next stage is to place the Chicken on a roasting tray and smother it in the marinade, a lovely messy job but very satisfying. Make sure you massage the marinade into the cuts to make sure the flavours penetrate right into the meat.  I put mine in the fridge after this stage and left to rest for about 7 hours….

WP_20130804_006

Next step is to prepare the Fattoush, a Middle Eastern Salad of toasted Bread, Tomatoes, Onions, Radishes, Dill, Parsley, Sumac, in fact loads of delicious flavours.  There are many different variations on this dish and the one I chose was a variation on the lovely Bethany Kehdy, and her new book ‘The Jewelled Kitchen’, its beautiful and one of my favourites at the moment.

It’s an exercise in ‘Mis en place’, a phrase used in professional kitchens meaning put in place or preparing everything ready for cooking or construction, in the ways of salads.

WP_20130804_007

As an experiment, I changed some of the ingredients slightly, adding about 150 grams of mixed Red Quinoa, White Quinoa and Bulgur Wheat that had been boiled for 10 minutes and left to cool.  I made a dressing from thinly sliced Red Onion, 60ml of Rapeseed Oil, 4 table spoons of Sherry Vinegar, some Salt and Pepper and massaged it all together leaving it to marinade for 10-15 minutes.

My Fattoush looked like this when completed.

WP_20130804_009

Prior to starting cooking, I had popped into Waitrose to pick up some bits and pieces (read wine!), and was considering what and how to serve the Chicken. Not being inclined to spend too much time on making bread I found some interesting looking Italian Flatbreads that were thicker than a Tortilla, and had some body and texture to them.  These were going to be the ‘blanket’ for the dish.

WP_20130804_008

I came up with an idea to make them even more interesting, and it involved a 1/2 inch paint brush!!

I had some Ghee in the cupboard so took my trusty brush (that is really handy in the kitchen), and brushed each Bread with the Ghee all over.  I then sprinkled Dukkah and Za’atar over both, giving them a good covering as evenly as possible.

Prior to serving, the bread’s were put together with the clean side on the outside, and heated through in a frying pan for a couple of minutes before turning over and repeating on the other side.

WP_20130804_010

The Chicken needs about 1 1/2 hours in the oven, I used a temperature of 170 degrees in our fan assisted beast. The smells coming from the kitchen invoked memories of wandering around  Jemaa el-Fnaa in Marrakesh, Morroco. The market square is famous for the food stalls that start cooking late afternoon and swamp the area with amazing aromas and exotic spices.

WP_20130804_011

The Chicken was roughly divided and placed onto the warm Flatbread and served with the Salad. It was absolutely delicious and actually really simple to make. You can prep the Chicken in the Morning and leave to marinade. The Salad is mostly a construction exercise, the results will delight the palate.

Have a go yourself, I am pleased I did.

L8ers, till next time.

Jules

A Mixture – شكشوكة‎ or שקשוקה (Shakshouka)

I was not expecting to cook over the weekend, but the heat of Sunday evening and the lure of the kitchen got the better of me.

We have been having a clear out and re stock in the kitchen, herbs and spices from Steenbergs recently purchased have included Sumac, Za’atar, Dukkah, Turkish Oregano, Spearmint from Egypt so opening the herb and spice cupboard is like an unknown journey across the seven seas!

The boss had taken our son out on sunday, leaving me to relax in the quiet and finger through some recipe books whilst listening to some hedonistic holiday anthems. Titanium, Bom Bom and Loca People hit the walls and ceilings with vigour, whilst in my head I was in far off places, Egypt, Lebanon and Tunisia.
It was soon evening and what to eat….Shakshouka was the answer.
The word means mixture if you believe wikipedia, and mine was going to be a blend of a couple of recipes from two of my favourite chefs, you know who I am talking about.
We had some Toulouse sausages in the fridge, these were de-skinned and put into a bowl with copious quantities of Sumac, Oregano, Chilli flakes, Habanero sauce (just a few drops, hot hot hot!) mixed with a fork, and left to marinate for an hour or so.
After an hour, the meat mixture was rolled into small balls, dusted with flour and fried in olive oil for a couple of minutes to brown, then set aside on kitchen paper to drain.
          
Next, an onion was chopped and added to a frying pan with some olive oil and butter, cooking slowly for about 20 minutes. After 20 minutes, I added some Salt and Pepper, Za’atar, a pinch of Sumac, chopped Garlic, fresh Coriander seeds and Cumin seeds. Quantities are according to your taste, as sometimes I find recipes need more than stated but its your chance to experiment. Remember you cannot take out but you can always add more, so taste as you go if unsure…..
I thought we did not have any peppers in the house, but remembered that I had been given a jar of roasted peppers as part of a christmas present, they came to the rescue and having been roasted and de-skinned already were absolutely perfect. Chopped into approx. 1cm pieces they were added to the pan and cooked for about 5 minutes, stirring from time to time.
          
Next I added a tin of chopped tomatoes to the mixture, and a sprinkling of sugar to bring out the tomatoes sweetness and counteract the acidity. The mixture was left to simmer for about 30 minutes on a low heat, enabling the flavours to develop.
Next step was to added the pre-fried meat balls, and continue to simmer for about 20 minutes on a low heat, this ensure the meat was cooked through.
At this stage, put on the oven, and set to 160 deg (Fan oven), or 180 deg (Convection/Gas) and set aside to dishes big enough for one serving, or whatever takes your fancy.
Transfer the mixture to the two bowls, ensuring the meat balls are around the outside enabling an egg to be broken into the centre, and shrouded by the piquant tomato sauce. Then put into the oven and bake for about 20 minutes until the eggs are set, but yoke still runny.
My version of the Shakshuka was served with some nutty bread and tasted delicious. Small balls of meat that were full of garlic and punchy spices, mellowed by a slightly sweet but flavourful sauce with the egg adding both texture and richness.  To finish I sprinkled some Parsley and Sumac over the top which you can see in the picture at the top of the page.
So there we go, another trip to the Middle East and a journey well worth taking. I am not travelling so much this week so hoping to get back in the kitchen and experiment some more.
il-hanā’ wa ash-shifā (May you have your meal with gladness and health)

Kofta b’siniyah & طحينة (Tahini) – An evening in Jerusalem without the flight!

This week I am in Darlington again and have a place booked at my favourite new Bistro, Meze which I am really looking forward too.

Inspired by warmer weather and the thought of past holidays in exotic locations this weekends kitchen efforts have been focussed on Turkey, Egypt and Jerusalem.  I have two of Yotam Ottolenghi’s books and looking through ‘Jerusalem” my eyes were drawn to Kofta b’siniyah, a delicious looking dish of mince shaped into sausages,  full of exotic spices and herbs, and served on a sauce of Tahini, and dressed with toasted Pine nuts, Parsley and Sweet Paprika.

To accompany the kofta I spent some time on the internet searching for a dish similar to the one I had recently at Meze. It was a Patates Salatasi or Potato Salad but without the mayonnaise, and I eventually found an original recipe by Ayla Algar a Turkish cook and writer here, from another food blogger!

To prepare the salad, I had some Organic Colleen potatoes supplied by Riverford. These are a waxy variety and seemed ideal for this particular dish. I steamed them for about 35 minutes and then removed the skins whilst still hot. I recall a TV programme many years ago saying most of the flavour is just under the skin, I think they were right as they were amazing. The dressing is made from Olive Oil, Red Wine Vinegar, Lemon Juice, Mustard Powder, Salt, Pepper, Dill & Flat Leaf Parsley. The dressing is added to the potatoes while still hot, that have been cut into smaller pieces, this allows the flavours to penetrate better. I ended up using the spring onion (chopped finely) in the potato salad and the red onion went in the tomato and pepper salad.

Other dishes to complete the meal were ‘Cacik’ a dish of Yoghurt, Cucumber, Garlic, Salt and in my case some Sumac, a salad of Tomato, Red Onion, Orange Pepper, Coriander, dressed with Sherry Vinegar, Olive Oil, Salt and Pepper, and toasted Pitta with some Olive Oil, sprinkled with Dukkah, an Egyptian spice mix.

The meal was delicious and was full and flavour, it took some time to prepare but was well worth the effort. Some genuine food from the kitchens of the Middle East.

The table, if you are wondering, is a slice of ‘rock’ from Erfoud in Morocco, about 3/4 inch thick and polished. Its full of Fossils and in the centre an Ammonite. It was purchased from HERE when we were on a tour a few years ago and shipped over within a week. It weighs 175Kg’s and always reminds us of our holidays in the sun.

Enjoy……

Sardinhas em brinde, meu caminho or Sardines On Toast, my way!!!!

There is a heady aroma in the house this evening, Garlic, Thyme, Rosemary, Lamb, Wine, Red Currant Jelly & Port, braised Lamb Shanks are on the menu with ‘Butter’ Mash and Green Beans wrapper in Pancetta.

Last week was hectic, manic and downright crazy with lots of travelling, eating, workshops and courses so the energy levels were rather low this weekend and cooking was not on the agenda.  The benefit of travelling was the chance to try some great food, Meze in Darlington is really worth a visit and my review is already on Tripadvisor. Pauline and Cem made me most welcome, they don’t normally open on Monday evenings but my booking was accepted over the internet and the restaurant was all mine for the night. After a delicious starter of Feta stuffed filo ‘cigars’ with a selection of side dishes the main of Izmir Kofte returned fond memories of our two holidays to Turkey, eating proper home cooked food.

The Delicious Starter of Feta stuffed Filo, Yummy!

    
A real treat was when being cheeky, and mentioning I was ‘into’ food, could I see the kitchen and meet the chef, within minutes I was sitting with Cem, drinking coffee and talking food, a lovely end to a fantastic evening, thank-you both for your warm Turkish hospitality.

Another treat was some ‘posh nosh’ at the 5* Rockliffe Hall Hotel just outside Darlington, imagine Wild Garlic and Smoked Potato Veloute with crispy Frog’s legs, it was beautiful. The main was a difficult choice as there was lots to choose from, in the end it was the Sea bream ‘French style peas’ Pancetta & Parmesan Dauphine that got me, beautiful cooked. Dessert was ‘Rhubarb and Custard’ you will have to eat their to try it, it was fab.

So back to this weekend, feeling rather ‘zonked’ the only outing was a trip to the New Forrest to get some fresh air, see the Ponies and surprisingly, find a fab Fish and Chip shop in the centre of Lyndhurst which was just brilliant.

On getting home, a snack was in order but not feeling up to much a quick look in the cupboard to see what could be thrown together quickly.

Sardines, what could we do with a couple of tins and some half decent Rye Bread and a few brain cells kicking into action, so here goes!!!!

Take some Ras-al-Hanout and Dukkah spice (about a tea spoon of each) and stick into a cup with some olive oil and mix to make a marinade, you will need to adjust the quantity depending on how many people you are making this for.

Put the marinade into a flat dish and add some sliced Tomato for 30 mins or so.  Empty the Sardine’s and Oil into a dish, add some chopped Garlic and sprinkle over some Dill, Thyme and some Black Pepper from the mill. Grate some lemon zest over the top, and squeeze half a lemon’s juice, turning the Sardines over to ensure both sides get the treatment.

Butter the bread (or brush with Olive Oil), and bake in the oven until crispy (about 7 mins at 180 deg fan). Remove from the oven and lightly spread some tomato paste (the stuff in the tube) over the bread, you need about 2 inches worth for each line.

Layer the marinated Tomato over the tomato paste on the Bread and bake for another 2 mins.

Split the Sardines into two, removing any eggs and place 2 slices on each piece of bread and bake in the oven for about 5 – 7 minutes.

The end result is just delicious, crispy buttery Bread, soft Tomato with a kick of spice and added flavour from the Tomato paste, and the Sardines with a hint of Lemon, Dill and Garlic.  Good food does not need to involve expensive ingredients, I have added this one to the memory banks for later.

Hope you all have a great week, until next time.
Jules

Esta comida es muy picante – Mole and the Lemon Tart Revisited

Olé Mole!

This week has been hectic, I’ve recently started a new job and it was induction time in Darlington (a 4 1/2 drive for me), then to Solihull to help paint a ‘Children’s Hospice’ as part of a volunteer team from work, and then up to Macclesfield before home down south.

Luckily, I was able to include some excellent restaurants so if you like Indian, Rose Murree in Hagley Road Birmingham is worth a trip, and for excellent English fair, Bacchus in Prestbury is also worth a trip the weekday special being extremely good value money. Click on the names to see their web sites.

I recently decided to spruce up the herb and spice cupboard and venturing food wise into Mexico, ordered a range of dried chilli’s amongst other exotic items such as Dukkah Za’atar and Ras al Hanout.

My inspiration was ‘Mole‘  Mexican for sauce. There are lots to choose from but I was going to attempt Mole Poblano,  more often used for celebrations as its apparently quite time consuming to make, it was about time for me to find out. Having the chilli’s to hand the rest of the ingredients were assembled, and there are quite a few. Peanuts, Ground Almonds, Onions, Tomatoes, Chocolate (YES, I had some special Peruvian, more of that later). Here is a picture of what you will need.

I used three different chilli varieties Pasilla, Mulato and Guajillo which needed soaking in hot water for 15 mins to soften them, after I had dry fried them for a couple of minutes in a hot pan to help; release their flavor oils.

I was using a combination of recipes for this Mole, William Harcourt-Cooze, of chocolate fame in conjunction with a web find and Tomasina Miers, Masterchef winner and owner of the ‘Wahaca‘ restaurant chain. The reason for this combination was that there were subtle differences in some of the processes, such as roasting the onions and tomatoes in a dry pan, and using Tortilla Chips as a thickening agent and flavour layer. The chocolate I used is a pure Cacao from Peru (Peruvian Black 100%), you can get it in Waitrose in the cooking section, or mail order if you click on William Harcourt-Cooze’s name above.

The spice mix on the left (Cloves, Cinnamon Bark), and the Peanuts were both dry fried to bring out their flavour before grinding into a powder. Once you have dry fried the chili’s, soak them for 15 minutes in hot water, reserve some of the liquid as this is added to the Mole to intensify the taste. Once soaked, remove the stalks and seeds before chopping up, and adding to the Onions, Garlic and Tomatoes.

       
The whole process took about 2 1/2 to 3 hours which includes soaking time, dry frying, grinding and reducing the sauce. Was it worth it, hell yeah. The flavour is just fantastic, deep rich and very satisfying. Its not too hot but warming and very satisfying.
      
To go with the Mole I got a couple of chicken breasts seasoned with salt and pepper, placed 3 fresh oregano leaves on the top and wrapped them tightly in cling film. They went into a saucepan of water that was simmering VERY gently, and cooked slowly for about 20-30 minutes (size dependent).
The Mole was served on top, alongside Basmati Rice with Sweetcorn and Red Peppers (diced very finely), and a salad of Tomato and Onion. Have a go, its worth the effort.

Lemon Tart Revisited

You may recall in my last post ‘the accident’, I dropped my Lemon Tart as it was being extracted from the oven ( I have a small scar to prove it, ouch).
My good friend Anna-Rita in Italy, showed me how to make this delicious Lemon Tart, something that would be perfect after a warm spicy number such as the Mole with Chicken. The Tart consists of a sweet pastry base, top and bottom and a filling of lemon crème/custard. Its easy to make BUT the pastry is DIFFICULT to handle due to its short sticky nature and even some time in the fridge did not seem to make too much difference.
       

The crème/custard is made by putting a couple of eggs, castor sugar, lemon zest and juice from 2 lemons into a saucepan and whisking over a moderate heat until thick. Don’t have the heat too high or you will end up with scrambled eggs. When thick, turn off the heat cover with some cling film to prevent a skin forming and leave to cool (you can put into a pan of cold water if you don’t have much time to speed the cooling process).

      
The pastry is a 3:1 ratio of Flour to un-salted Butter, Sugar, Eggs and Dried Yeast. This is mixed in a Kenwood to bring it together and then 2/3 of it rolled out on Baking Parchment. Once in a greased fluted baking dish, add the lemon crème/custard roll out the remainder and put on top, sealing the edges. You should have about 1cm of crème filling, cut away any excess pastry.
30 minutes at 160 deg (fan oven) and you end up with a delicious dessert fit for any dinner table. I served mine with Mascarpone and slices of Lemon Confit which had developed a beautiful intense sweet/sharp flavour since they were made a couple of weeks back.
That’s it for this time foodies….. I hope you enjoyed the blog and have a go yourself……

Lets make Focaccia

The bank holiday seemed an excuse to spend some time in the kitchen practising some of my new skills learnt on my recent foodie vacation.

I’ve had a go at bread before but usually use a bread machine for the kneading part, so Focaccia would be perfect as its not a ‘kneaded’ bread!!

I think Anna-Rita, Guiliano and Angelo would be proud of me, I got some fresh yeast from our local Tesco’s bakery (they do have at least one use!), added it to the warm water and sugar and put it to one side for 10 minutes to let the yeast start to feed.

In the trusty Kenwood bowl, Tipo ’00’ flour, milk and olive oil were added and the mchine put into a ‘canter’!

Once the ingediants are combined and you can see some ‘life’ in the yeast/water sugar mix, add it to the bowl and continue to mix.  The bowl on the left is after the 1st rise, as it was a sunny afternoon I put the bowl on the window ledge and let nature do its stuff.

I was thinking of a nice light dessert and remembered the Lemon Tart that was part of the ‘Italian Experience’, and the sweet confit of lemon that was served with it. Out with the Mandolin and two lemons later the slices were ready. The method I choose (thanks Google), was to pour hot water over the lemons first and allow to cool, do this twice before making a 50/50 sugar/water mix in a saucepan and simmering on a gentle ‘bubble’ for 1 1/2 hours. The soaking in hot water apparently removes any bitterness. You should end up with a jar like this.

Back to the Focaccia, after the batter has risen, add loads of olive oil to a tray, and also cover your hands in it too, tip the mix into the tray and gentle spread out to the sides, I used a combination of ‘exotic’ cherry tomato’s and Rosemary to decorate the bread and enhance the flavour. Mine looked like this when ready. I let it rise for about another hour before putting in the oven to bake.

I had picked up some Veal from our trusty farm shop to make Braciole, a stuffed meat dish that is used to flavour a tomato based sauce that goes with pasta such as Orecchiette. It needs to be flattened out to make small ‘escalopes’, stuffed with two cheeses, I used Gran Padano and Parmesan and some fresh flat leaf Parsley. Dont forget to season with Pepper, you don’t need to add salt due to the cheese. Once wrapped the rolls are secured with a couple of cocktail sticks.

Fry the Braciole in a saucepan, in Olive Oil until sealed all over, pour in a jar of Passata and simmer for 90 Minutes untill everthing is tender and the sauce reduced.  The Sauce is served with the Orecchiette.  I will talk more about the lemon dessert another day as I managed to drop mine as I was getting it out of the oven!

So there we have it, Braciole, Focaccia and Orecchiette in tomato sauce.
Delizioso, Buon appetito!