Kringle Version 1 (Not a complete Failure) – Danish Pastry Bliss

The last couple of weeks have been challenging and being struck down with flu has just added to the frustration, not feeling particularly inspired to get into the kitchen. Until recently I have not been a fan of Twitter, my Facebook account was deleted some time ago as it became too distracting, Twitter, due to its limited message size, seems to provide a source of inspiration on the foodie front and is the reason for this latest post.

WP_20140322_13_57_06_Pro

I am a massive fan of Yotam Ottolenghi, and Middle Eastern inspired food in general. Yotam recently ‘tweeted’ from Copenhagen a picture of an interesting looking pastry called KRINGLE, I saw this post and decided to do a bit of detective work, and see what this treat was all about.

The word originates from the Old Norse kringla, meaning ring or circle and denotes the traditional shape of this pastry, made using either Puff or a Yeast based dough. Trying to find some recipes and guidance for making Kringle I looked to Google and found a number of different approaches and shapes to this tasty pastry, mostly by clicking through the ‘images’ search results, rather than web which did not seem to have so much too offer.

If you decide to investigate as I did, you will find variations from many countries including Denmark, Estonia, Holland & Wisconsin (home to many Danish people apparently), here is my 1st attempt which did not go quite to plan!!

The recipe I used is HERE, and is based on a combination of Puff Pastry but INCLUDES yeast, be prepared to be patient as it will take 3 days to make, most of this is resting time and should not be hurried if you are to get the best results. You might note an extra spice in the heading picture, Mahleb, an aromatic spice made from the seeds of a species of cherry, Prunus mahaleb the St Lucie cherry, which I added to the pastry mix.

WP_20140323_10_33_51_Pro

I must have been tired when I started the construction element of my 1st Kringle as I go it completely wrong! You follow a similar method to making Puff Pastry, flattening Butter and folding it into the Dough mix, and leaving it to rest in-between folds in the fridge overnight. This is where I made my 1st mistake and things went downhill from here. If you compare mine, to the instructions on the web links on this page you will see where I went wrong.

There are a number of interesting variations on preparing Kringle, I used one HERE to get an idea on the techniques to create interesting shapes.

WP_20140323_16_09_54_Pro

You need to treat this beast with respect, and timing/resting is important. You can see the butter beneath the surface after the third day, but you will also notice ‘islands’ of butter which is not what you are looking for.  This happened as a result of not doing the folding correctly and trying to fix the problem in a hurry!!!!

WP_20140324_18_48_32_Pro

After the resting and rolling you can cover the centre of the Kringle with whatever you wish, I opted for a Butterscotch, Sultana and Pecan Nut mixture. I had originally intended to add some Apple, but it was getting late in the day and decided to omit this ingredient at the last minute. The Butterscotch was made from Egg Whites, Light & Dark Muscovado Sugar and Butter.

WP_20140324_18_49_34_Pro

Now for my next mistake, this was not going to plan at all!

My Butterscotch mixture was way to0 wet, and I should have chilled the pastry further to make it less pliable. Once you have applied the filling you roll lengthways (front to back looking at the picture above), and then cut down the middle to create two tales. Don’t cut all the way as the next stage is to plait the two ends top to bottom and then join together. The technique is in the link above and should create a ring of Pastry, with the cut sides facing upward.

As everything was too soft and wet, my effort to create a beautiful masterpiece failed miserable and I ended up creating what looks like a pair of trousers!

WP_20140324_19_23_39_Pro

Despite the odd shape and bungled folding the end result tasted absolutely fantastic which was a relief, considering the multiple mistakes I had managed to accrue over the weekend!

This pastry is well worth having a go it, you can play around with the flavours to your hearts content, or go for some simpler shapes to start off with, just put Kringle into Google and select the images to find loads of information on how to make them.

Till next time,

L8ers

Fragrant Gnocchi, Slow Roasted Tomatoes, Chocolate Mousse, More Courses & Glasgow’s Finest!

WP_20140309_10_26_26_Pro

The weeks are flying by at the moment, the trip to France is booked, a week at the Gascony Cookery School in early June is something to look forward too. Being impatient and keen to add to my culinary knowledge I spent another day in London with the ‘Pukka Paki’, Sumayya and what an event it was! I had recommended the school to a colleague at work and by sheer coincidence he decided to pick the same day as me to attend. Glad you enjoyed it Tom.

WP_20140315_12_59_08_Pro

You HAVE to attend the cookery school to appreciate the subtle techniques involved in cooking Pakistani food, its mostly hands-on and you would not get anywhere near the same from reading a book. There were four of us on the course, all keen foodies (and blokes!!) and we had great fun learning new skills and understanding the differences between Indian, Bangladeshi and Pakistani cooking.

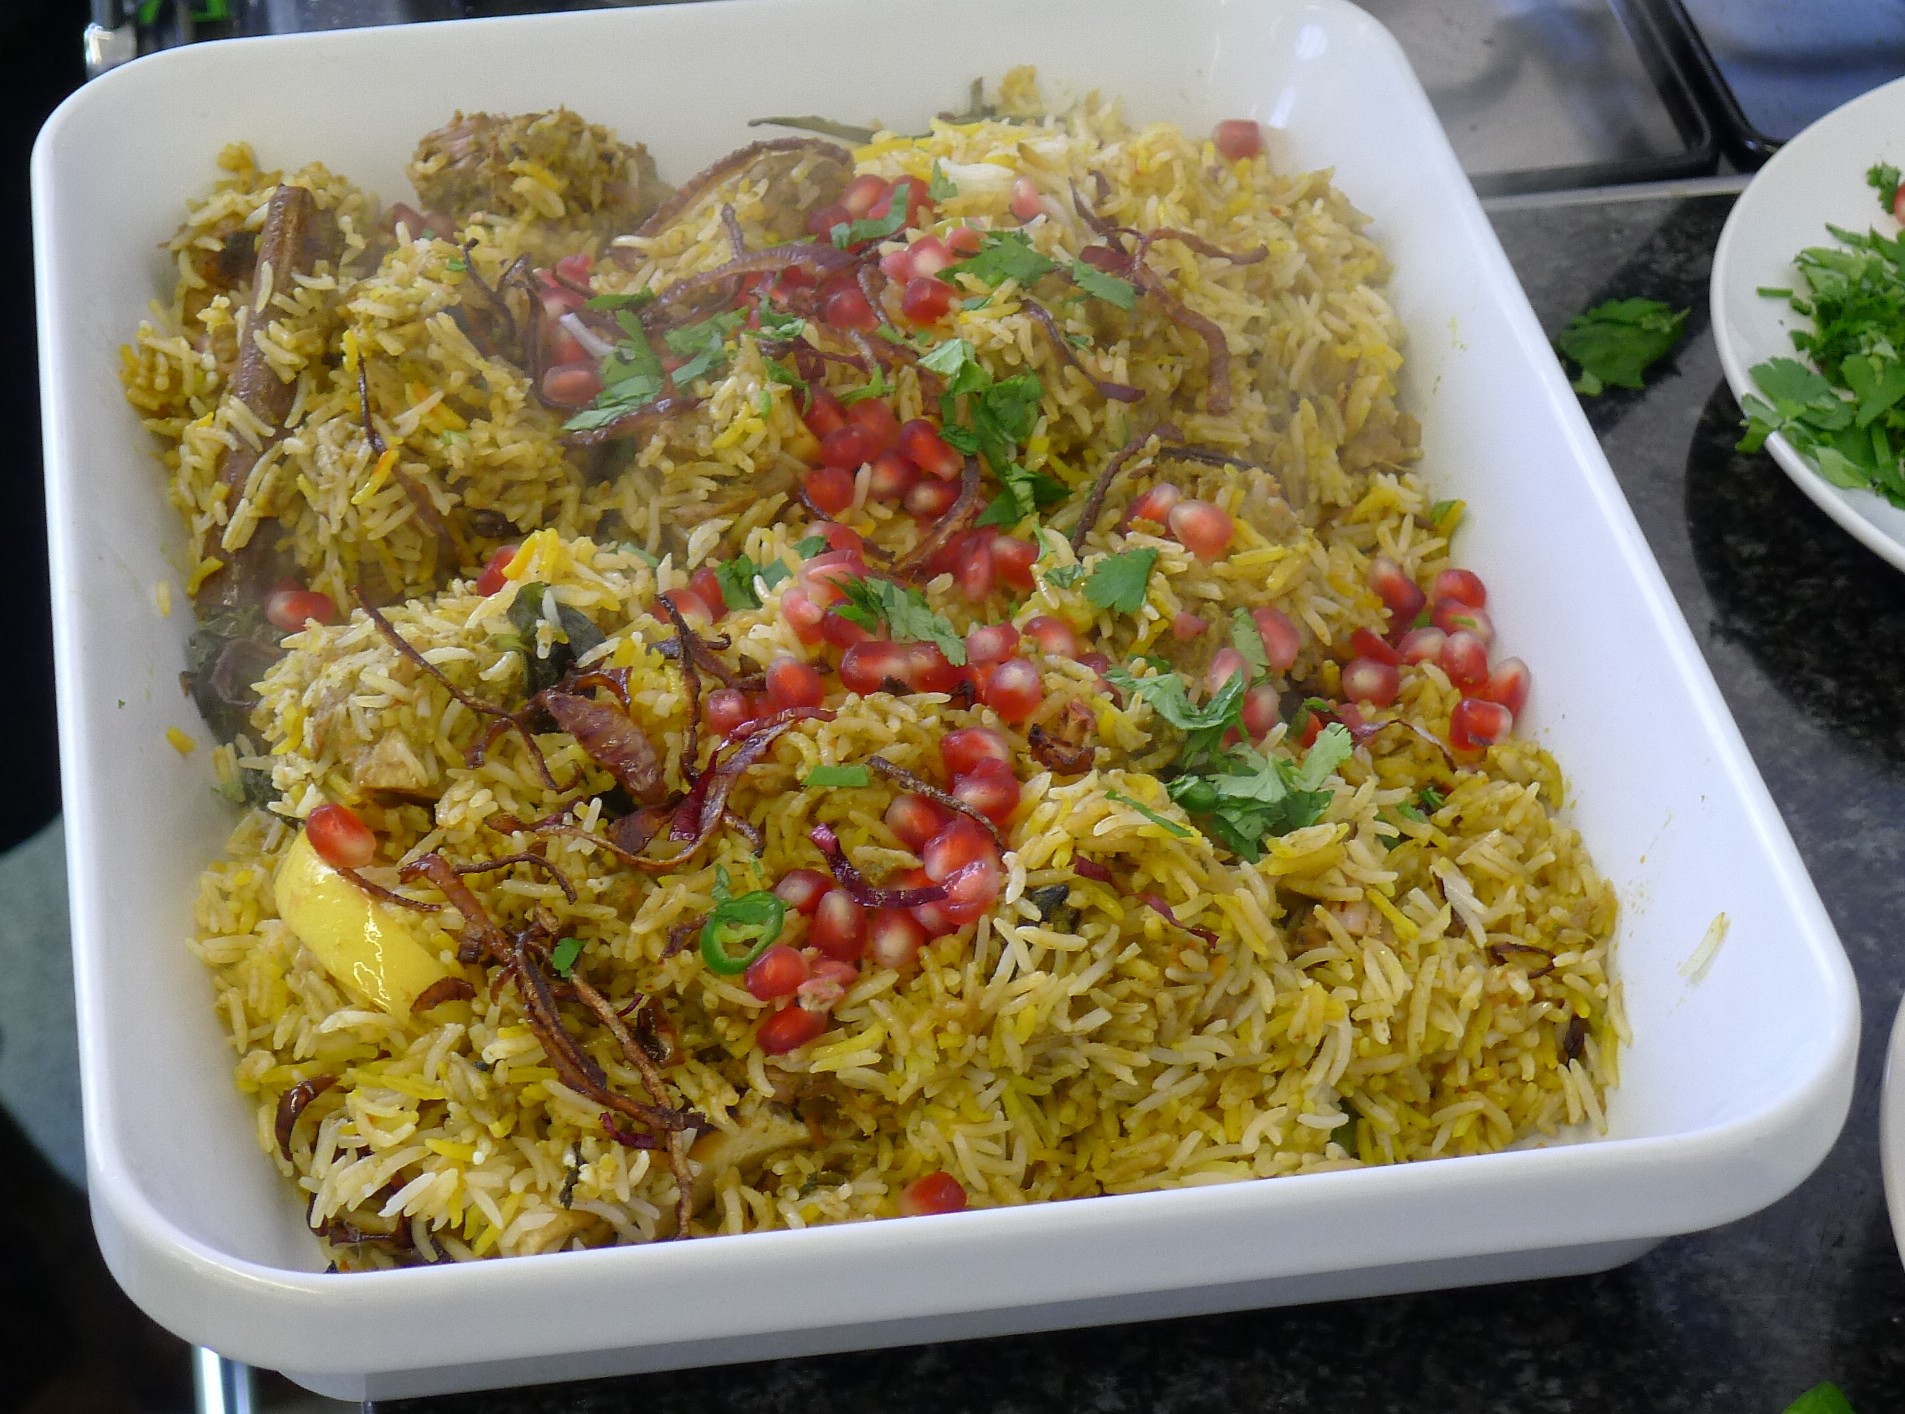
On the menu was Beetroot & Beef Curry – Chaukandar Gosht, fragranced with Cardamom and Cinnamon, Green Masala Chicken Biryani – infused with Mint, Coriander, Lemon and Green Chilli’s and whole garam masalas, Channa Daal with Takra of Curry leaves, red Chilli, Cumin and topped with Tamarind, Homemade Naan breads with Poppy Seeds & Qawami Seviyan – sweet Vermicelli with Cardamom, Saffron, Cloves and Pistachios.

WP_20140315_13_47_16_Pro

After time spent learning and cooking we all sat down to a hearty (and very tasty) lunch. I cannot recommend Sumayya enough, her courses are also available through the Divertimenti Cookery School in London, if you want to learn some new skills her courses are money well invested and great fun.

Moving away from the exotic spices of Pakistan, last weekend saw my 1st attempt at Gnocchi which were surprisingly straight forward.

WP_20140309_17_13_34_Pro

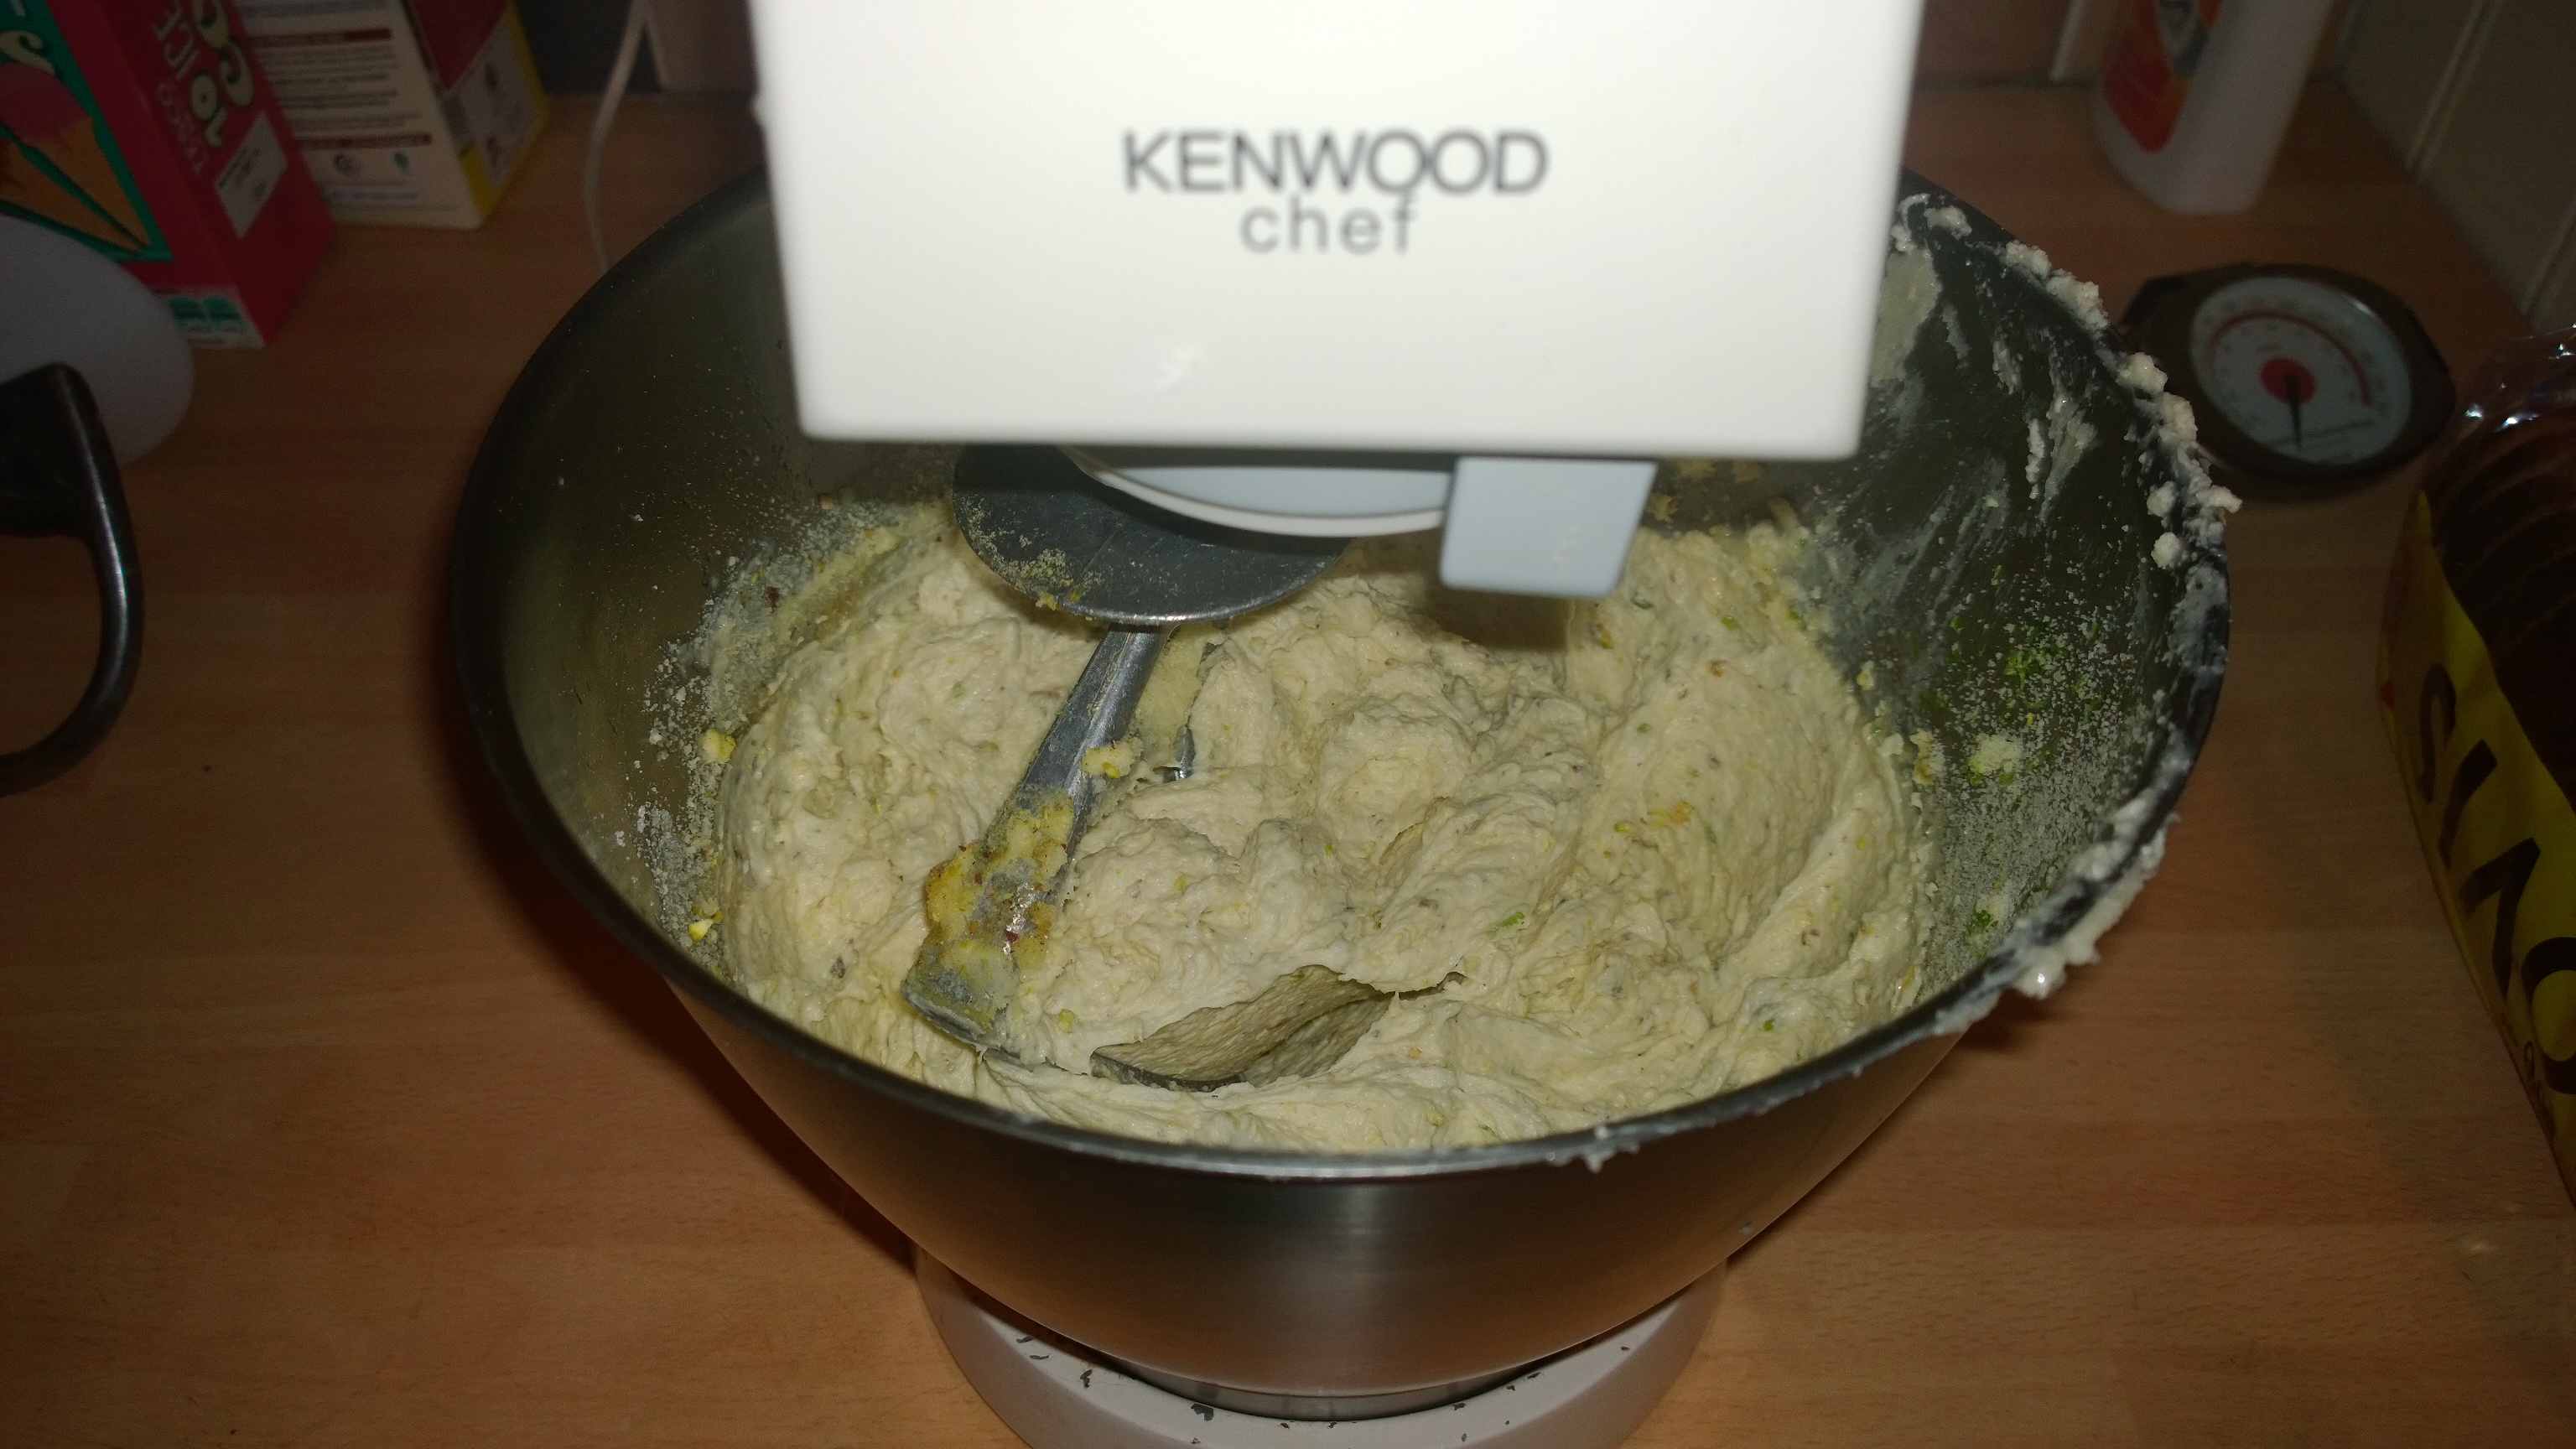
The potatoes were boiled in their skins from cold, about 30 minutes and then peeled with the back of a knife, SIFTED flour to keep things light was added after the potatoes had been through a ricer. If you are careful, you end up with soft pillowy (if there is such as word) Gnocchi, which are rolled on the back of a fork to create furrows for the sauce to stick.

WP_20140309_18_08_58_Pro

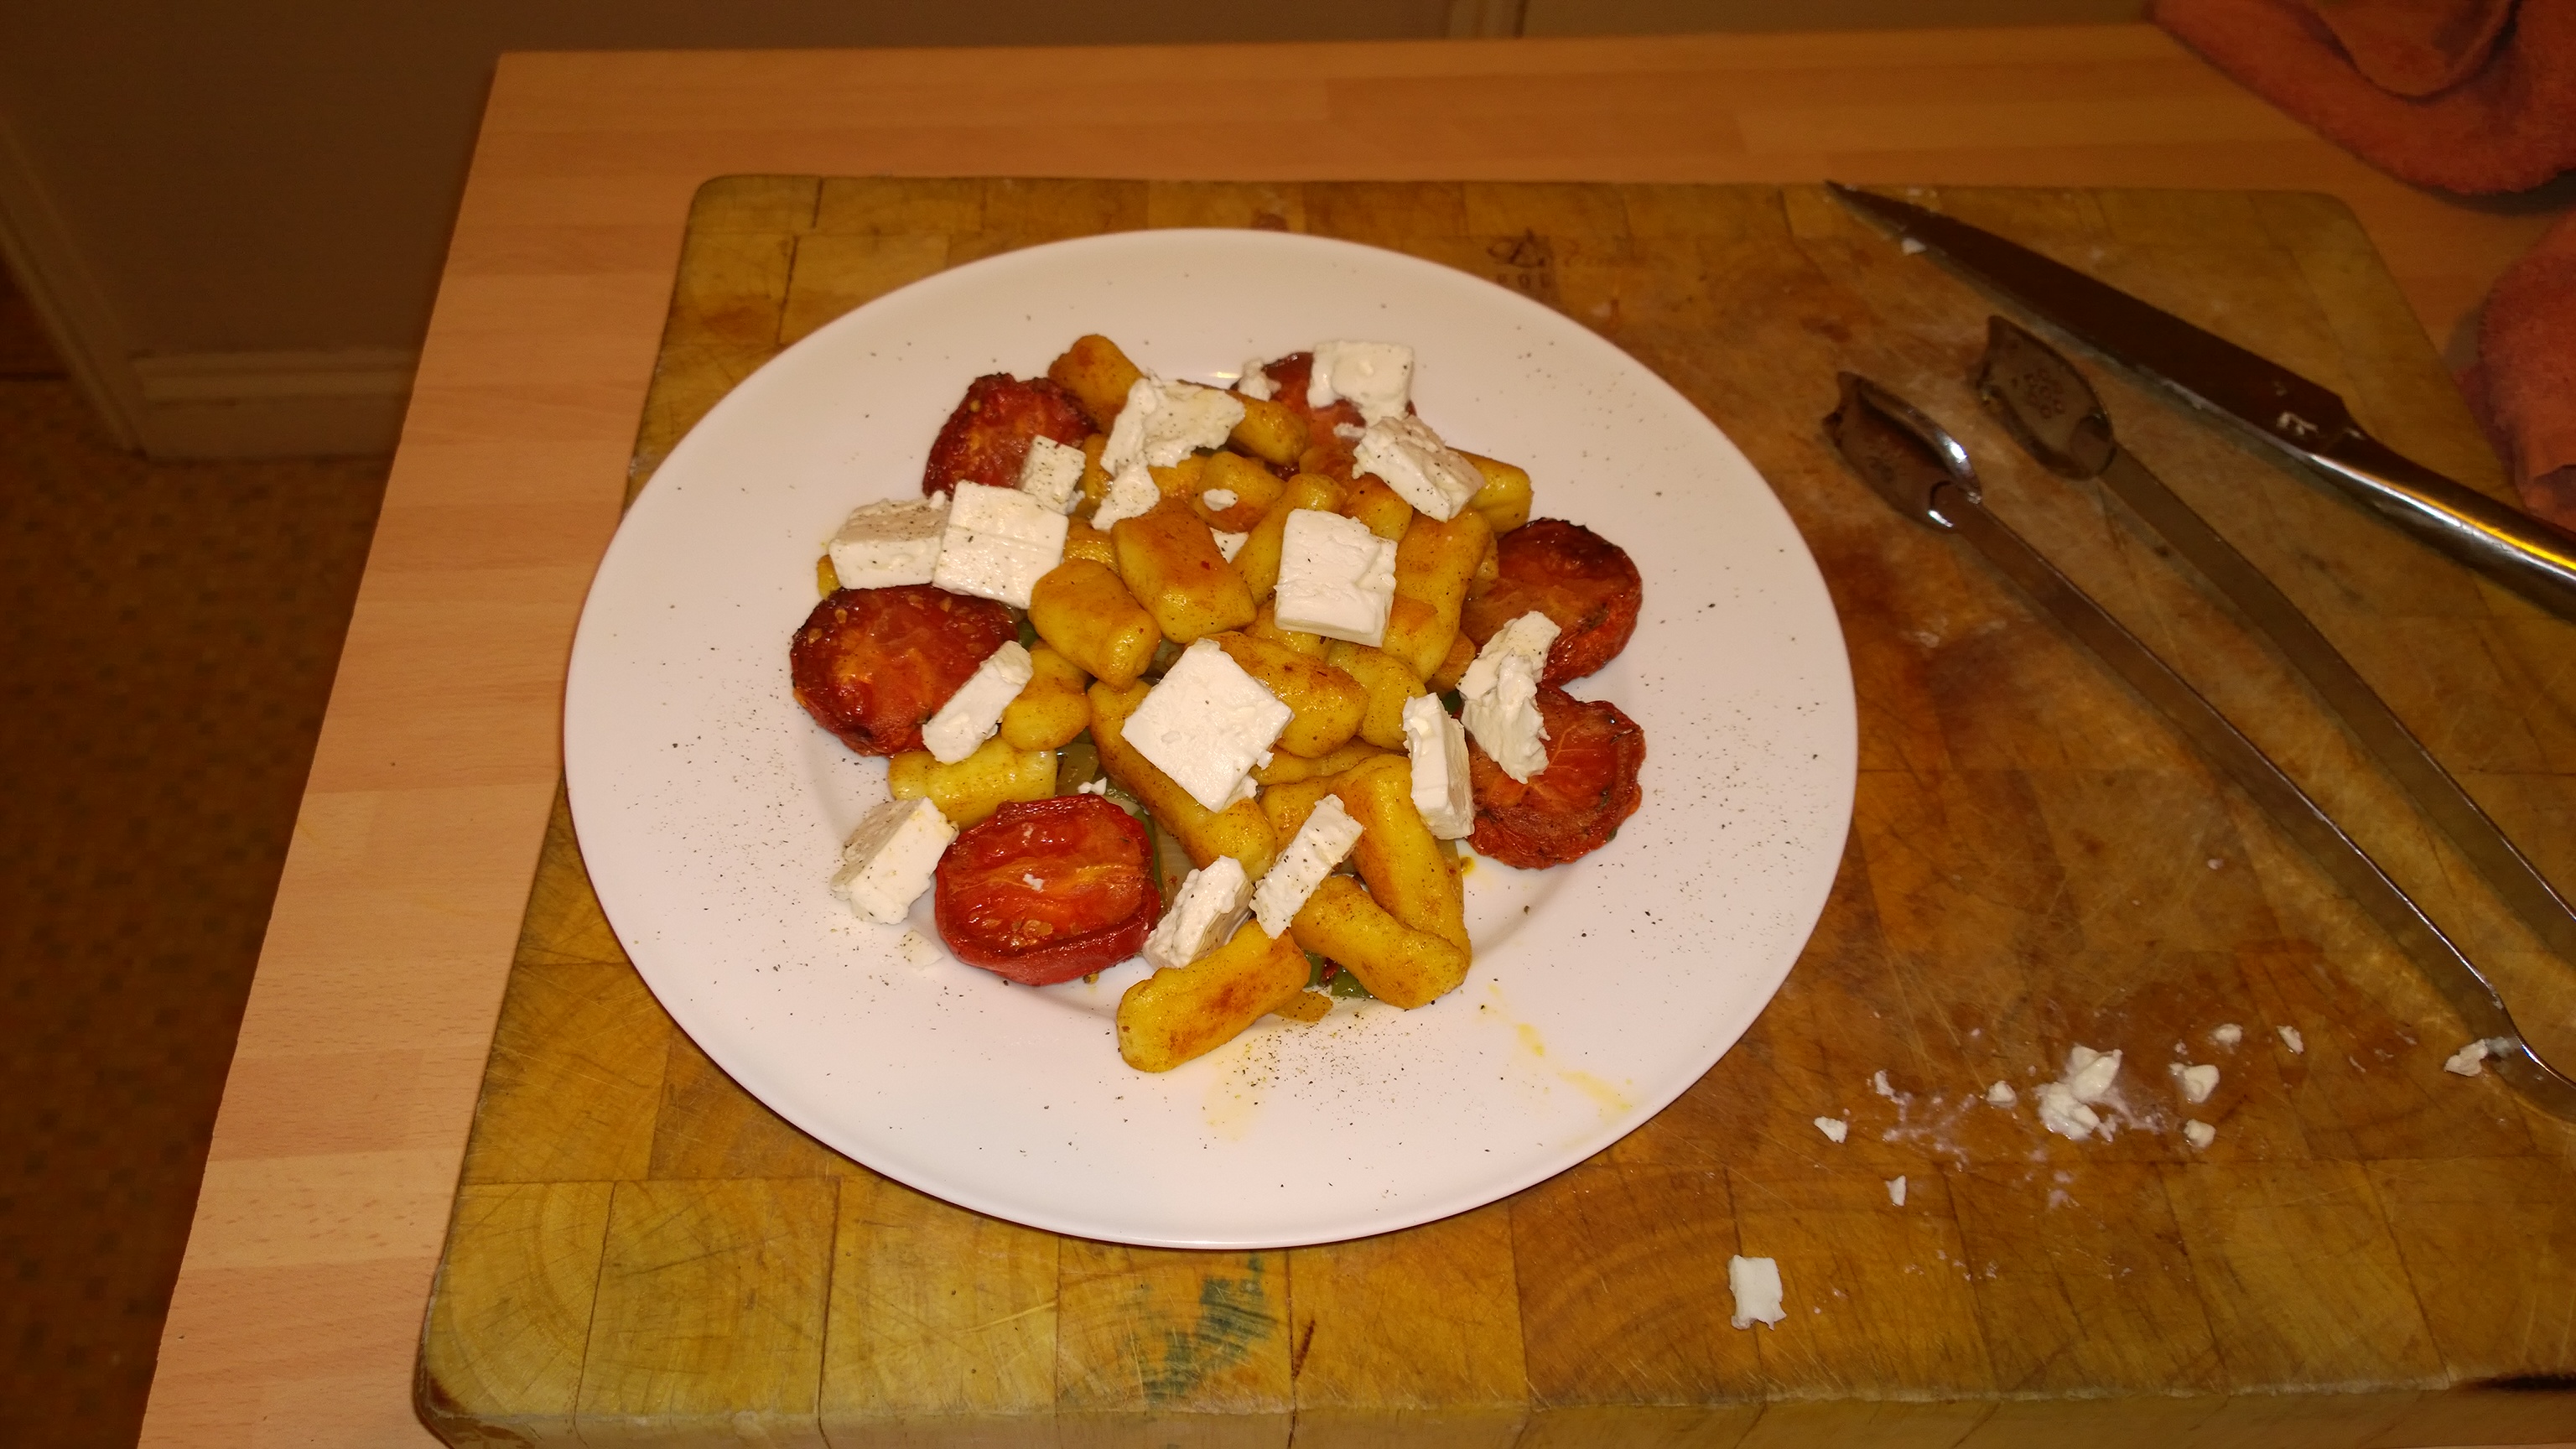
As you can see the final presentation needs some more practise. they are very soft so might benefit from some time in the fridge before finishing off. Unlike the usual sauces that accompany such delights, I went for a more unusual (in my mind) combination to go with the Gnocci, Slow roasted Tomatoes, Feta & Middle Eastern Flavours!

WP_20140309_18_42_38_Pro

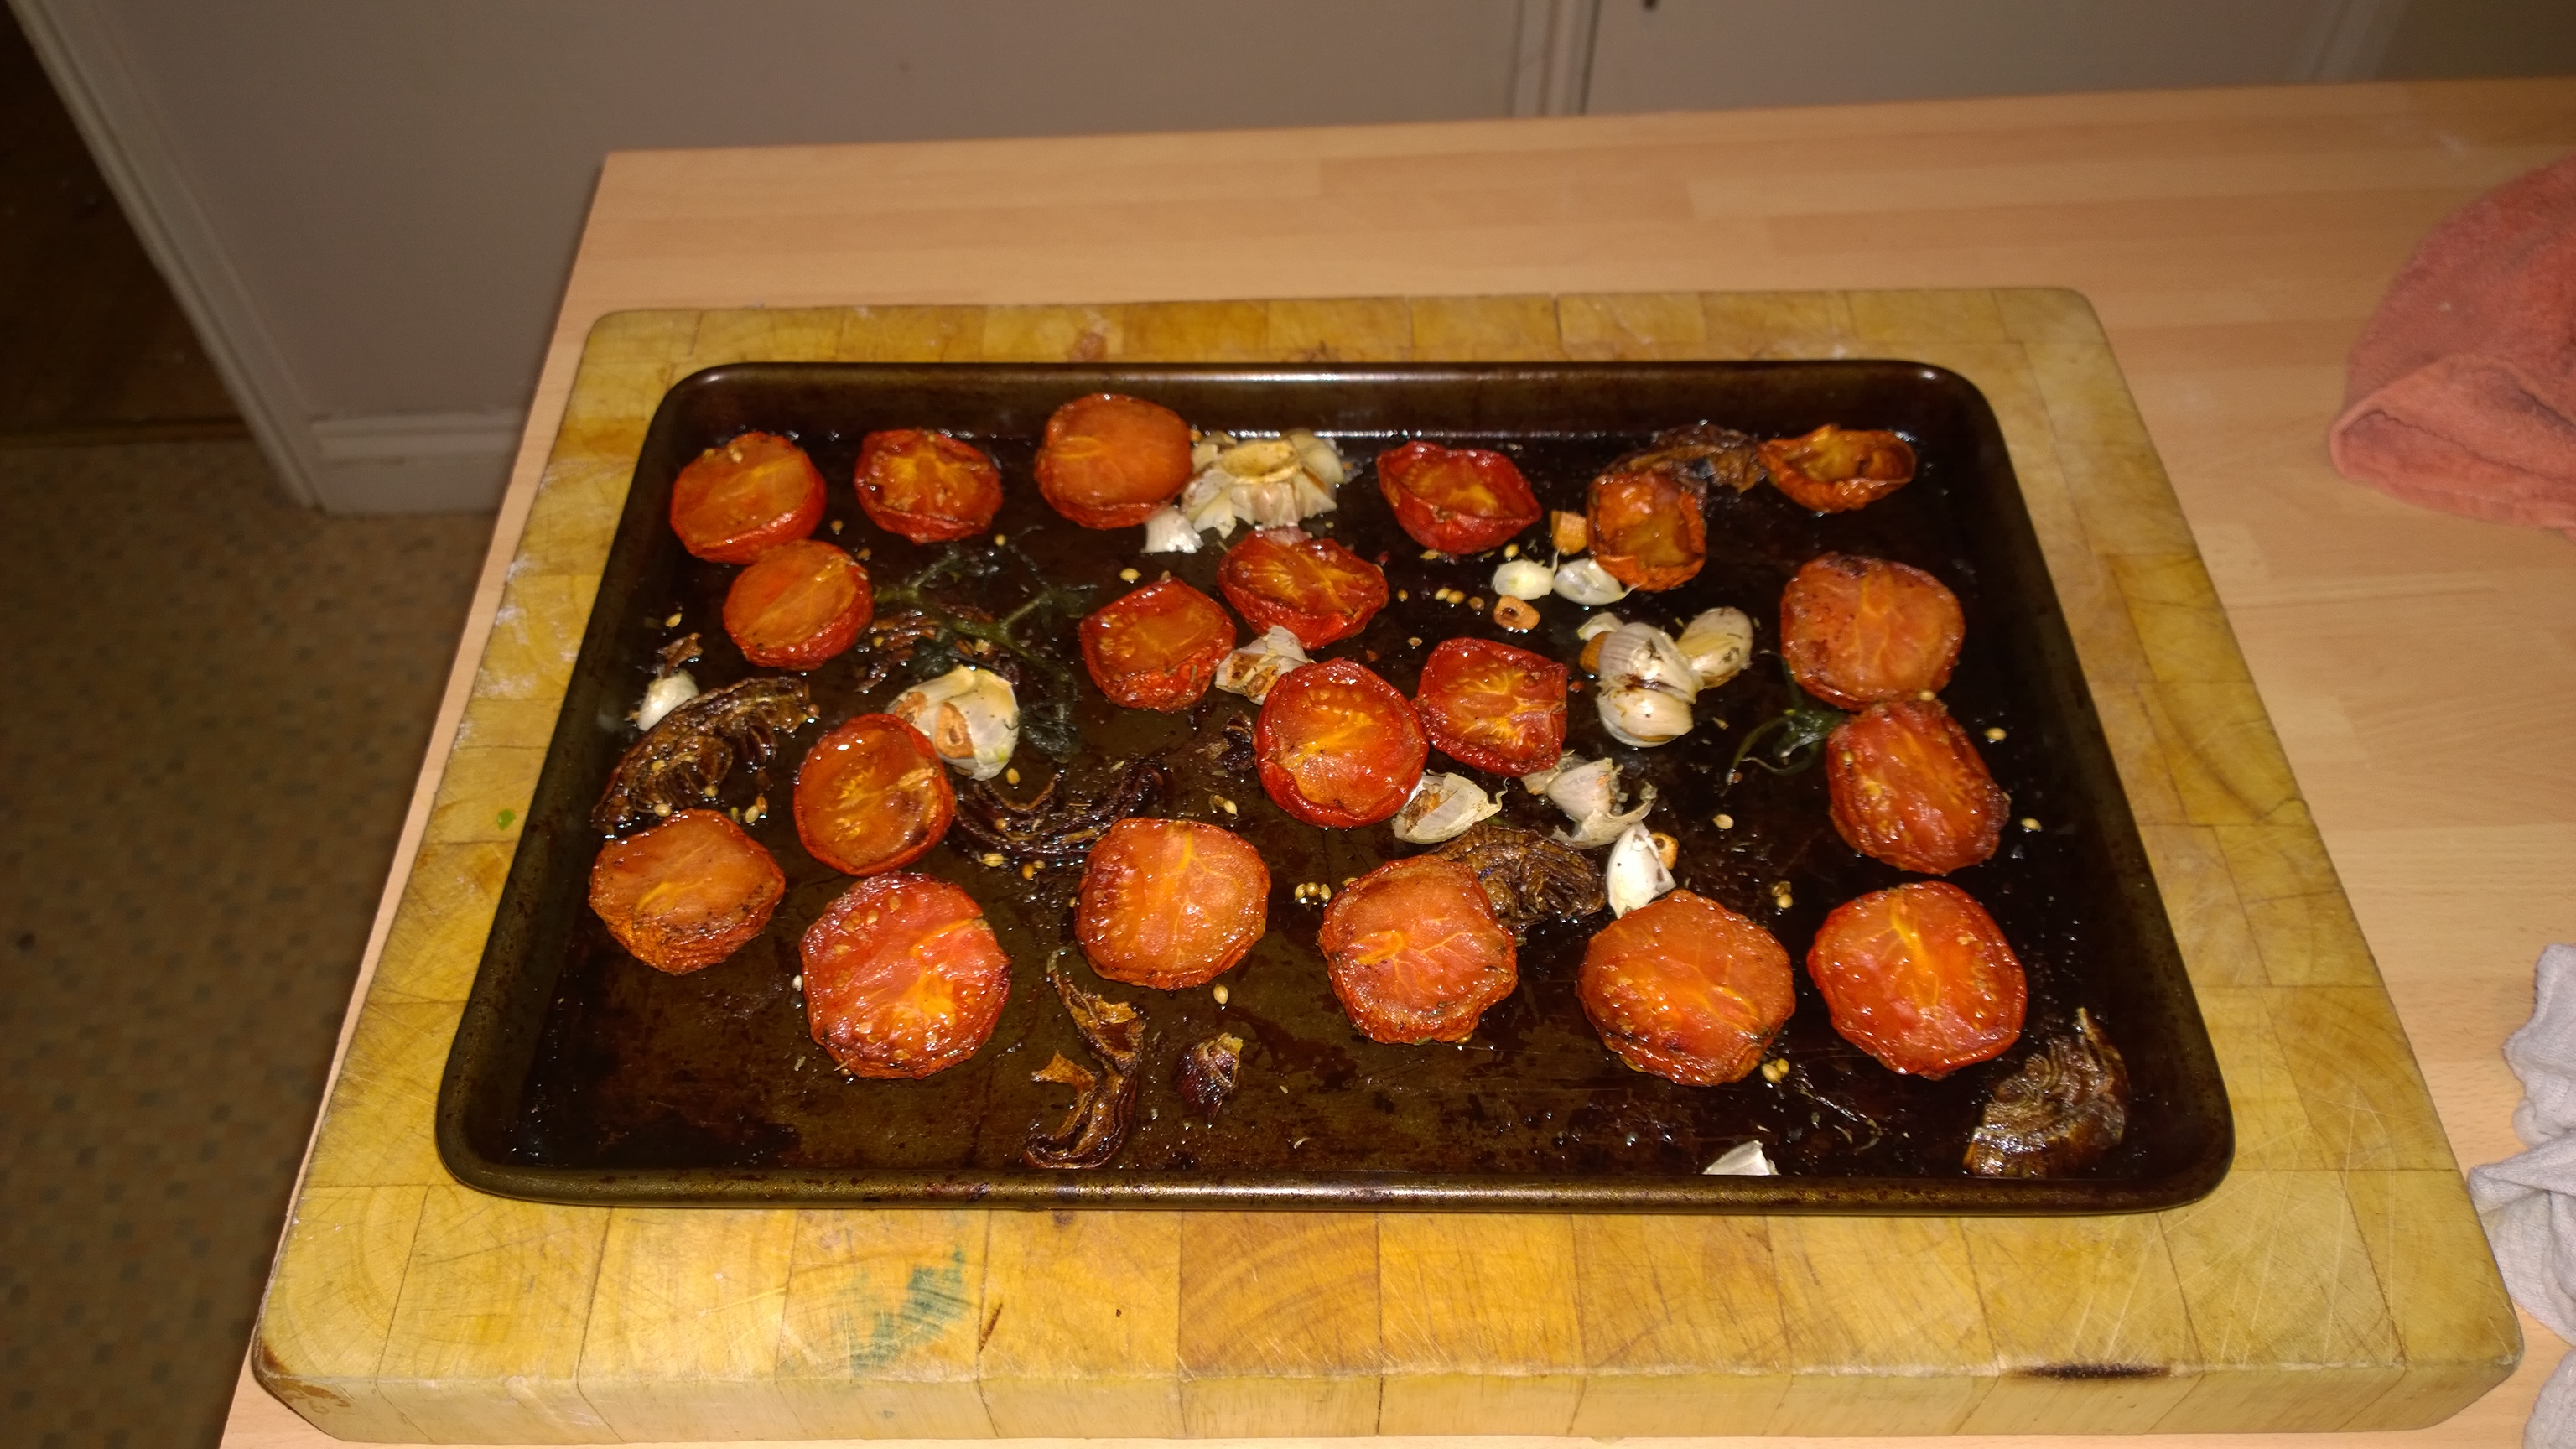
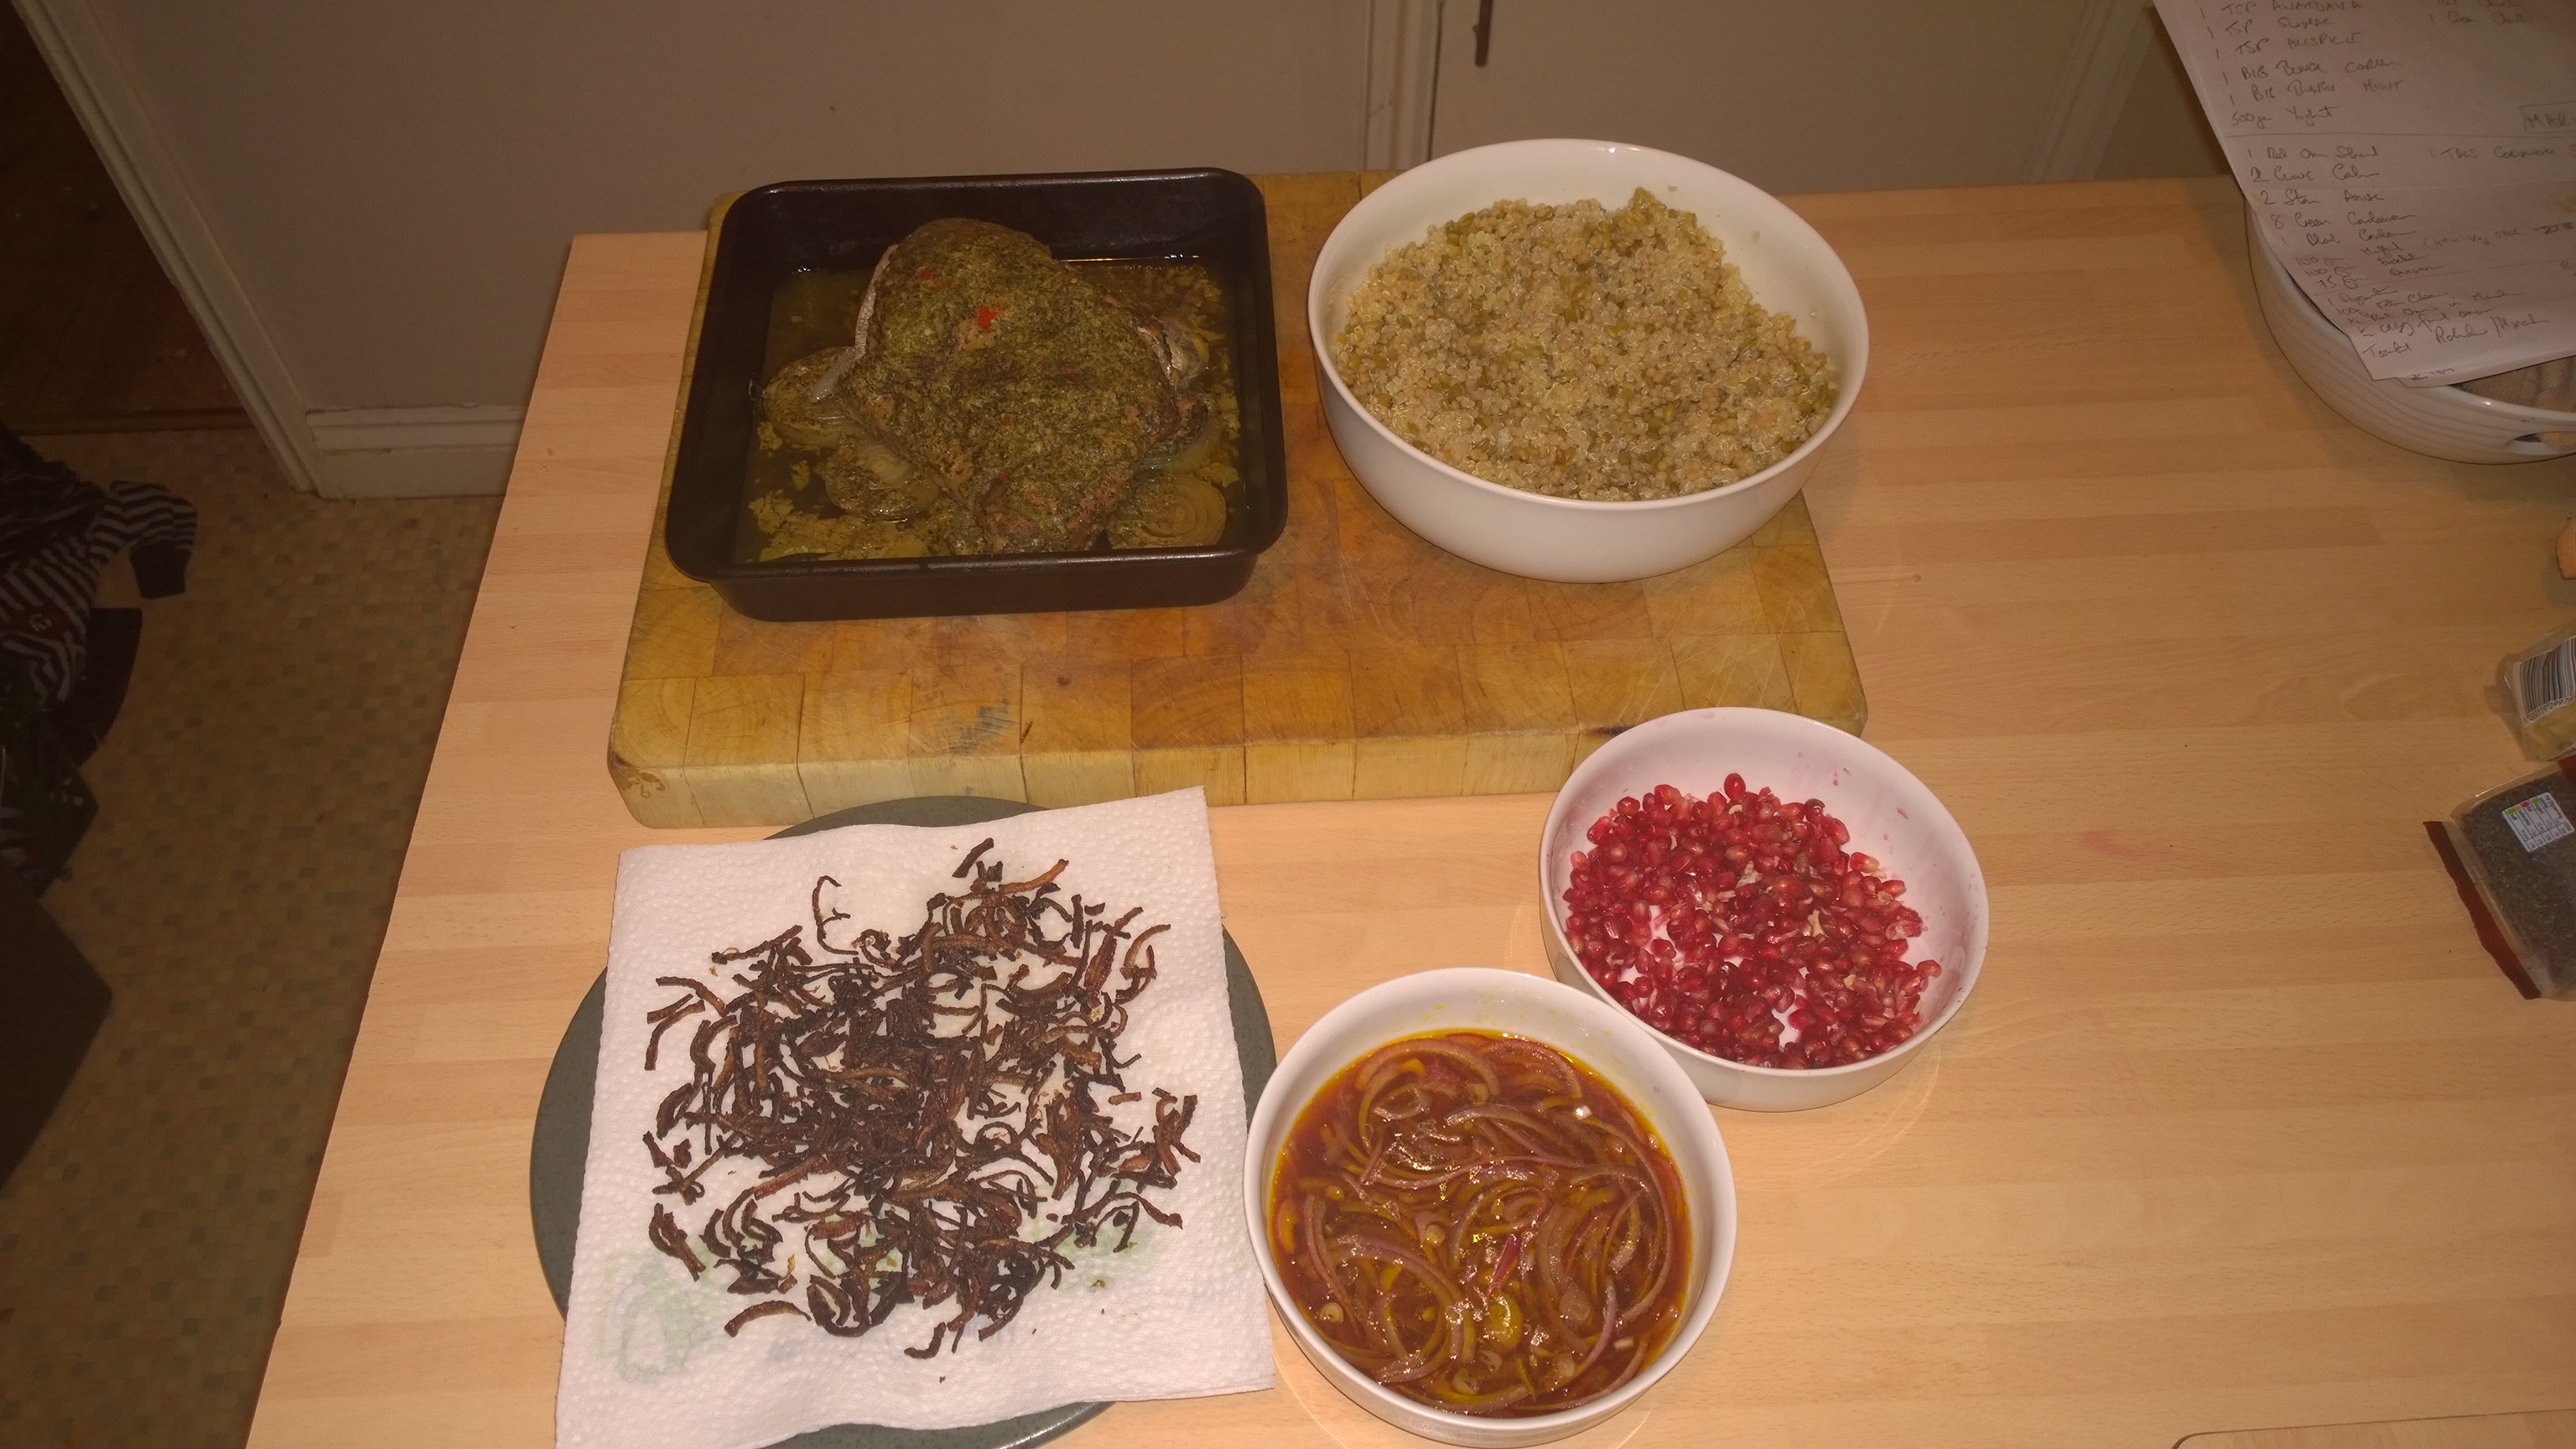
This element needs starting early, the Tomato’s are going to be SLOW roasted for about 8 hours at 100 degrees. Take about 10 Tomatoes, cut them in half and place on a baking tray that has had some half decent Olive Oil spread on the surface. Sprinkle with some Sea Salt and make sure they are well coated in the Oil, they should be CUT face down. Add to the tray a halved head of Garlic, a chopped Onion and sprinkle everything with some Thyme, Coriander Seeds, Sumac and Pepper! Stick them in the oven and wait for the aroma’s to fill the kitchen, this does take a while (8 hours of course). Keep an eye on them as ovens do vary.

WP_20140309_18_46_44_Pro

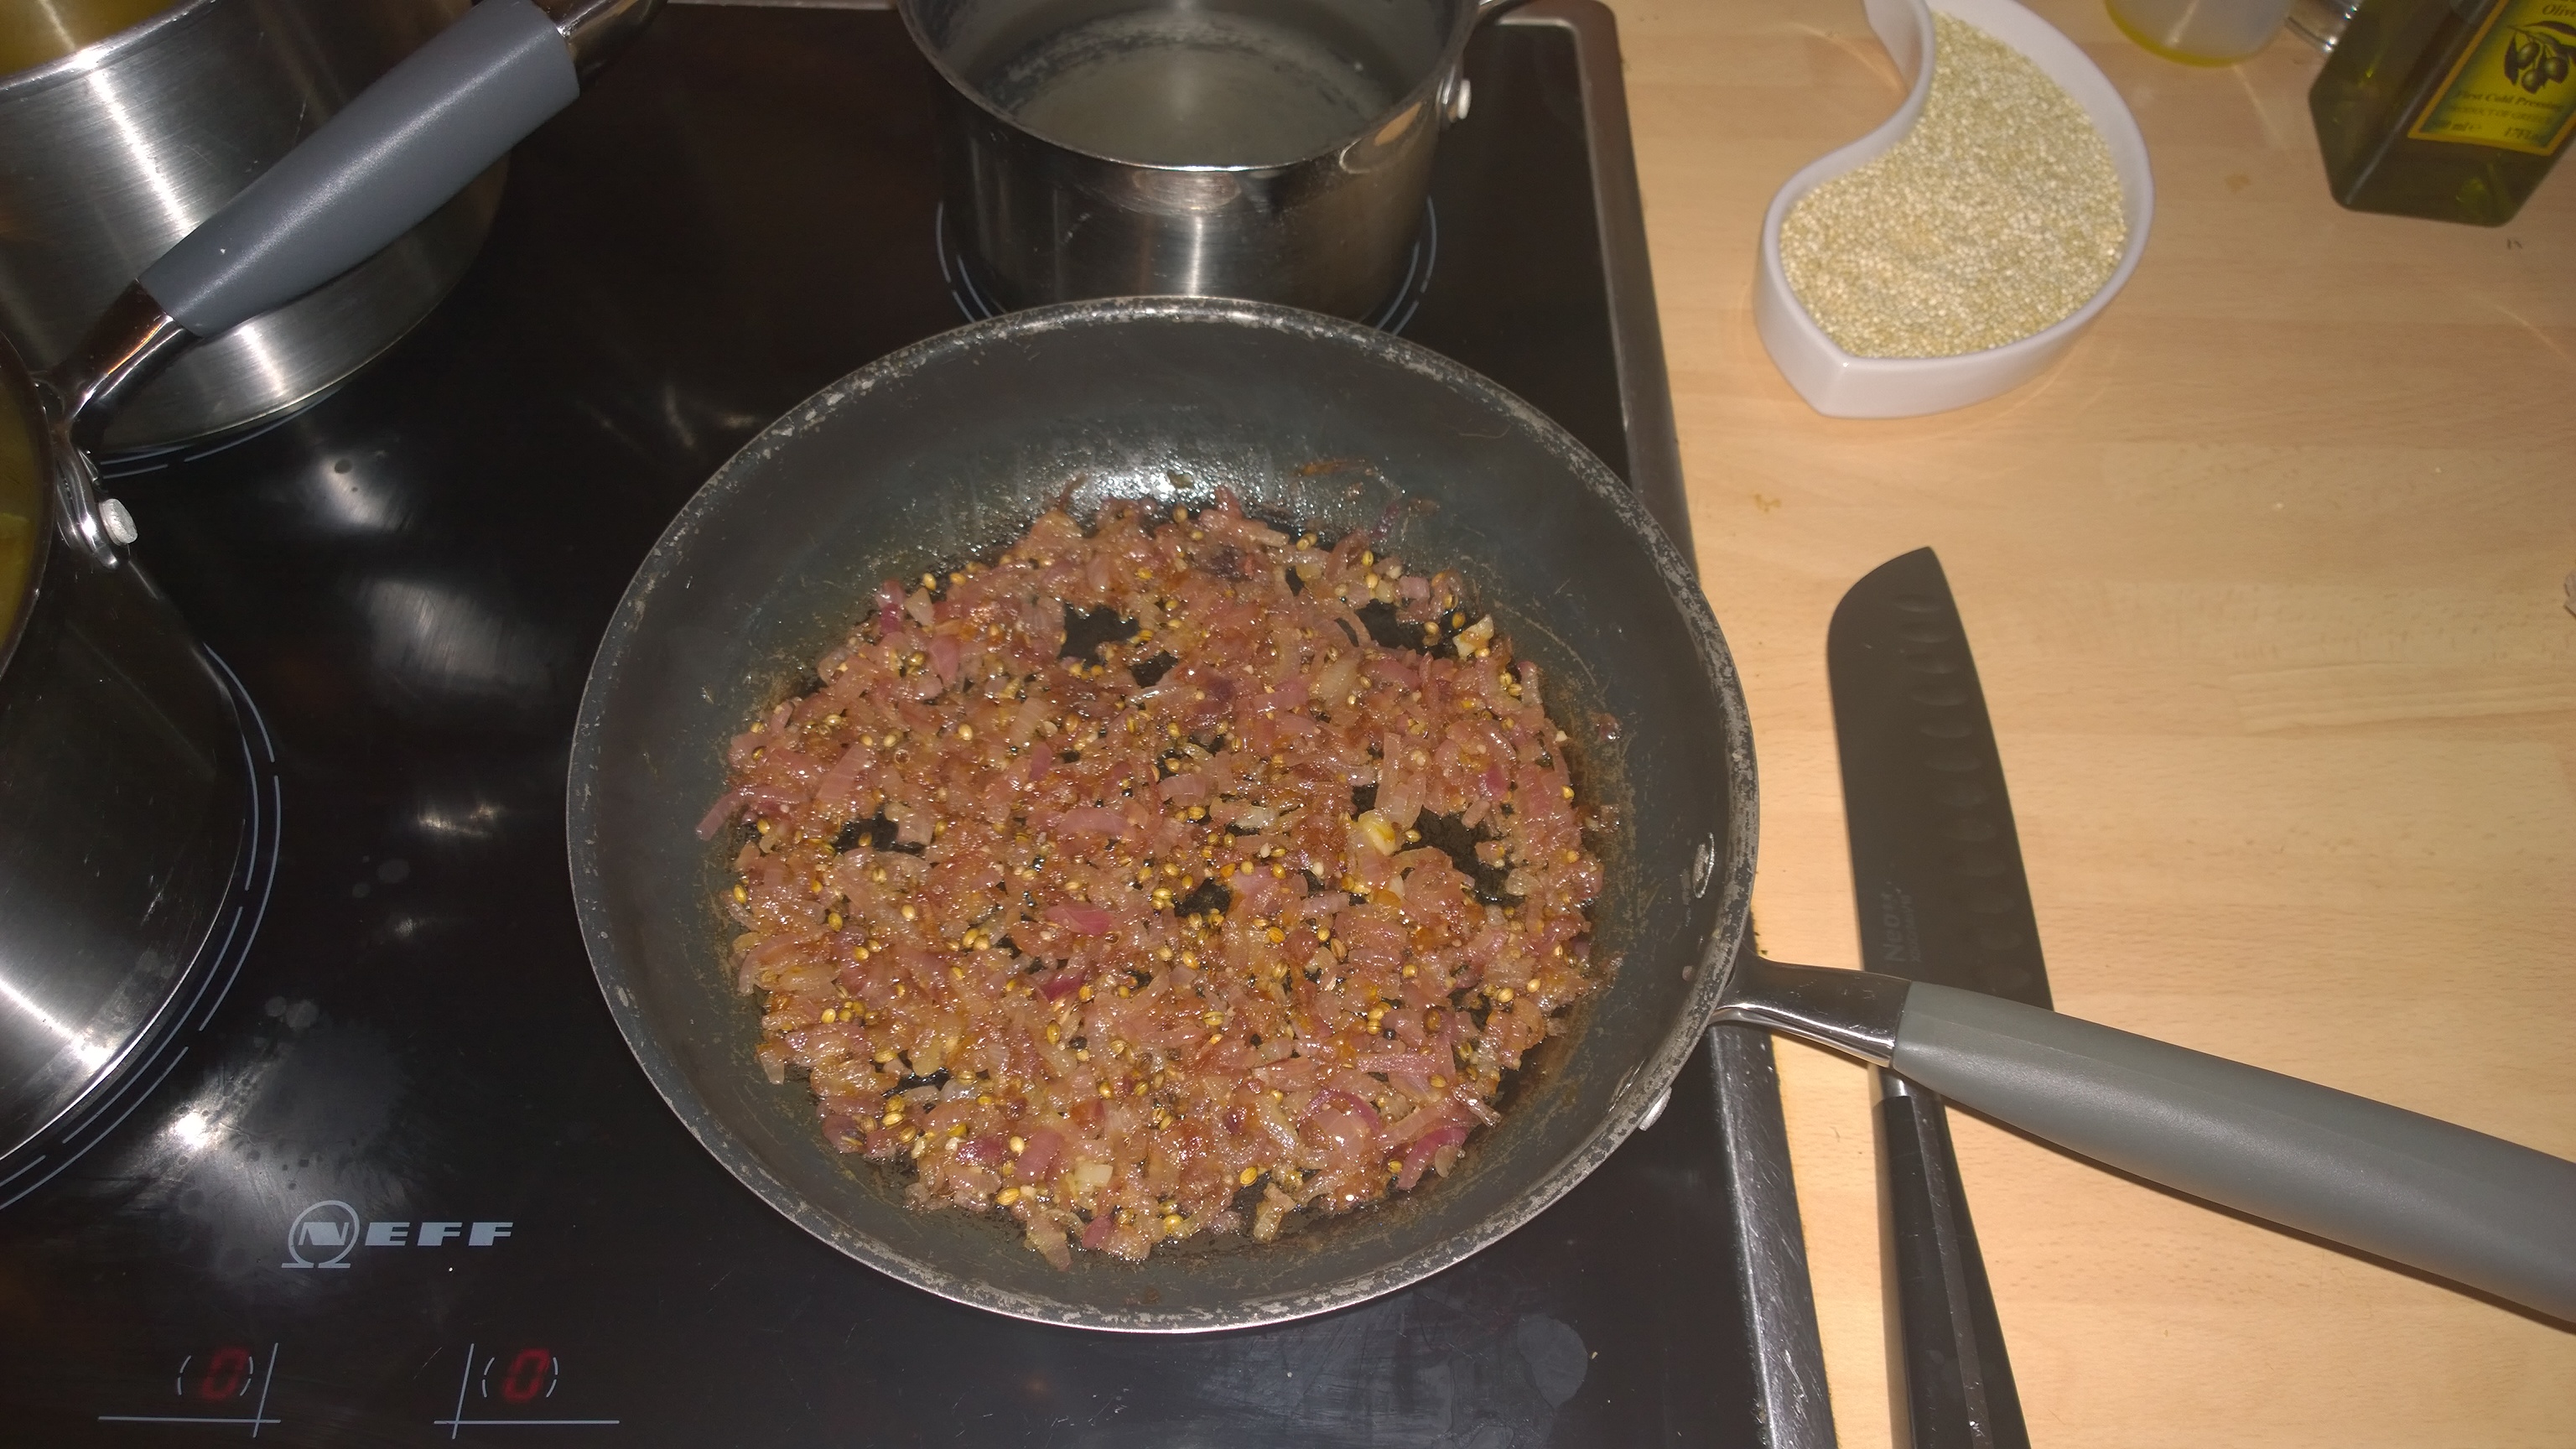
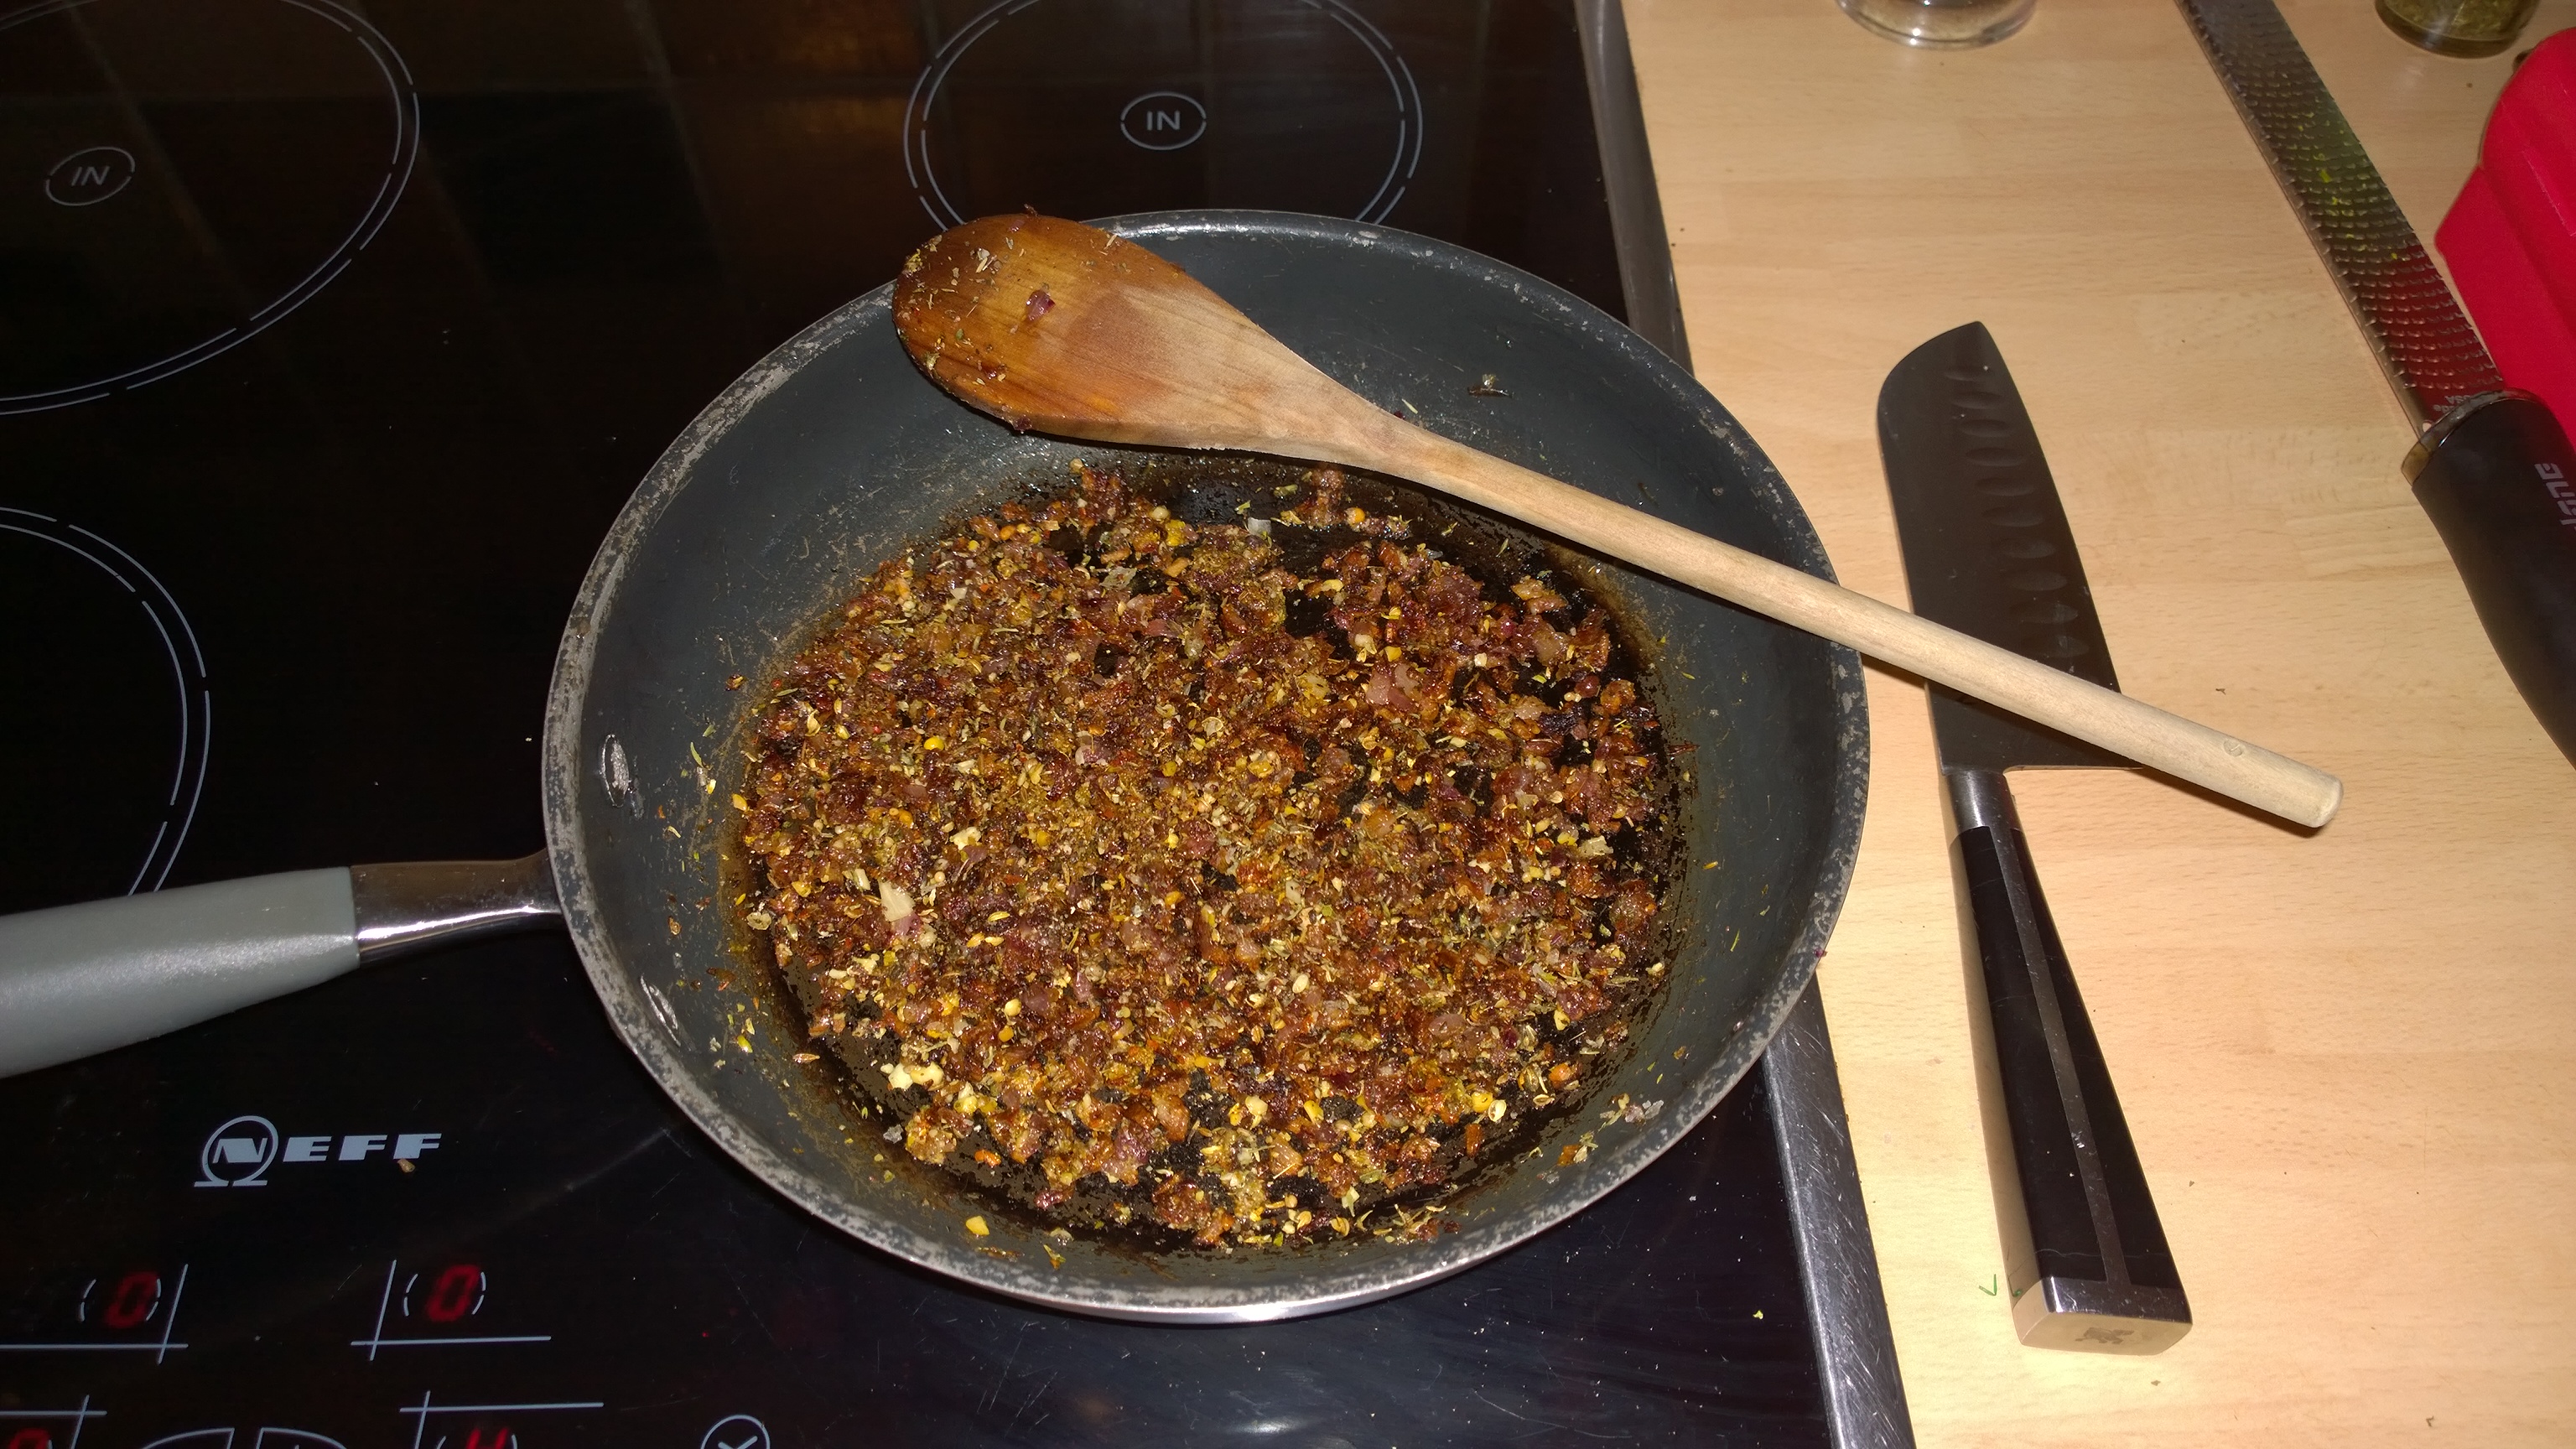
To add to the interest, a vegetable medley was prepared consisting of Onions, Peppers, Garlic, Aleppo Pepper, Thyme and some more Sumac. The Gnocchi was put into boiling water (but not moving, so they don’t risk breaking up), until they popped to the surface and then drained briefly on some kitchen paper.

WP_20140309_19_02_21_Pro

The Gnocchi were then lightly fried in some Butter and Ras Al Hanout sprinkled on top , ensuring an even coating and imparting the ‘exotic’ element of the dish. The presentation could do with  a bit more work but I was preparing for a trip to Glasgow so rushed. Place a bed of the vegetables on the plate, then surround with the roasted Tomato’s and place the Gnocchi on top. The final flourish is some Feta Cheese, broken up and distributed around the plate. Finish off with some cracked black pepper it was really tasty.

The Shandon Belles – A taste of Glasgow

I had a couple of days in Glasgow last week, and a couple to come this week so an excuse to try some new restaurants. Looking at Trip Advisor there were a few that caught my eye, the 1st being The Shandon Belles, in Argyle Street, WHAT a find. The place is steeped in history and sits below another famous landmark, The Buttery where Two Fat Ladies is situated.

WP_20140310_20_16_35_Pro

Dishes on the Menu included Whole grilled Sardines, dressed leaves, soft herb dressing, pink Prawns, sweet Chilli & Coriander Mayonnaise for starters and mains, Pepper filled with vegetable Cous Cous & smoked Mozzarella, dressed leaves (v), Meat loaf, Chive Mash, Tomato Jus.

I decided to go for the Fish of the day special, which was Ling, with cheesy Mash and Soft herbs. Never had Ling before, will certainly order it in the future, cooked to perfection and utterly delicious, the fish was served with roasted vegetables and certainly hit the spot. To be honest I was that tired I only managed the one course but plan to re-visit at at later date.

The service was impeccable, the place is steeped in history and when I was chatting with the waiter and talking about the blog, he presented me with a folder to look at, with pictures from the past and menu’s going back to the 70’s which was fascinating. Imagine Steak Tartare being more expensive than Lobster, and Tongue and Sweetbreads on the menu, delish!

Highly recommended, great value and well worth a visit.

The Tiki Bar & Kitsch Inn – Another taste of Glasgow!

WP_20140311_19_38_37_Pro

The following night I was in a different part of Glasgow, my own fault and due to some confusion with hotels! I am really lucky to have some great technology at my disposal, which includes several smartphones with integrated GPS and some useful software. I use them to good effect when away, searching for places to eat that are within walking distance, but also linking to Trip Advisor to get a view of quality.

The Tiki Bar and Kitsch Inn was one such find, a 15 minute walk from the hotel it promised some interesting Thai flavours, freshly cooked and no bottled sauces in sight (as stated on the menu!).

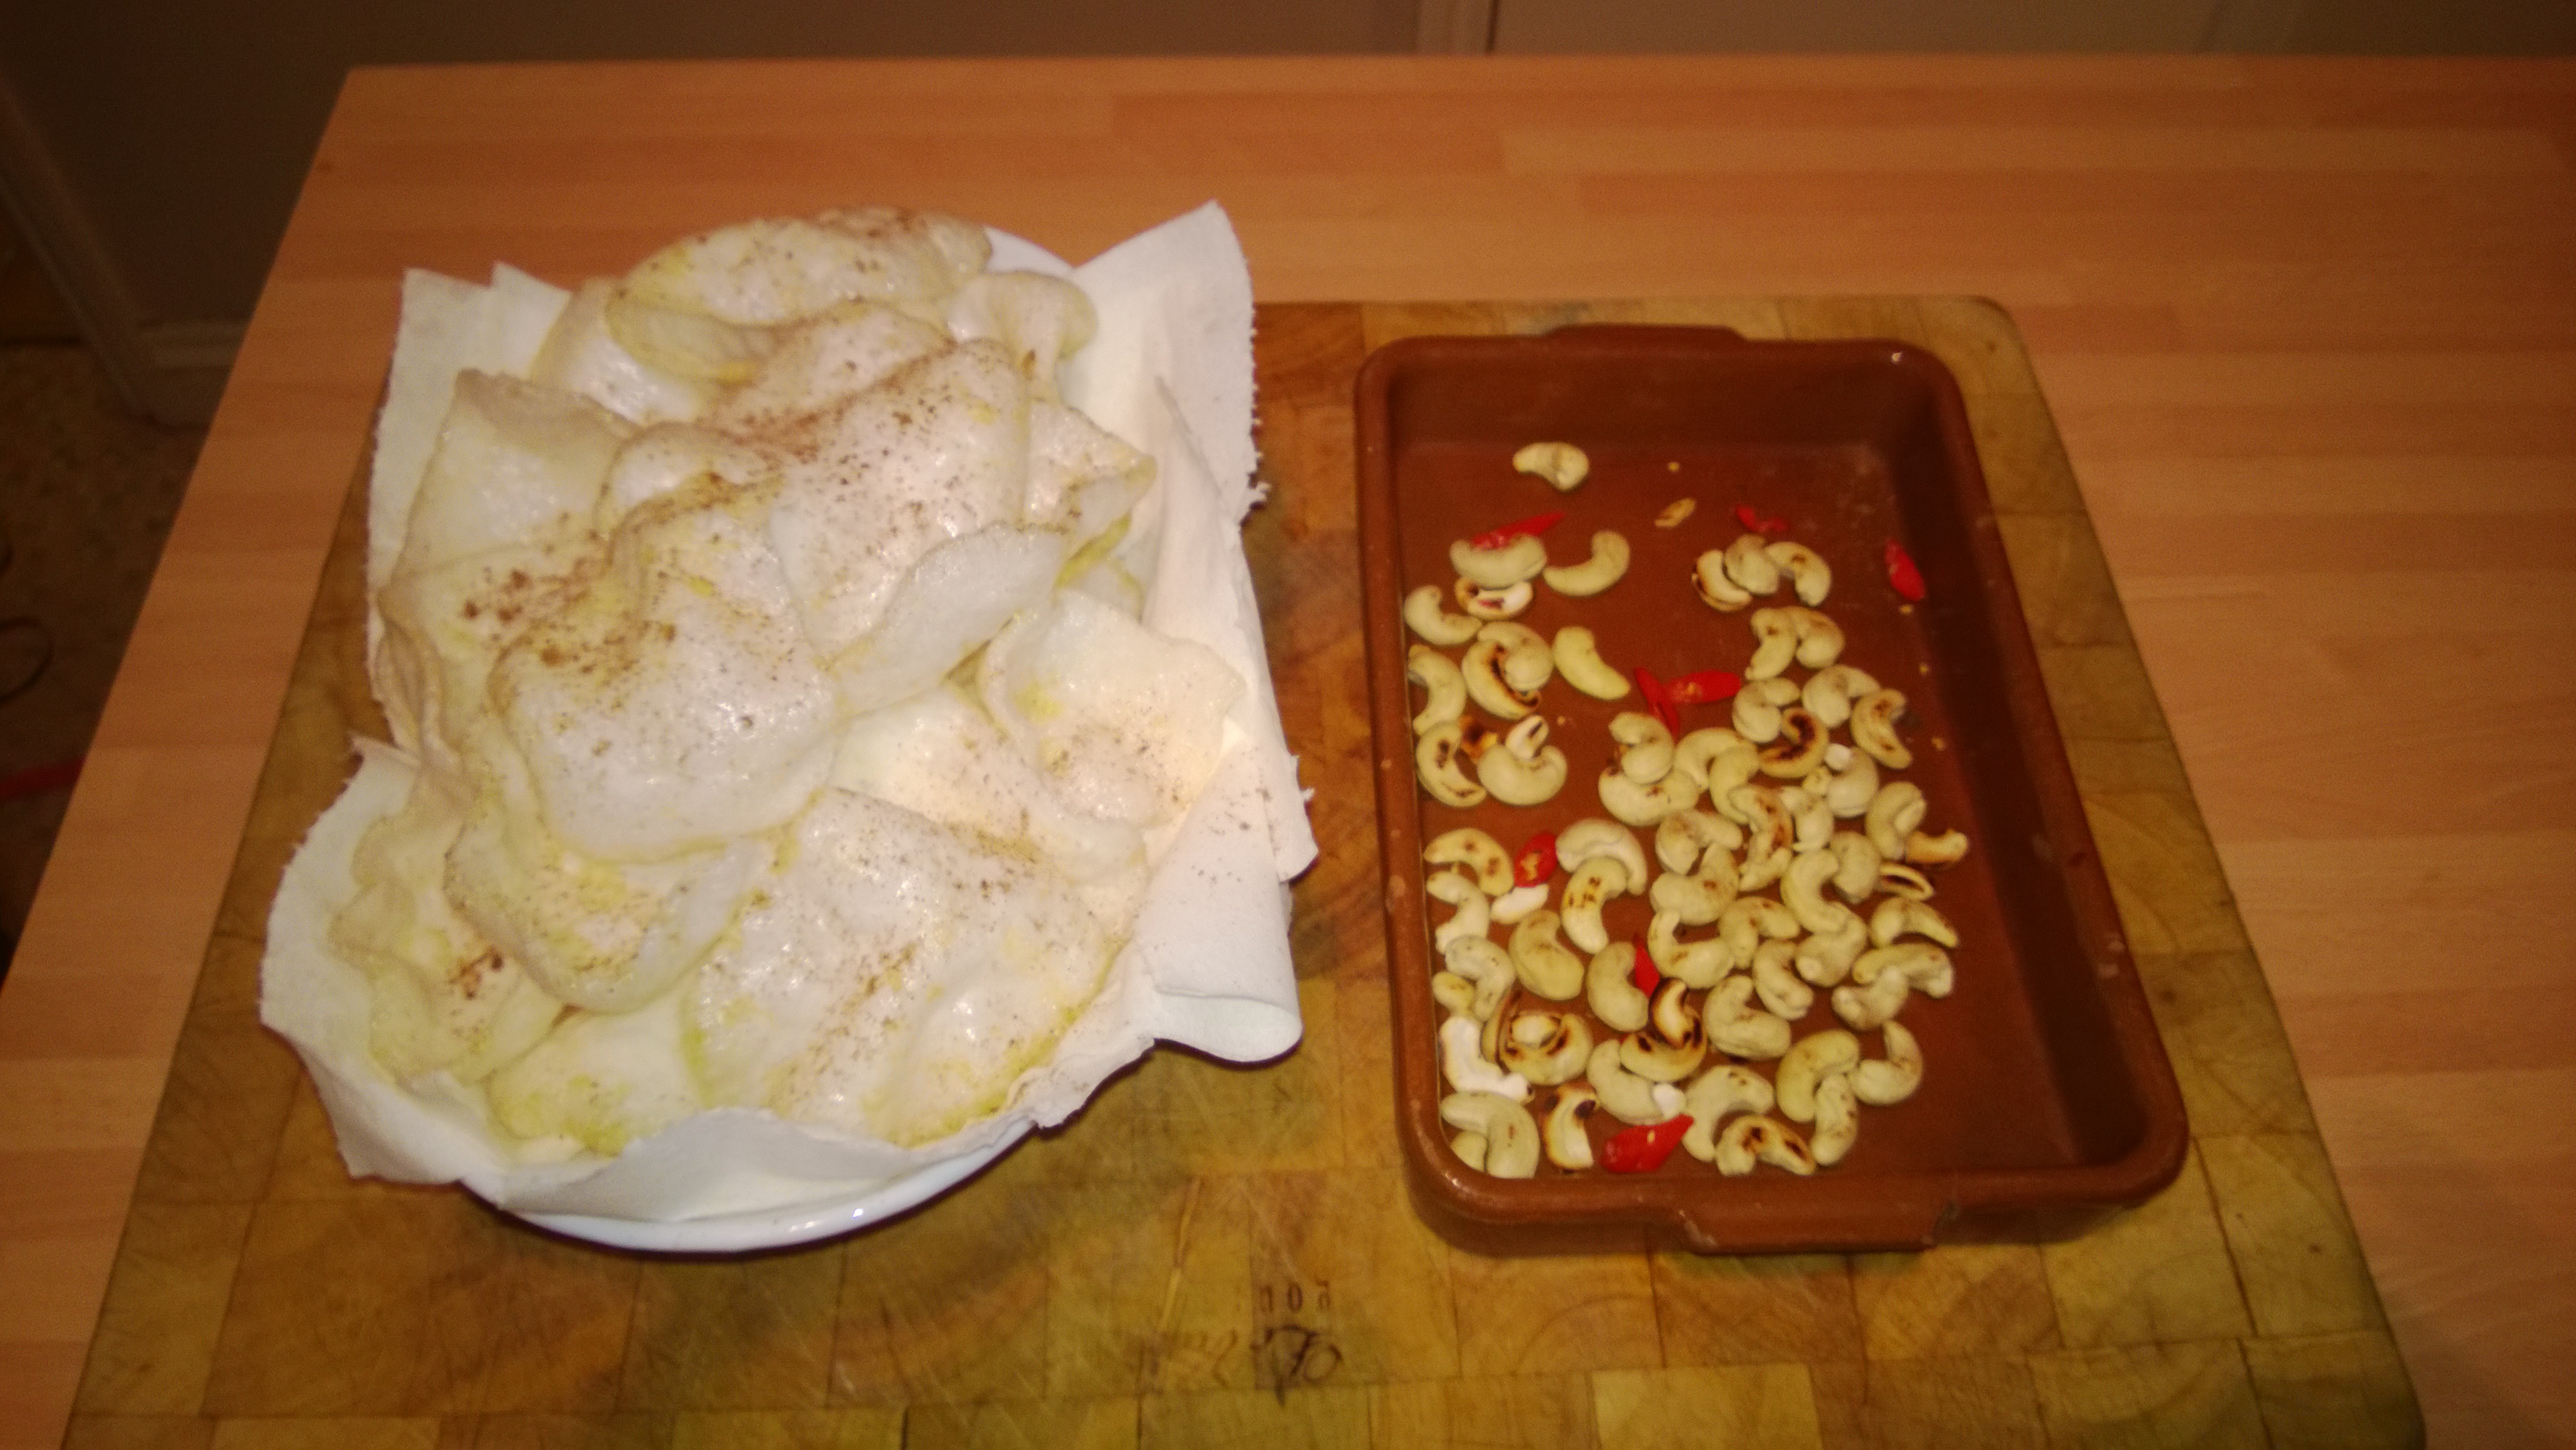
While I was choosing what to eat the lovely waitress bought me some water, and delicious Spicy Crackers with a Sweet Chilli dip to munch on, a really nice touch. They were very crisp and  not at all greasy like some of the Prawn Crackers you usually get served in oriental establishments, they certainly got the taste buds dancing.

WP_20140311_19_33_46_Pro

I was pretty hungry so thought I would go for a starter, the divine (and spicy) Crying Tiger Beef Salad, Grilled marinated beef, served cold with a Thai style green salad (beef is cooked medium rare). YUMMMMMMMMMMM, the beef was cooked perfectly and the starter really set the evening off beautifully.

WP_20140311_20_09_30_Pro

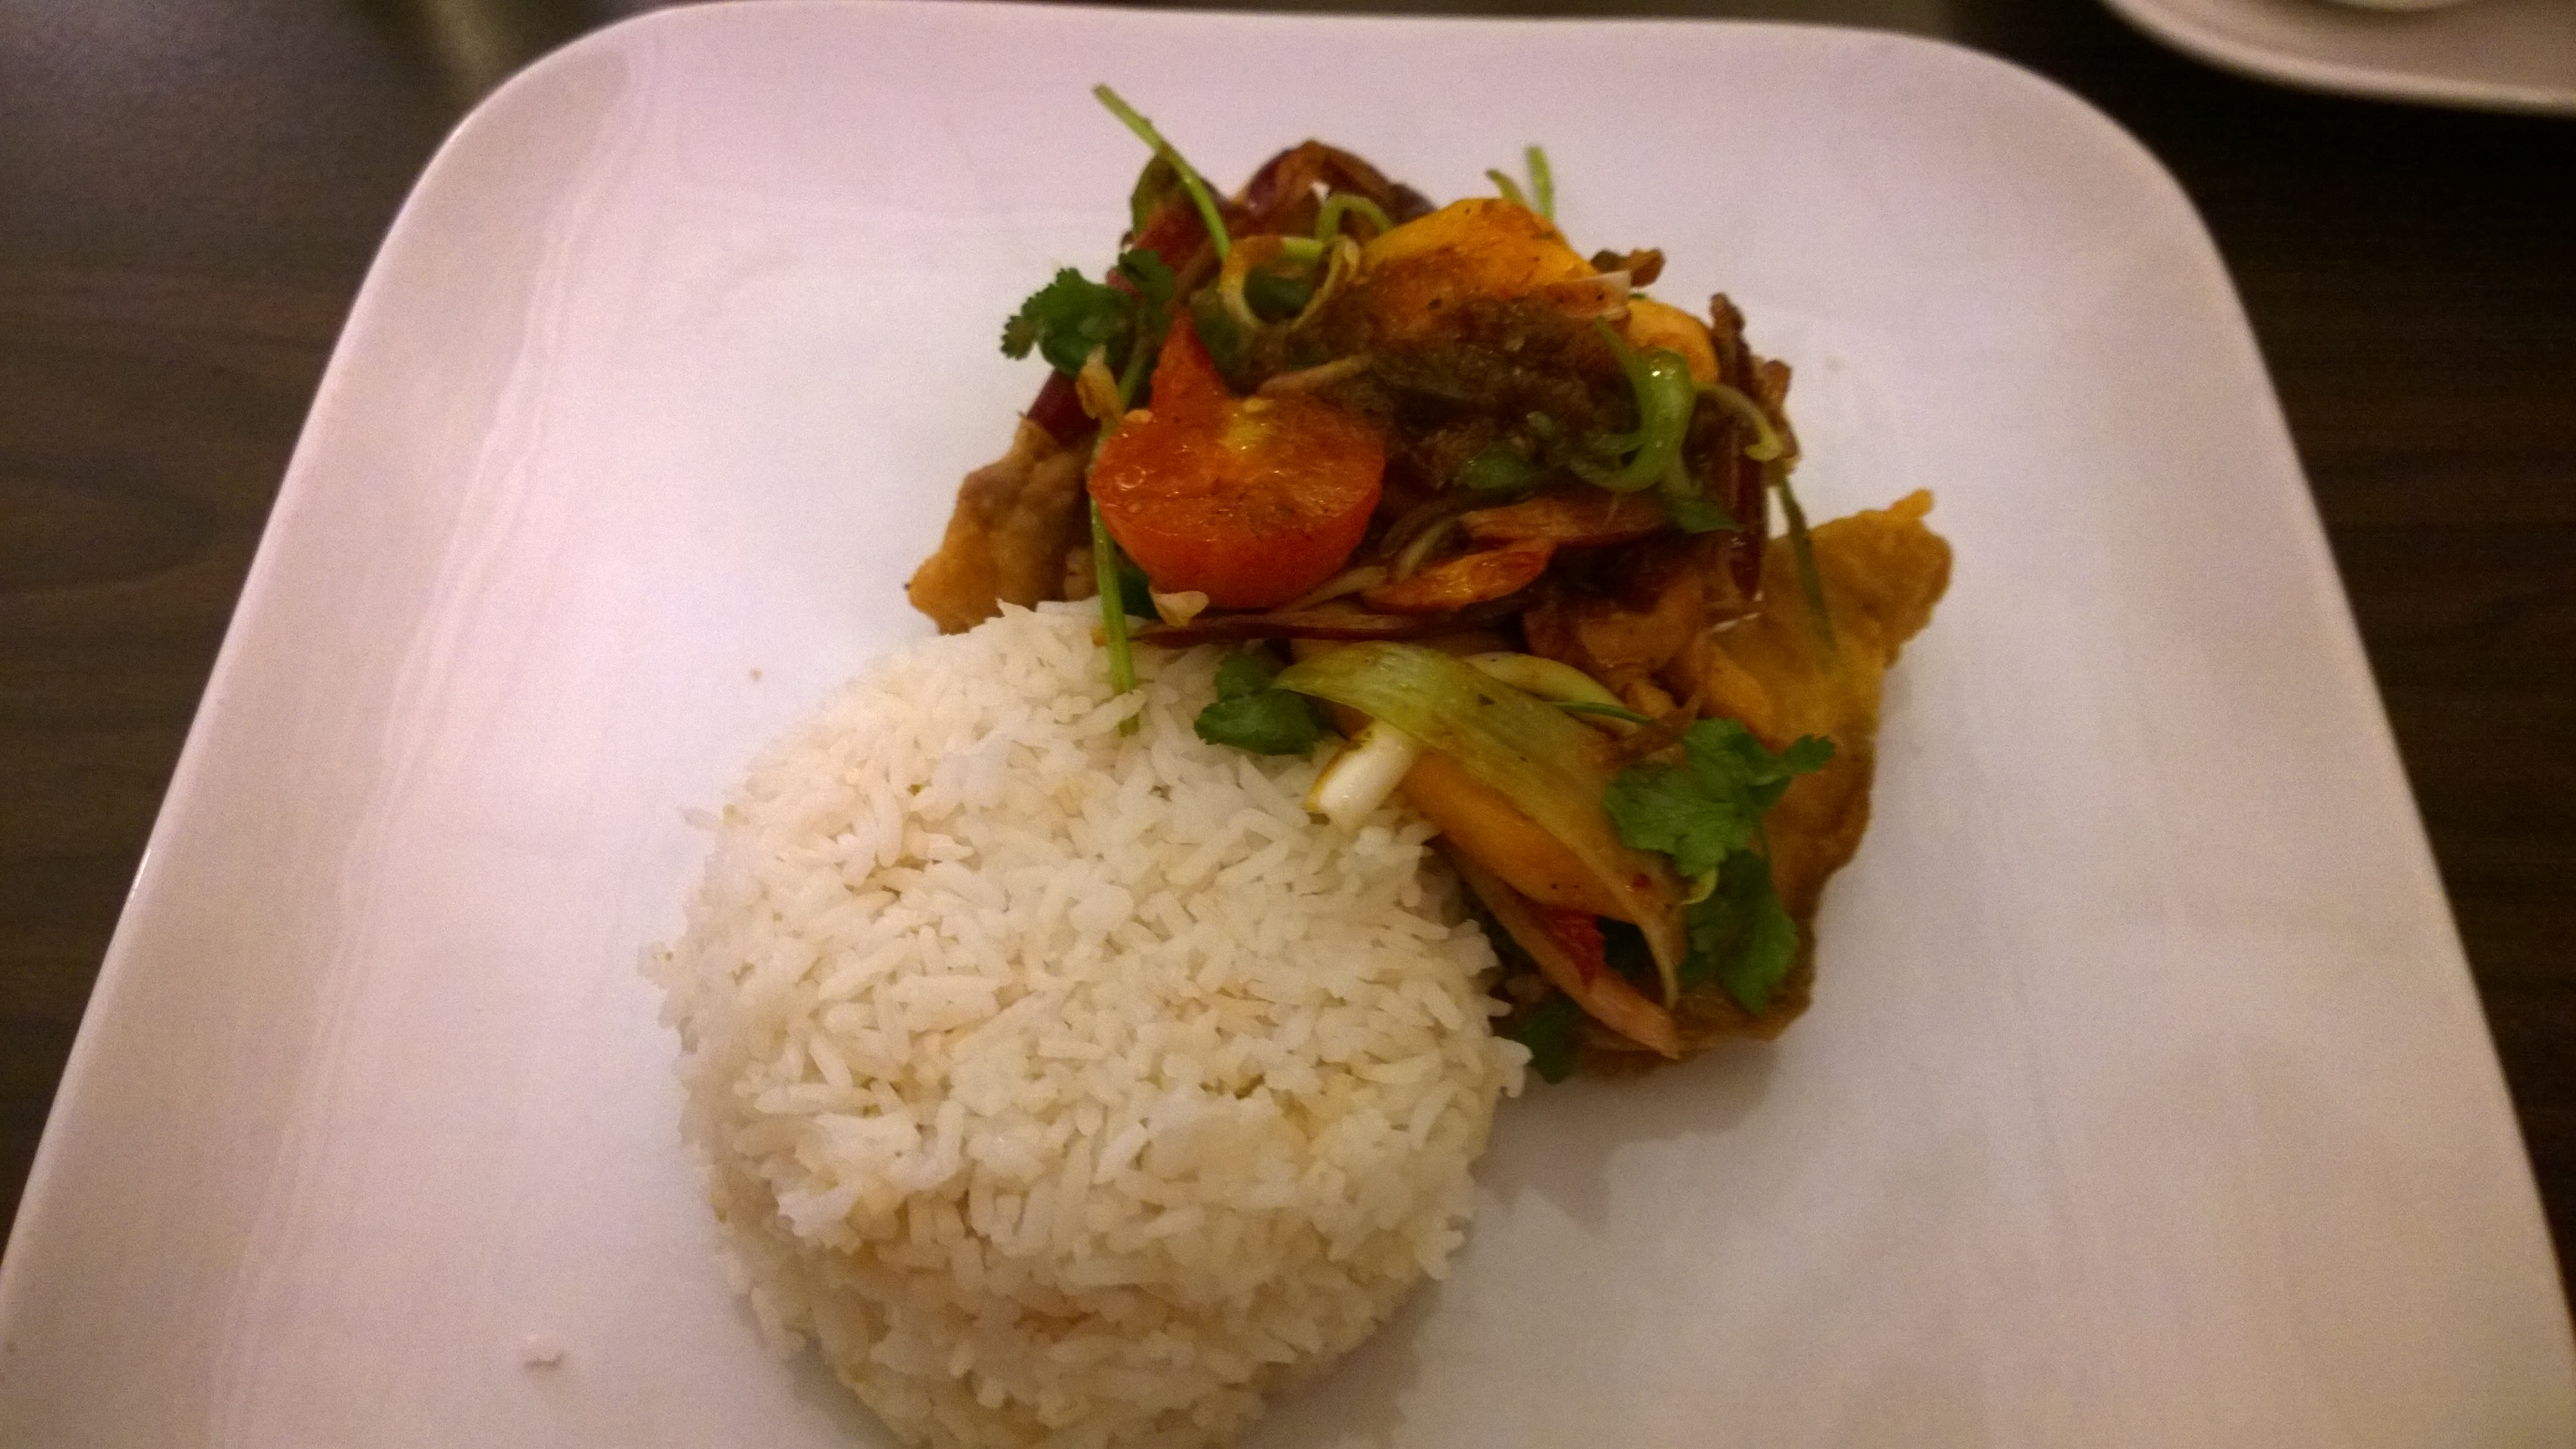
Mains were Pla Tod Yum, Crispy fillet of Coley dressed with fresh Mango and Cashew Nuts in roasted Chilli, Lime and Lemongrass sauce with Jasmine Rice, another stunning dish and another 1st as I had not had Coley before either. Dessert, yes I WAS hungry, was a delicious Coconut & Mango Panna Cotta, which slipped down and did a great palate cleansing job.

Like The Shandon Belles, I cannot recommend this restaurant highly enough, awesome food, fantastic service and another lovely evening. Give it a try if you are in the area.

Back to the kitchen for one final flurry, Chocolate Mousse. Never made it before so onto the Internet to look for some guidance and another well known chef and food blogger, David Leibovitz came to the rescue. David is a Pastry Chef originally from the USA but now living in Paris,  has written a number of books and also has a fantastic blog, (click on his name above to take a look).

WP_20140309_14_36_45_Pro

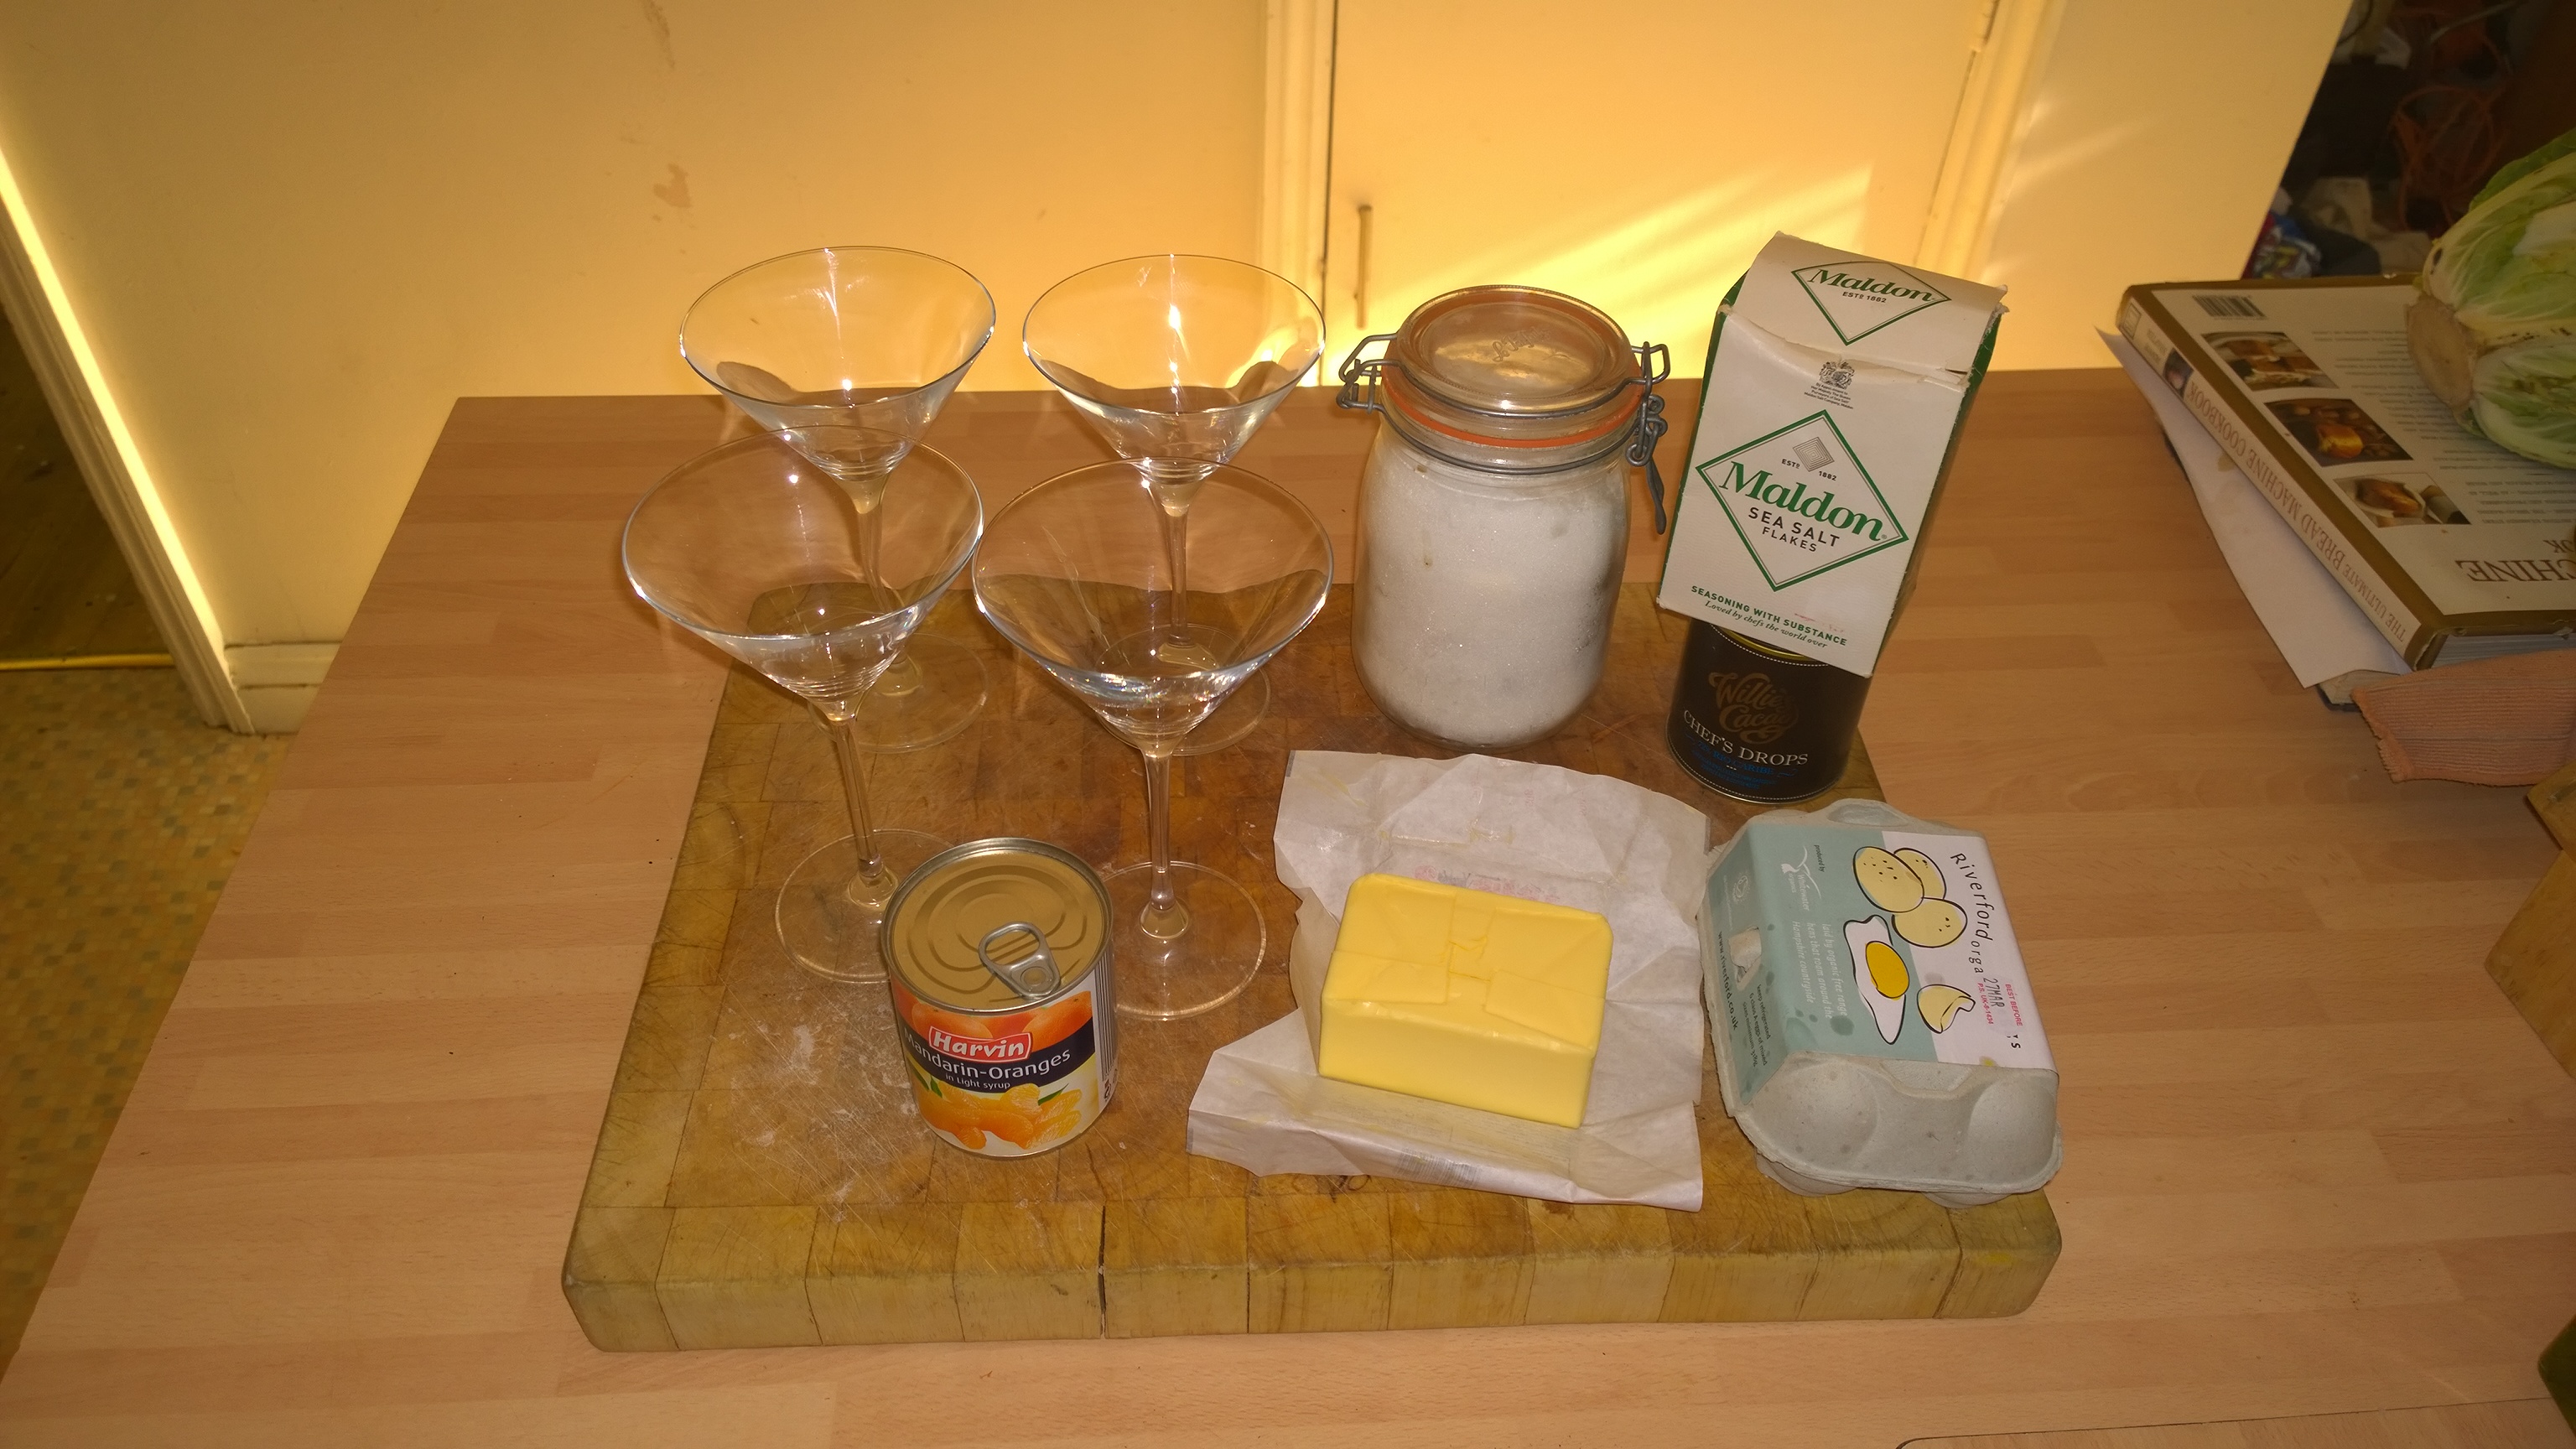
The recipe I went for is originally from Julia Childs, details can be found HERE. My version added some Mandarin segments, I like the fruity tang against chocolate, and I did not add the alcohol (didn’t have anything appropriate in the cupboard at the time).

WP_20140309_15_03_51_Pro

The process is like making a Sabayon, whisking Egg Yolks and Sugar over hot water to create a light and airy mixture, just follow the instructions in the link above and you shouldn’t go wrong, I went technical and used an electric whisk rather than the hand method.

WP_20140309_15_13_42_Pro

The chocolate is melted over a ‘Bain Marie’, hot not boiling water with a bowl over the top (NOT touching the water as the chocolate will burn), with the butter. Use the best you can get, my preference is Willi’s Cacao, you can get it online or in Waitrose. In this recipe I used the Rio Caribe 72% Chocolate Drops, really tasty, rich and sublime.

WP_20140309_15_18_38_Pro

The final process is to whisk the Egg Whites to soft peaks and gently combine with the Chocolate/Butter mixture, folding gently combining the two and loosing as little air as possible.

I placed the Mandarin Segments in the bottom of Martini glasses and spooned the Mousse on top, then popped into the fridge for a few hours to set.

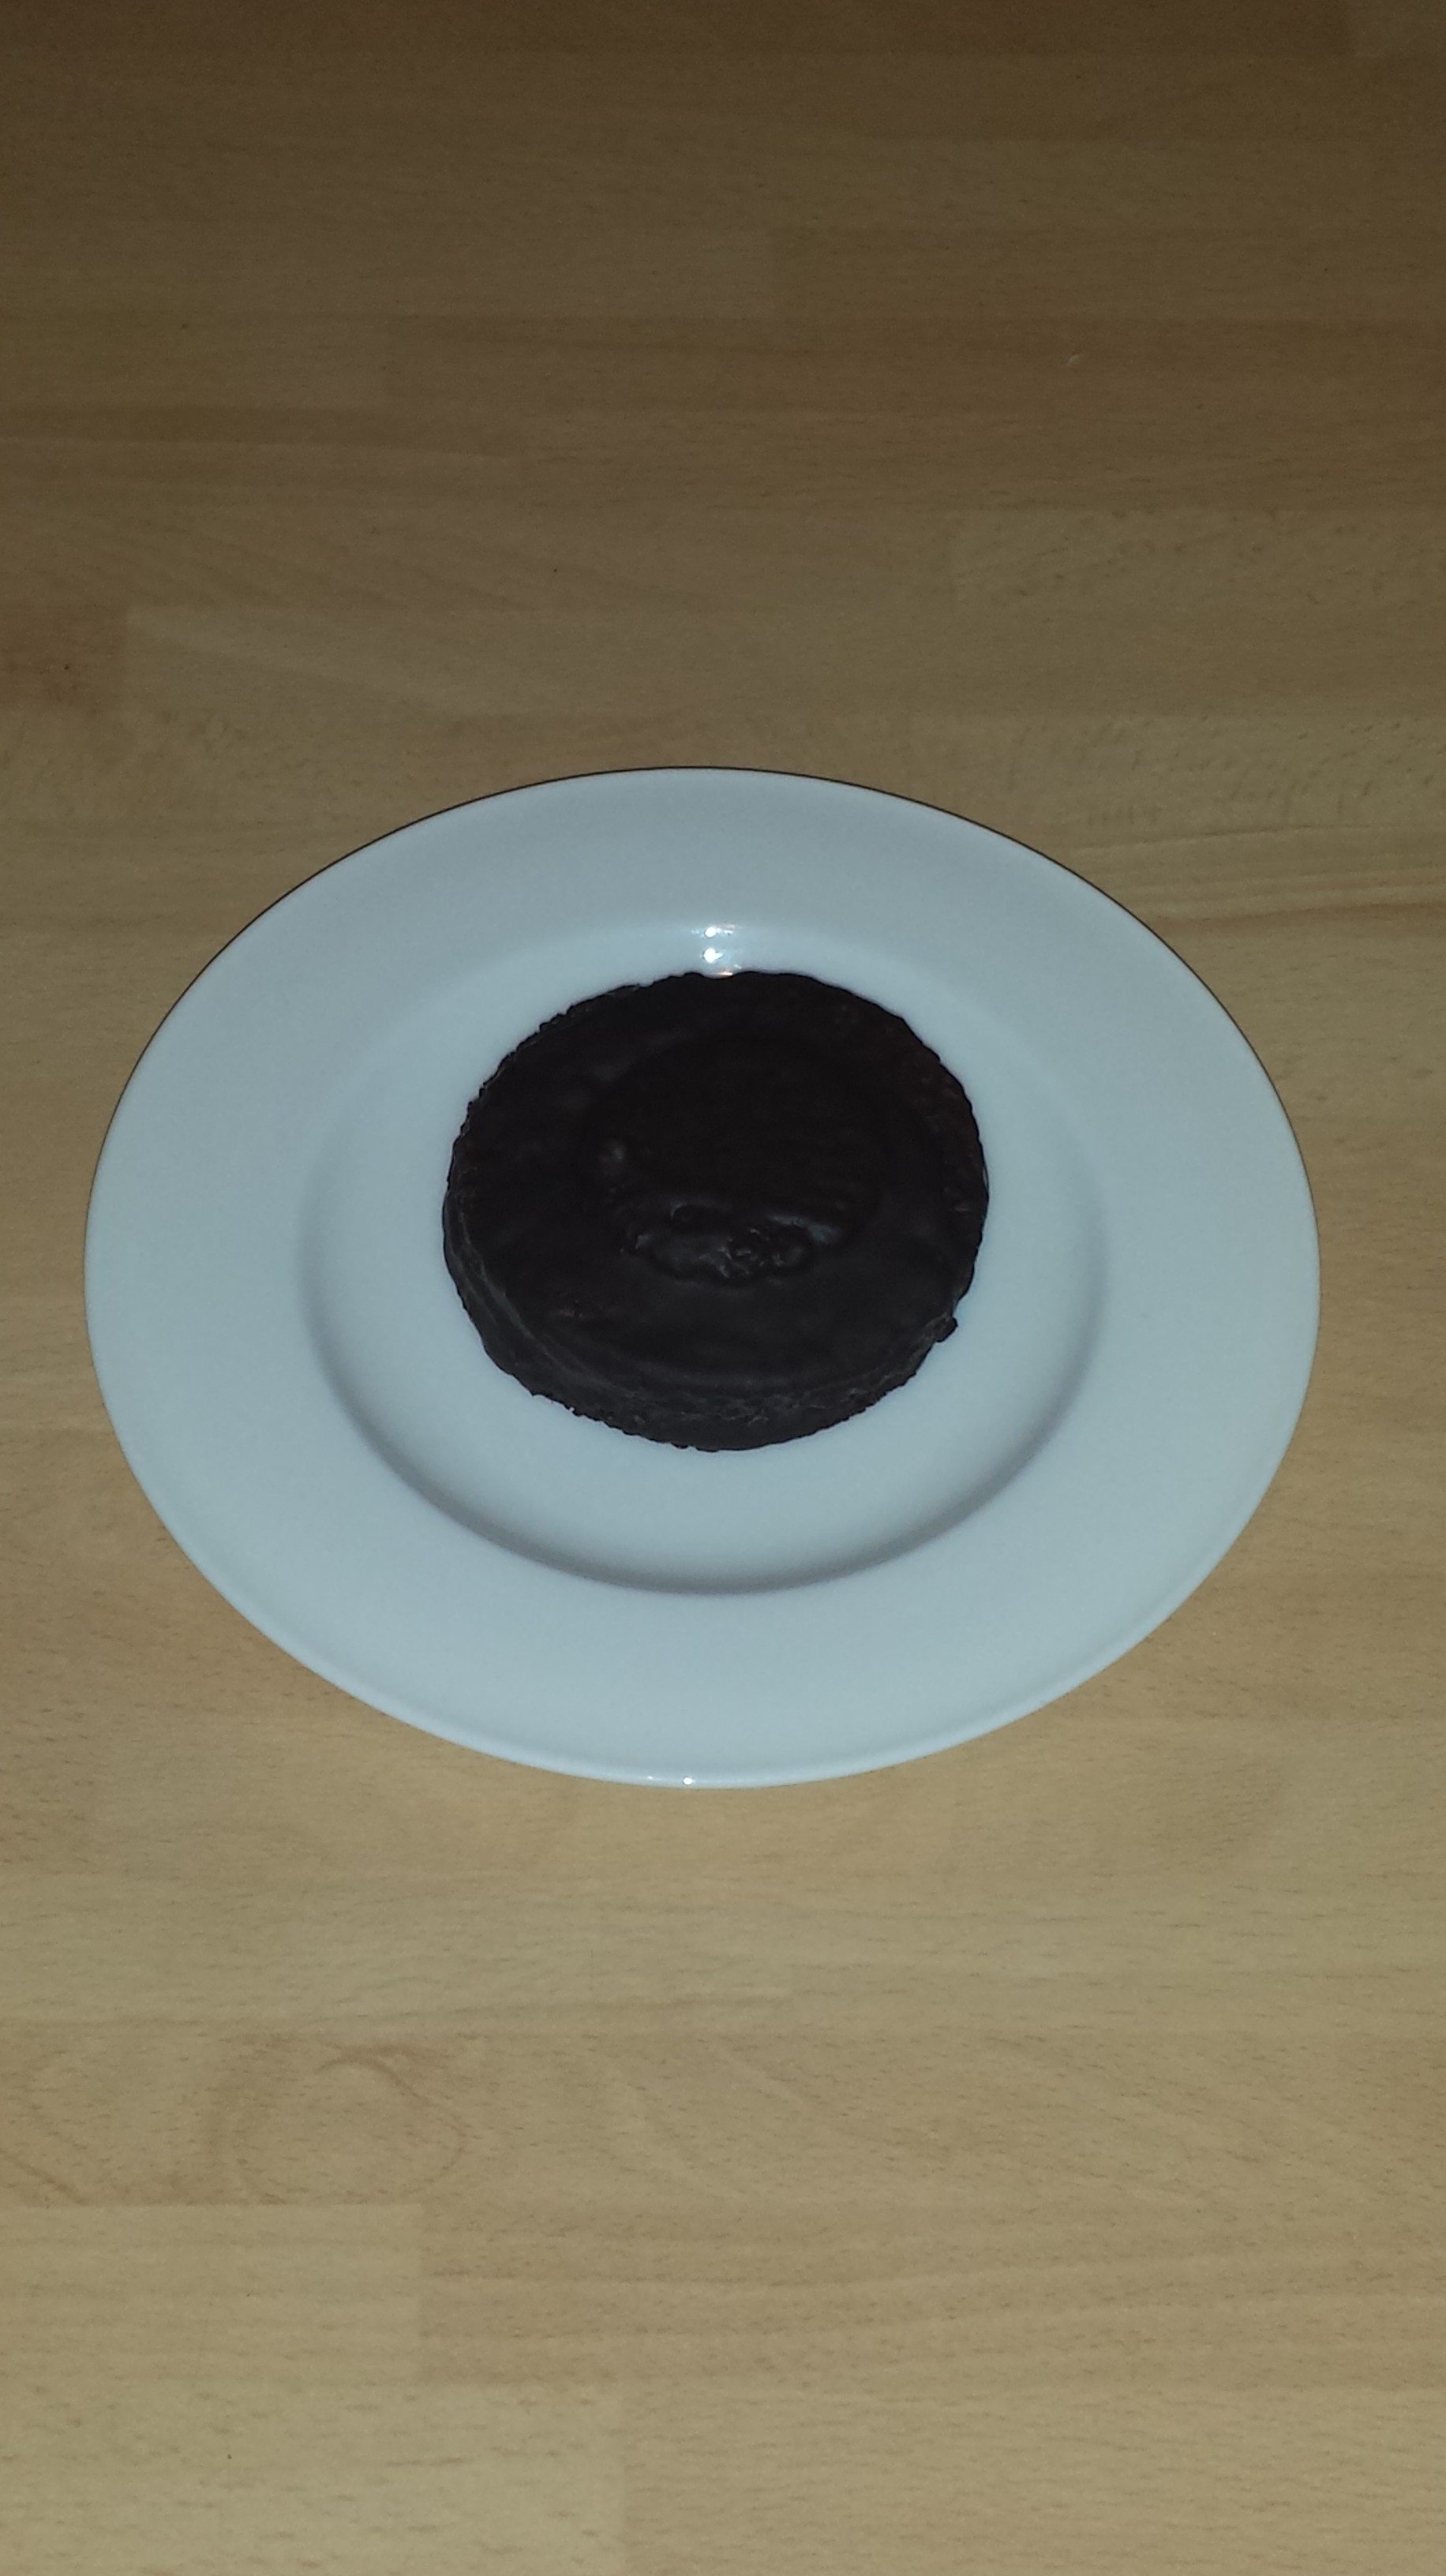
The feature image for this post shows the results, to find out what they taste like have a go yourself, they were Mmmmmmmmmm.

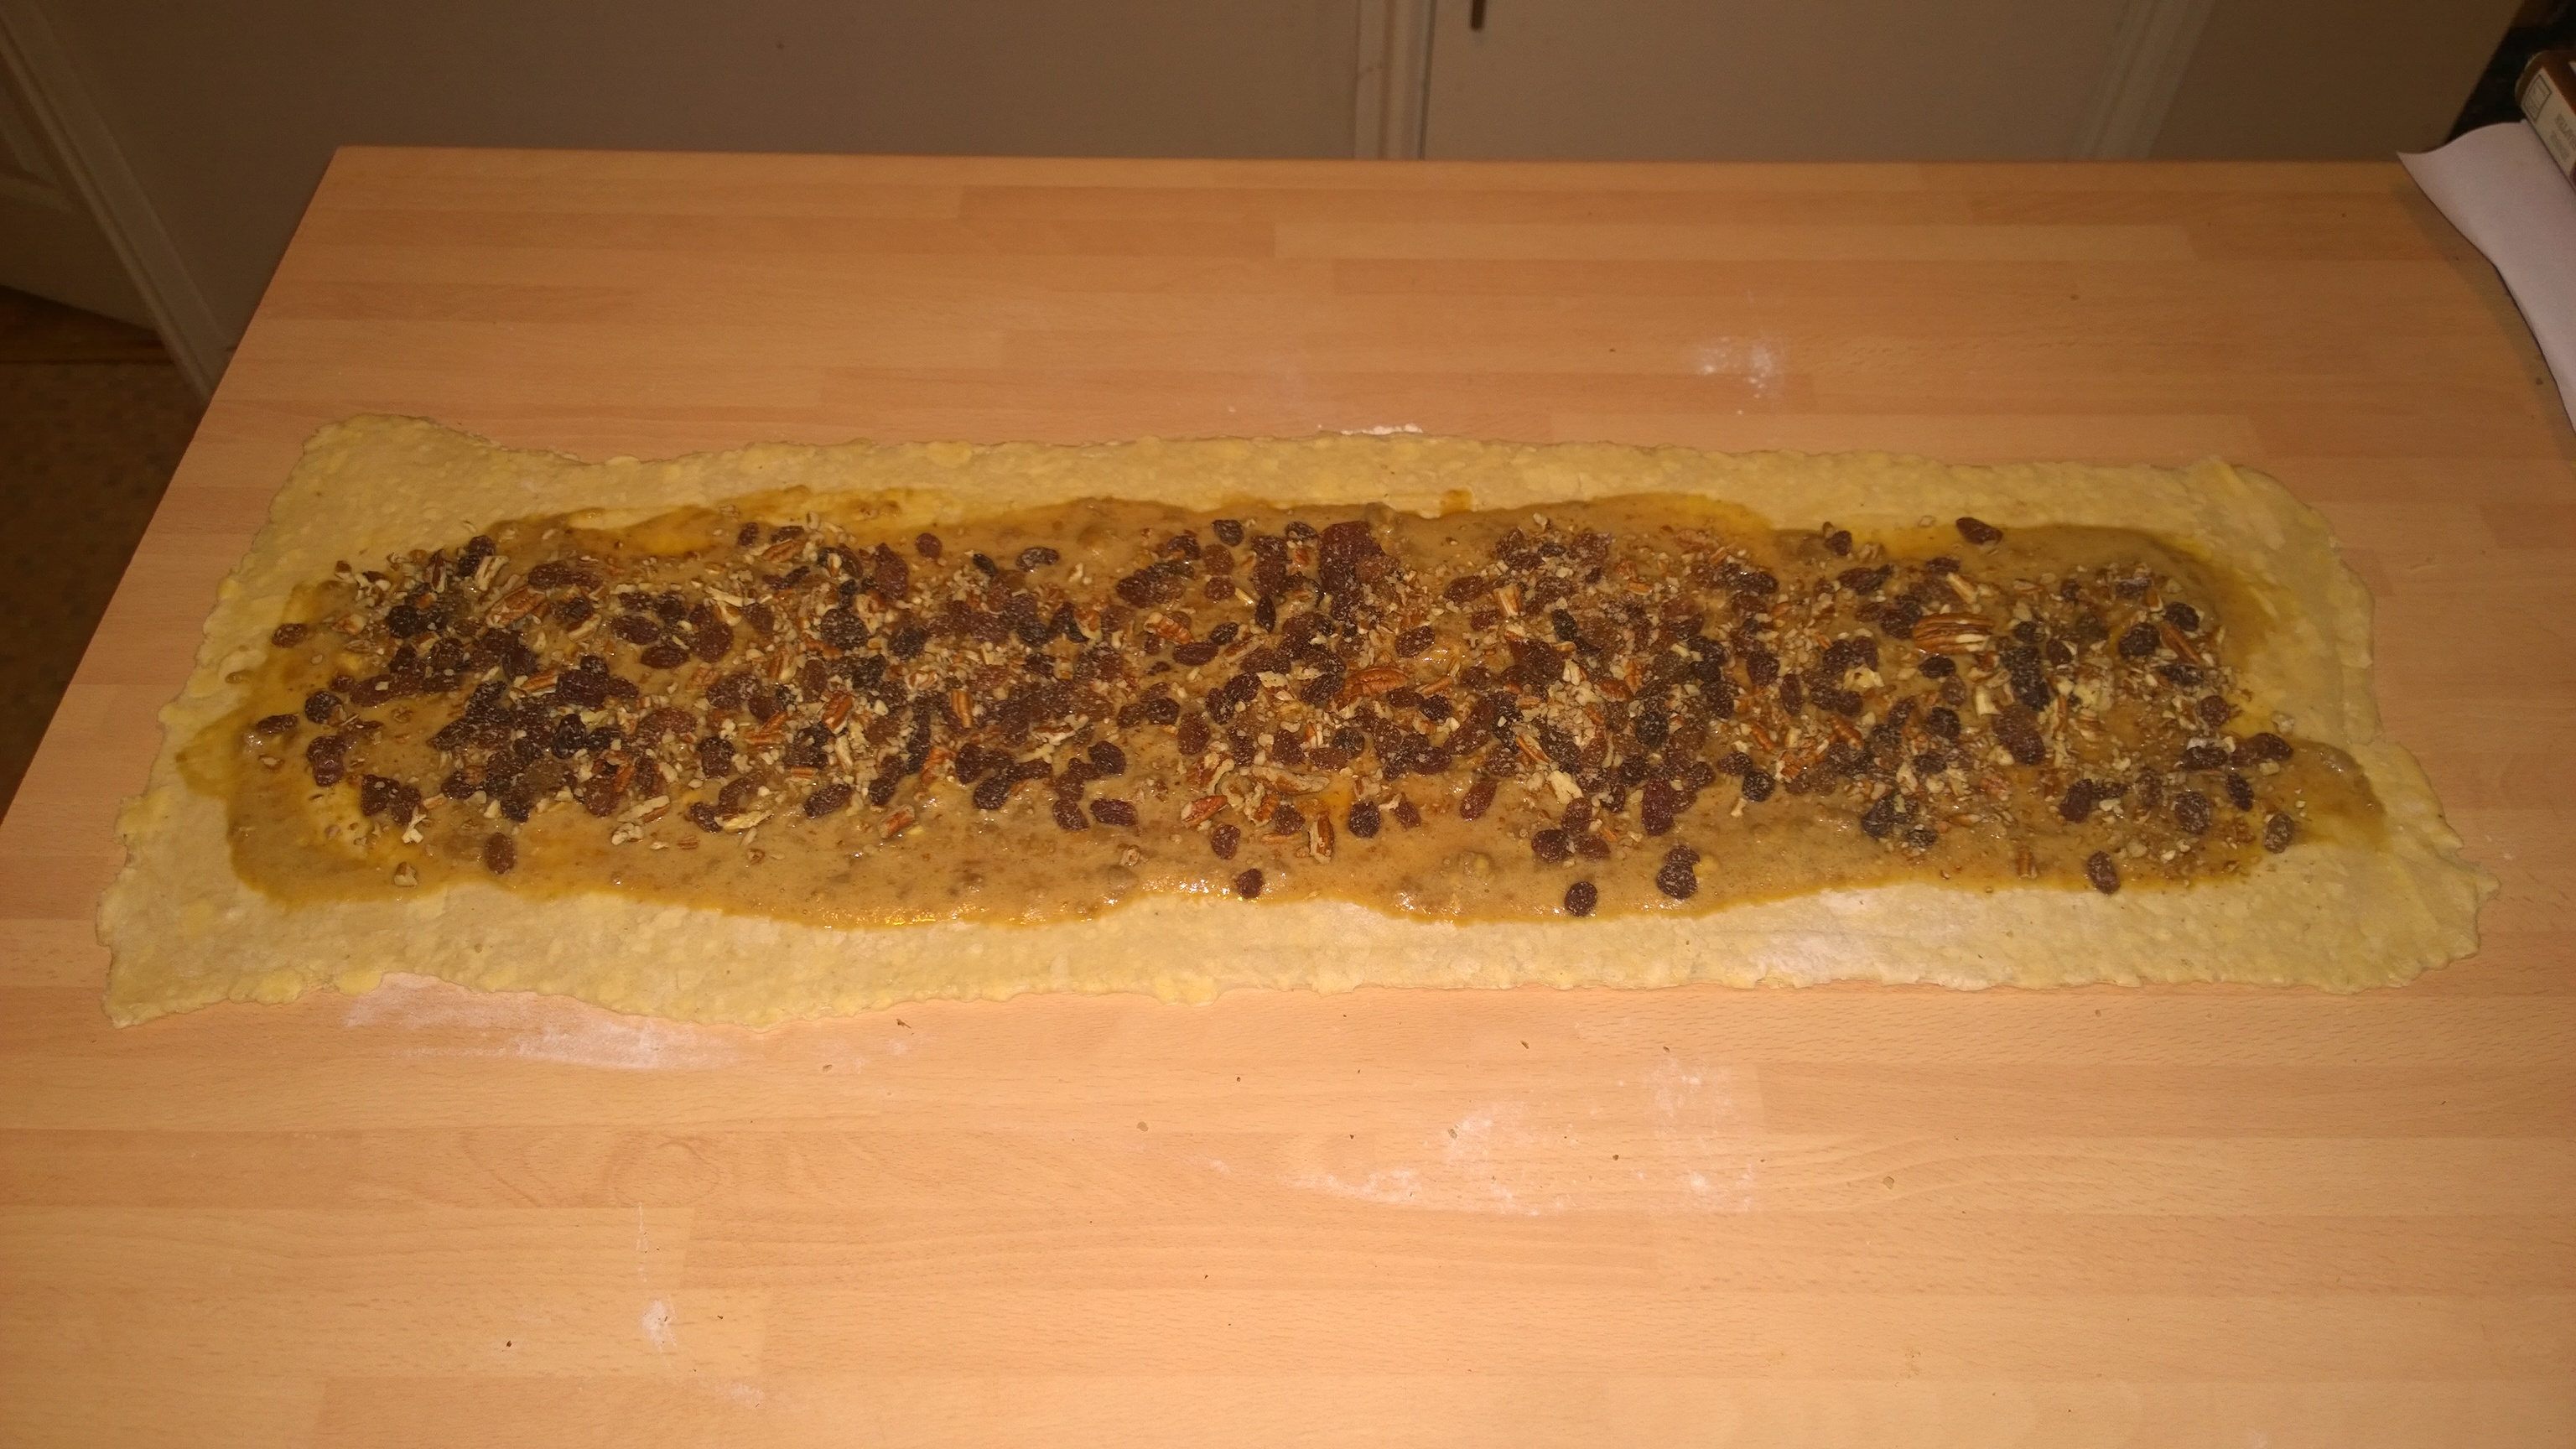
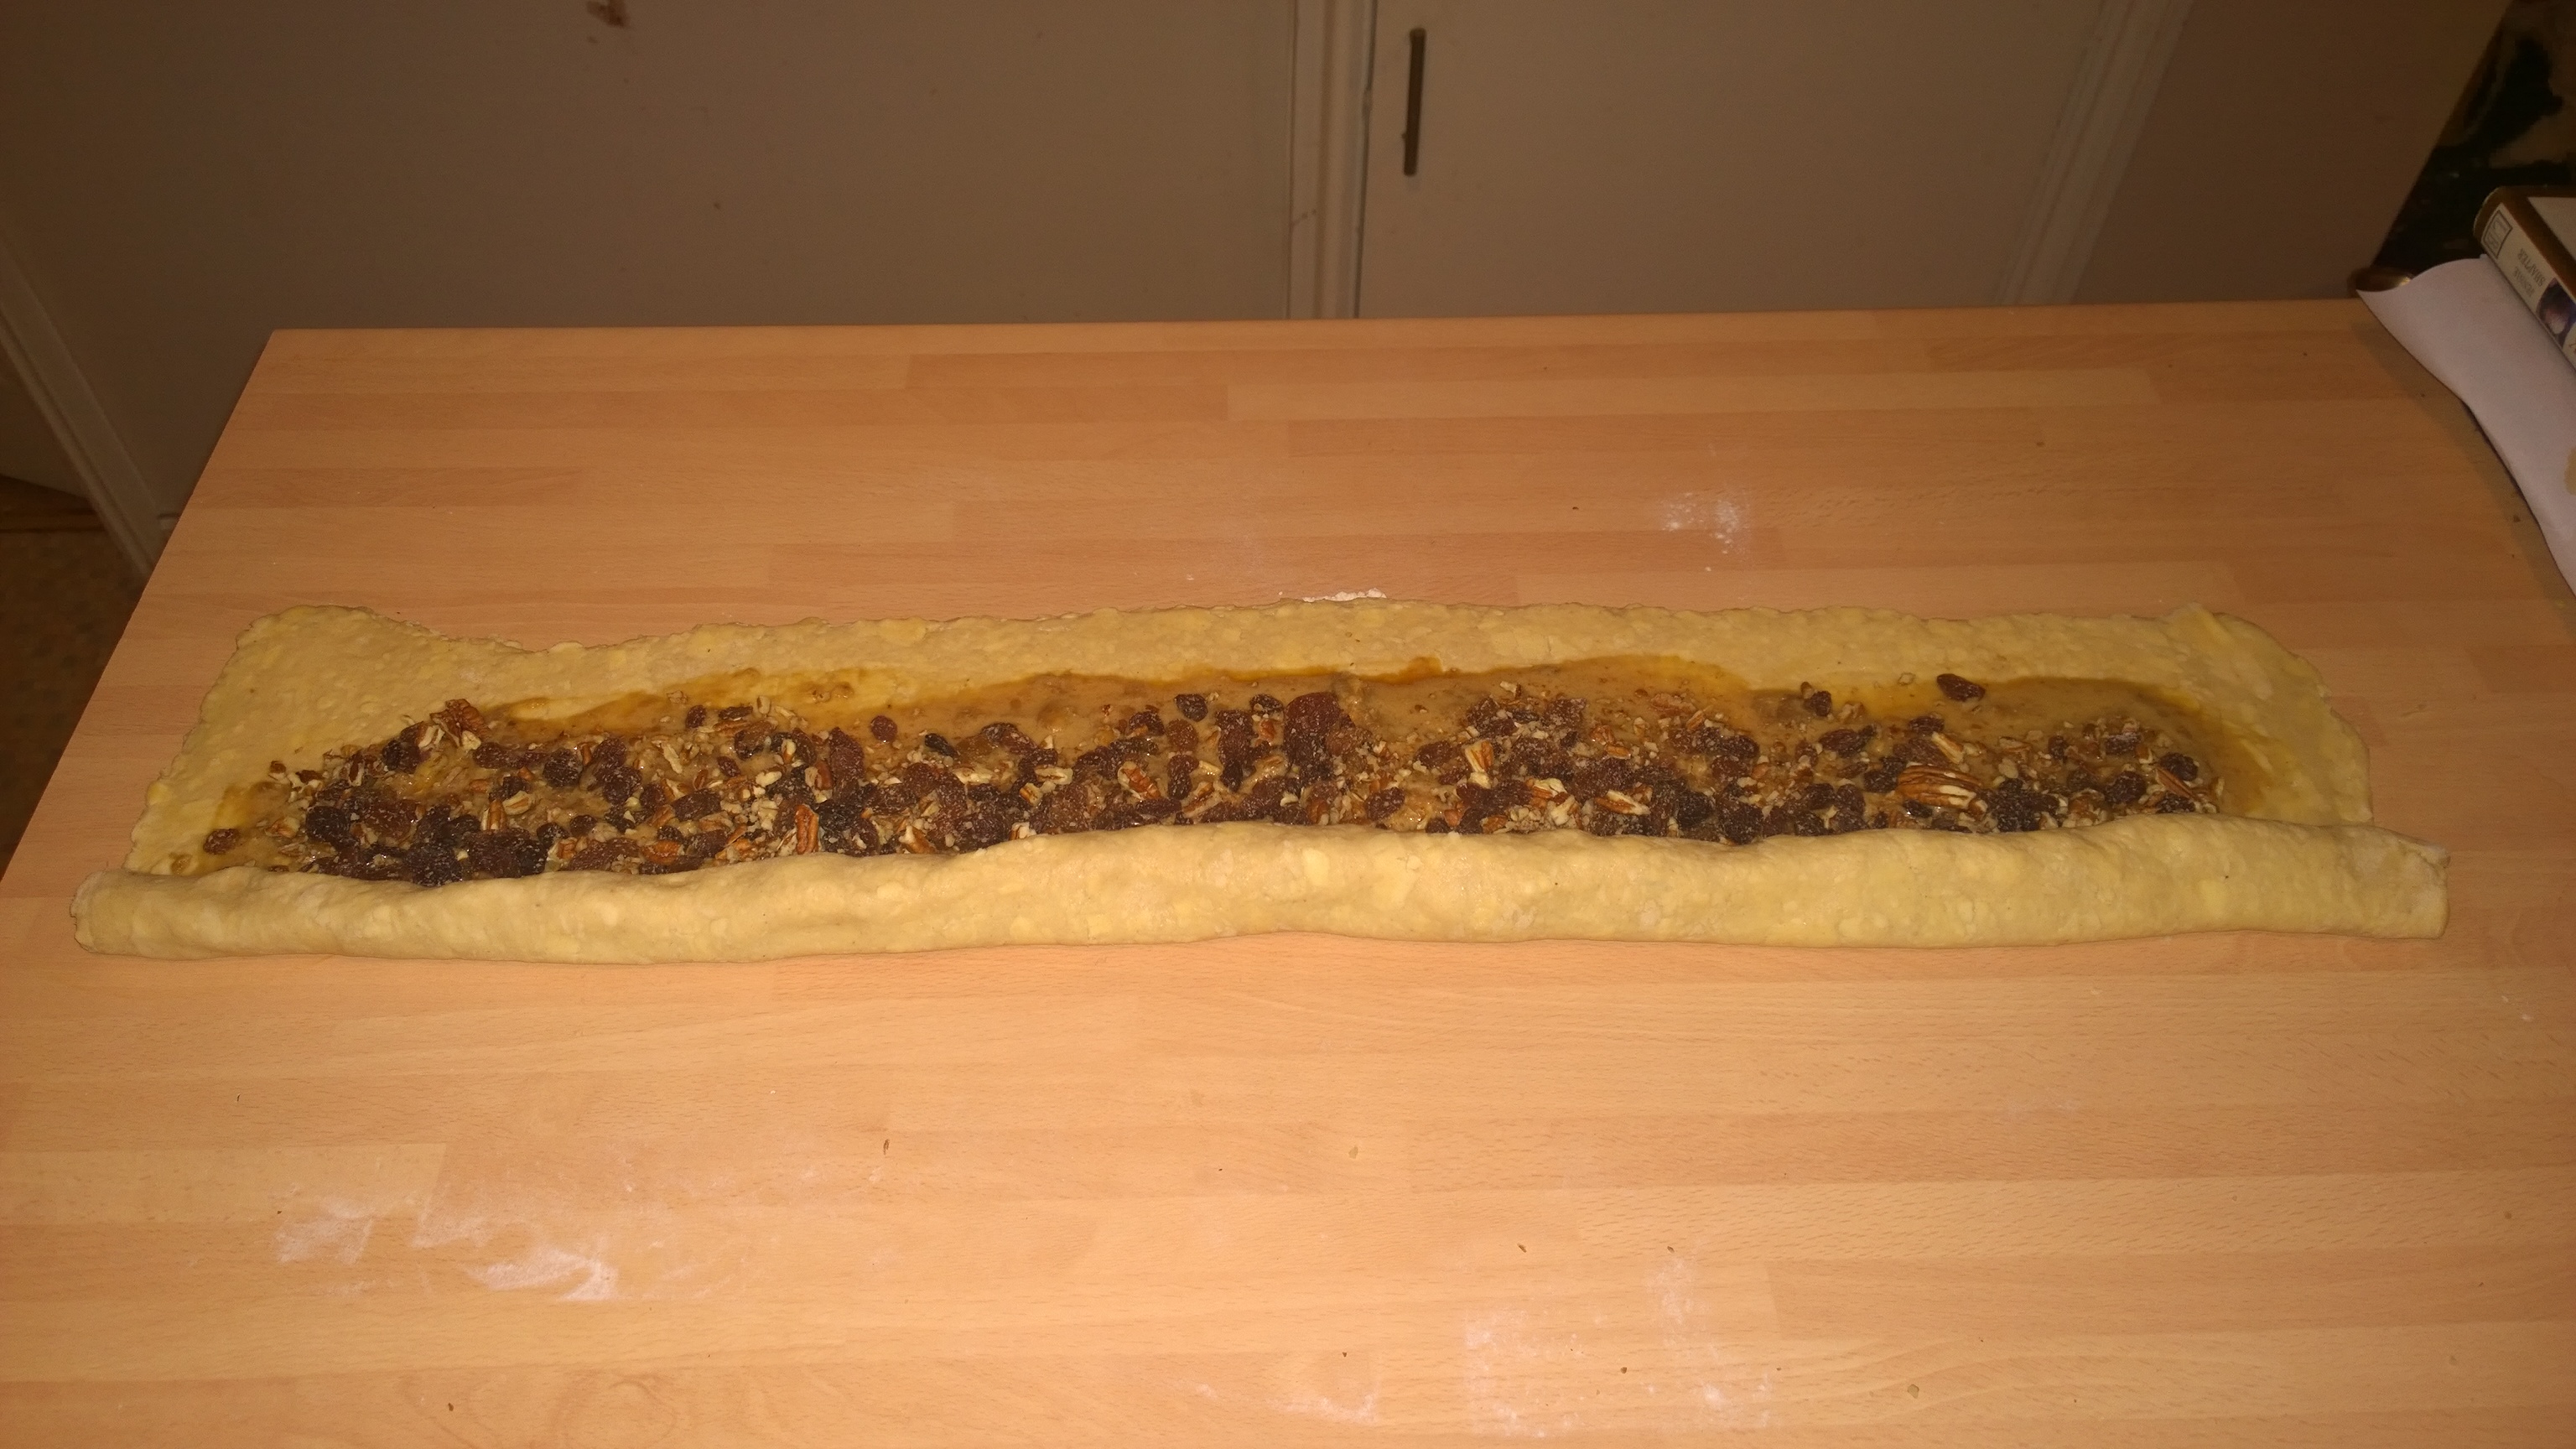
That’s it for now, flying back to Glasgow tomorrow for a couple of days so looking forward to trying another eatery. I am hoping to get some time to test a Danish Pastry, Kringles in the near future.

I stumbled across them on a Twitter post by Yotam Ottolenghi, so have been researching recipes so I can have a go. They take a few days to make and the diary has been pretty full recently but look really interesting as there does not seem to be a huge amount written about them.

Till next time, L8ers……………….


Pakistan meets Japan in the Middle East!

I am just about to book this years cooking vacation, my original plans have had to be suspended due to local challenges and I will be heading off to Gramont, in Gascony in early June for a weeks course and some r&r. The bad news is a clash with FBC2014, the international food bloggers convention which is taking place in London at the same time!

I was driving up to the fave farm shop to buy some meat recently, and my mind was thinking of what to cook over the weekend. With the rubbish weather we have been having, and the boss being full of cold for several weeks something tasty and wholesome had to be on the cards.

WP_20140302_10_12_00_Pro

The wholesome is a blend of three grains Quinoa, Maftoul, a Palestinian Cous Cous, and Freekeh; two of these grains are regarded as super foods so this has to be good for you! The protein is a half (or whole) shoulder of lamb that is marinaded for at least 8 hours in a mixture of Yoghurt, Coriander, Chilli’s,  Mint, AnardanaSumac, All Spice and Garlic, and then slow cooked for about 4 hours until tender.

WP_20140302_10_19_44_Pro

This recipe uses a considerable amount of fresh Coriander and Mint so if you have a oriental supermarket near you, its probably best to buy from them,  I got a massive bunch of Coriander for 70p, the supermarket equivalent would have been at least a fiver!

The following ingredients are needed to create this dish, ideally start the day before you cook to allow the meat to soak up all the marinade flavours.

Marinade

  1. 500g  Natural Organic Yoghurt
  2. 1 Big Bunch fresh Coriander
  3. 1 Big Bunch fresh Mint
  4. 4 cloves Garlic
  5. 1 Red Chilli
  6. 1 Green Chilli
  7. 1 Tsp Anardana
  8. 1 Tsp Sumac
  9. 1 Tsp All Spice

This mixture is an adaption of Sindhi Lamb Biryani, a dish I learnt to cook on the Pakistani cookery course I attended last year and the Pakistan element of the title above, with some subtle Middle Eastern influence. Place it all in a food processor or blender and whizz till smooth and blended it should look like this.

WP_20140302_10_21_02_Pro

Take your half/shoulder of lamb and pierce with a sharp thin knife to enable the marinade to penetrate into the meat, pour some of the marinade into a suitable bowl, put the lamb in and pour the rest over the top making sure its well coated. Cover with cling film and place in the fridge for at least 8 hours or overnight. Its worth turning the meat over every few hours just to make sure the marinade is doing its stuff.

WP_20140302_10_23_14_Pro

This is how mine looked before the final marinade was added to cover the exposed lamb shoulder.

For the next step you will need the following;

Pakistan Meets Japan In the Middle East

  1. 1 Red Onion finely sliced
  2. Vegetable Stock
  3. 2 cloves Garlic, crushed
  4. 2 Star Anise
  5. 1 Tbls Coriander seed
  6. 8 Green Cardamon (crushed)
  7. 1 Black Cardamon
  8. 2 Tsp Pomegranate Molasses
  9. 100g Maftoul
  10. 100g Freekeh
  11. 75g Quinoa

When the lamb is marinated, place in a roasting dish and cover with tin foil, stick in an oven set to 130 deg (fan) 150 deg (convection) and cook for 4 hours till meltingly tender. An hour before the lamb is finished cooking you can start to prepare the rest of the ingredients. Check the cooking instructions on each of the grains, the Maftoul can either be boiled or steamed, the other grains are usually boiled until just tender.

I cooked the Maftoul (9 minutes) in Vegetable stock and 2 Tsp Pomegranate Molasses, the Freekeh (40 minutes) in Vegetable stock and Quinoa (20 mins and 10 to rest) in plain water.

The Onion and hard spices need frying until tender, adding the garlic towards the end so it does not burn, it should look like the picture below at this stage. The Onion/Spices are gentle mixed with the grains when both are cooked removing the Cardamon and Star Anise to prevent tooth issues!

WP_20140302_18_59_26_Pro

To complete the dish and introduce the Japanese element,a modified Ponzu dressing is used that has had some Rapeseed oil and Grape Molasses added, and used in conjunction with some thinly sliced red onion.

The Finishing Touch

  1. 1/2 Red Onion, fried until brown and crispy
  2. 1/2 Red Onion finely sliced
  3. 3 Tbls Rice Wine Vinegar
  4. 2 1/2 Tbls Mirin
  5. 2 Tbls Yuzu
  6. 3 Tbls Soy Sauce
  7. 2 Tsp Grape Molasses
  8. 1 Pomegranate (seeded)
  9. 25 g Toasted Almonds and/or Pistachios to finish

WP_20140302_19_56_56_Pro

This recipe developed over several hours, and tasting each stage to make sure the balance was right. The final touches need you to mix the Rice Wine Vinegar, Mirin, Soy Sauce (to taste) and Grape Molasses. One 1/2 of the finely chopped Onion is added to the mixture and set aside in the fridge for an hour or so. The other 1/2 of the Onion is fried until crispy and stirred into the final dish. You will notice in the heading picture some Feta cheese, I forgot to add it at the end, DOH.

WP_20140302_20_05_51_Pro

So here you have it, a nutritious and tasty meal that is full of goodness and a flavor punch to match. Just finish off with the Nuts and Pomegranate. It takes a bit of effort but as the boss said, scrummerlicious.

This dish was influenced by Bethany Kehdy, Yotam Ottolenghi and Sumayya Jamil who continue to inspire my food direction. Spices from Otolenghi’s and Steenbergs, and the meat from Vicars Games @ Casey Fields Farm Shop.

Go on, have a go, its worth it.

L8ers…..

Carrillada, Guancia, Schweinebacke, Pork Cheek or لحم الخنزير خده

Before Christmas I was in my favourite place to buy meat, Casey Fields Farm Shop and eyed a pack of Pork Cheeks which quickly found their way into the basket. The lady in front starting to ask what I would do with them and before you know it, she had the other packet in hers, I love that place!! I was saving them for a rainy day, and having had far two many of them recently decided to put something tasty together. In 2007 we were flooded, I mean the whole ground floor and it took 6 months to rebuild the place so have a lot of sympathy for those suffering at the moment, we’ve been through it too.

WP_20140209_15_12_14_Pro

You will see these beauties only cost £2.49 and 4 of them are plenty for 2 people as they are very rich and umptious, served with a variety of sides such as Mash, Cabbage, or maybe Freekeh or Mograbieh for a Middle Eastern touch. You will need the following ingredients to knock up this beautiful winter warmer. The Pork Cheeks are going to braise long and slow, in fact 4 1/2 hours in a deep and mouth watering stock, despite the Chilli, it’s not a hot dish at all.

  1. 1 pack Pork Cheeks (or 2 per person)
  2. 4 Cloves Garlic
  3. 2 Sticks Celery
  4. 1 Red Onion
  5. 2 Carrots
  6. 3 Star Anise
  7. 9 Juniper berries (or maybe 10 if you prefer even numbers!) lightly crushed by hand
  8. 1 Tsp dried Thyme
  9. 1 Tbsp Coriander Seeds
  10. 1 Tsp Yellow Mustard Seeds
  11. 1 Black Cardamom pod
  12. 1/2 Tsp Aleppo Chilli flakes
  13. 1/2 Tsp Chipotle Chilli flakes
  14. 1/2 Tsp dried Sage
  15. 2 Bay Leaves
  16. 2 Sprigs fresh Rosemary
  17. 1 Large Glass Red Wine (I used Merlot)
  18. 1 Tsp Aged Balsamic Vinegar
  19. 1 Tbsp Tomato paste
  20. 1 Tin chopped Tomatoes
  21. 1/4 Litre Beef stock
  22. 1 Bunch Coriander
  23. White Pepper (I used Muntok from Steenbergs) to taste
  24. Maldon Sea Salt to taste

Firstly chop the Onion and cook for 10 – 15 minutes in 50/50 butter and Oil to soften, then add chopped Celery and Carrot and the Mustard Seeds and continue for another 10 – 15 minutes. Then, add all the spices and Tomato paste and ‘cook out’ for another 5 minutes.

WP_20140209_15_41_38_Pro

Then add the glass of red wine and cook reducing by about 1/3. You braising liquid will look something like the picture above. After about 15 minutes, add the chopped Tomatoes and Beef Stock and cook for another 15 or so minutes, you should have some heady aroma’s in the kitchen by now.  Set you oven to 130 deg  (fan) 150 deg  (convection), the cheeks are going to cook long and slow, about 4 1/2 hours.

WP_20140209_15_52_34_Pro

While you are reducing the braising liquid, coat the Pork Cheeks in seasoned flour and fry in butter and oil until brown, about 3 minutes each side and then ‘nestle them in the braising liquid after chopping up the whole bunch of coriander and adding first.

WP_20140209_15_55_25_Pro

The picture above should give you an idea of what you are aiming for. To go with the Pork Cheeks I prepared buttery Mash Potato, I prefer to cook the potatoes in their skins and gently peel with the back of a knife after about 35 minutes In the boiling water. Passing the potatoes through a Ricer and adding a decent load of butter produces fantastic results. I also added, in this case about 1 TSP of English Mustard which ‘lifts’ the Potato and enhances the Pork. Potato NEEDS Salt, so season to taste.

WP_20140209_19_51_47_Pro I also braised some Cabbage in Butter and White Wine, and at the end seasoned with some Anardana (Ground Pomegranate Seeds), it worked surprisingly well.

WP_20140209_20_00_22_Pro

As you can see from the close-up, the Pork is just melt in the mouth tender, the mash was soft and buttery and the Cabbage added a different texture to the meal. This is worth the effort and during these wet and miserable days, gave us some pleasure in the food department. Waitrose sometimes stock Pork Cheeks if you don’t have a butcher nearby, herbs & spices from Steenbergs and Ottolenghi, please try this one as you won’t be disappointed.

Till next time…

L8ers…………………………………………..

وفته kufteh In Search of the perfect………….Kebab!

I love a Kebab, the only issue I have is that they are typical a bit bland, covered in a ‘not very nice’ tasting Tomato Chili sauce and the meat origin is suspect. This is a generalization as I have had some awesome Kebabs, but whilst dining in a half decent restaurant. This post is the result of some creative I have been working on over the past few months, and uses some unusual and exotic spices to create an amazing flavour. I cannot repeat/print what the boss said last night as we were munching our way through them but it was highly commendable 😉

WP_20140126_16_59_19_Pro

For me, food is about what you see, smell, taste and FEEL. Texture is important when eating, and this version of the popular take-away will have you wondering why you did not make them yourself before. I will start with the ingredients, you may need to invest in some of them as they are not found in your typical supermarket, but are readily available from my favourite suppliers such as Ottolenghi’s and Steenbergs, once you have tried this dish, you can experiment with other Middle Eastern Delights!

For the Kebab

  1.  500 grms Lamb Mince
  2. 1 Red Onion
  3. 1 Clove Garlic
  4. 1/2 tsp. Anardana
  5. 1 tsp. Sumac
  6.  1 tsp. Aleppo Pepper
  7. 1/2 tsp. ground Cumin
  8. 1 tbsp. ground Coriander powder
  9. 1 tsp. Ground Ginger
  10. 1 tsp. Thyme
  11. 1 tsp. Peppermint
  12. 1 tbsp. Dukkah
  13. 1 tsp. Pomegranate Molasses
  14. Zest of 1 lime
  15. 2 tbsp. dried Barberries

For the Red Onion Relish

  1. 1 Red Onion
  2. 2 tbsp. White Wine Vinegar
  3. 2 tbsp. Castor Sugar
  4. 60 ml Rapeseed Oil
  5. 1 tbsp. Poppy Seeds

For the Mint Yoghurt Dressing

  1. 250ml Greek Yoghurt
  2. 2 tbsp. Dried Mint
  3. 1 tsp. Sumac

To Serve

  1. 1 Baby Gem Lettuce, Leaves separated and halved lengthways
  2. 2 Tomatoes, sliced and sprinkled with some Sea Salt,  covered in 1/2 small bunch Chopped Coriander
  3. Pitta’s Grilled and Cut width ways to form pockets

WP_20140126_16_51_10_Pro

Part of the secret of this dish (it’s probably not a secret really, but the phrase sounded good at the time of writing!), is to cook the Onion and Garlic/Spice mix first, and add It to the meat when cooled, to marinade. So cut the Onion finely and cook in some Butter and Oil (or Ghee), on a lowish heat for at least 15-20 minutes, then add a splash of water and continue to cook, until the Onions are soft, melting and sweet, about another 15-20 mins. Crush a clove of Garlic and add to the Onions cooking for 2-3 mins then add all the other herbs and spices, fry for 2 minutes more then take off the heat, add the dried barberries, Lime Zest, Pomegranate Molasses, stir and leave too cool.

WP_20140126_17_26_37_ProWhen the mixture has cooled, mix well into the Lamb mince, cover and pop into the fridge for at least a couple of hours, half way through, take out and mix again, making sure the Onion/Spice is well distributed.

The accompaniments make this special, a simple dressing of Yoghurt and lots of dried Mint, with some Sumac sprinkled on top, and for me, a killer Onion Relish which is dead easy to make, and comes from one of Yotam Ottolenghi’s salad recipes which I have posted before. Thinly slice the Onion and place in a bowl. Dissolve the Sugar in the White Wine Vinegar and add to the onion, mixing well, then add the Rapeseed Oil, using your fingers to blend everything together, then finish by adding the Poppy Seeds and set aside for at least an hour (in the fridge).

The Lamb Kebabs need to be gently fried, about 3-4 minutes each side. To Serve, take a halved Pitta, opening up the large end, pop in 2-3 pieces of lettuce, some of the Onion Relish, some of the Tomato and Coriander Slices, pop in a Kebab and spoon on some Yoghurt Mint dressing.

WP_20140126_20_03_23_Pro

A simple dish to make but packed with flavor and texture, its well worth investing in some new and unique spices to make this dish. I started my culinary journey when I was seven, but only really discovered the delights of Middle Eastern flavours in recent years, and I am so glad I did. Using Cold, Hot, Piquant and Spicy really makes this dish stand out, its not Chili Hot, so you experience waves of flavor, and texture.

Till next time.

L8ers…….

Pistachio Cardamom & Polenta Cake – Cooking for Coeliac’s (Gluten Intolerance)

2014 has arrived and there is much excitement in my world. Last year I drove miles, thousands of them and it meant having to stay away more often than I preferred, which reduced both family and kitchen time. This year I am looking after a another team based in the south, so less travelling and some more excuses to adventure with food (and spend time with the family!).

WP_20140115_17_29_25_Pro

I met the southern team last week, and decided to treat them to some home made baking, BUT one of them is a Coeliac which is an intolerance to Gluten. The only known treatment for this is a Gluten-free diet which is a bit of a challenge, if you check the packets of many ingredients the number that claim Gluten free is not massive especially if baking cakes and desserts!

I did some research and found a suitable replacement for flour was Polenta, which is Maize (Corn) ground into a meal (course Flour). Its not the same as conventional Flour so baking with Polenta requires some thinking. You have to be careful with other ingredients too, Baking Powder which is used as as raising agent can contain Gluten so check your packets 1st before embarking on this particular cake.

I made this in between customer meetings and conference calls so apologies as there are not too many photographs in this particular post (2 to be precise)!

I decided to bake a Pistachio and Cardamom Polenta Cake with a hint of Rose Water & Lime Butter Frosting, Middle Eastern inspired and something which was an ongoing development during the cooking process, here’s the final version, which was AMAZING, your will need the following ingredients!

Cake Ingredients

  1. 8 cardamom pods, seeds only
  2. 150g pistachios, shelled
  3. 100g ground almonds
  4. 1 tsp rose water
  5. 175g polenta
  6. 1¼ tsp baking powder
  7. 300g unsalted butter, at room temperature
  8. 325g caster sugar
  9. 4 medium eggs, lightly beaten
  10. 1 unwaxed lime, grated zest, plus ½ lime juice
  11. ½ tsp vanilla EXTRACT

Soaking Syrup

  1. 120g Castor Sugar (Mine has Vanilla Pods in it to infuse)
  2. 1tsp Rose Water
  3. 80ml Lemon Juice
  4. 30ml Lime Juice
  5. 1tbsp Pomegranate Molasses (This is critical as it provides a unique Middle Eastern Flavour)

The basis of the recipe were a couple of cakes I found on the Internet which had Semolina as the base and quite a lot of Rose Water, but could not be used as Semolina contains Gluten, hence the Polenta replacement.

I was a bit nervous about introducing too much Rose Water into the cake, as I think its definitely an acquired taste. I decided to add some further adaptions and significantly reduced the Rose Water component, but introduced some more Middle Eastern flavour in the form of Pomegranate Molasses. I also increased the Cardamon and added Lime reducing the quantity of Lemon, which I prefer……….. YUMMMMMM…!

Lime Butter Frosting

  1. 250g Unsalted Butter
  2. 256g Icing Sugar
  3. 2 Limes Zested
  4. ½ Lime Juice

The Cake Process

  1. Grease a round, 23cm, loose-bottomed cake tin and line with baking parchment.
  2. Preheat the oven to 170°C/gas 3 (If using a FAN oven, drop the temperature a bit).
  3. Extract the Cardamom seeds from their pods and grind to a powder in a pestle & Mortar.
  4. Put Pistachios in a food processor and grind for a few seconds, you don’t want a powder but pieces around 2-3mm so there is still texture.
  5. Add the ground Almonds, Cardamom, Polenta, Baking Powder and 2/3rds of the Pistachios and mix briefly. The remaining Pistachios are sprinkled on the Lime Butter Frosting to finish.
  6. Beat the Butter and Sugar until pale and fluffy. Add the Egg in small amounts, incorporating it well. (A Kenwood is good for this with the beater).
  7. Fold in the mixed dry ingredients, then the Lime Zest and Juice, Rose Water and Vanilla extract.
  8. Put it into the lined tin, level and bake for 50 minutes to 1 hour until a skewer comes out oily but dry. (Mine took slightly longer, about 1 hr 10 mins)

The trusty Kenwood Chef was used to beat the Sugar/Butter, and also used to mix in the eggs. You might find the mixtures splits during this process, adding a small amount of Polenta will bring it all together.

WP_20140115_17_59_49_Pro

Put all the ingredients for the Syrup in a small saucepan; bring to the boil to dissolve the sugar, then remove from the heat.Remove the cake from the oven; while it is still hot, spoon the Syrup over the cake, I used about 4 Tbsp, judge with the eye.

Allow the cake to cool, then take out of the tin. Coat the top of the cake with the frosting, sprinkle with the remaining Pistachios and gentle press in to fix.

I had one challenge whilst trying to find the Polenta in the shops, a large chain had some Corn Meal, but looking on the side of the Packet, there was the label ‘May Contain Traces of Gluten’. This brand was very cheap and obviously processed in a factory grinding flour and other Gluten laden products. Another higher end shop had Polenta, but it was Organic and very expensive. Eventually I gambled and went for Polenta Express, Gluten Free but apparently the dry grains had been pre-cooked in some way, it still looked and felt like flour/meal and worked a treat.

The cake is quite (well very actually) moist and sticky,  great on its own (as my new friends found out), but also goes really well with a serving of Crème Fraiche or Double Cream.

Feedback from my new team was VERY encouraging, a couple of them have vowed to make it themselves, they loved it so much. Its definitely an ADULT cake, the Pomegranate Molasses used in the Syrup really adds an amazing flavour dimension, the Rose Water is very subtle, and tends to stimulate the nose rather than the taste buds which is what I was hoping for. The Lime Butter Frosting adds another texture and all the flavours work together really well.

Pomegranate Molasses and Rose Water is readily available, I use Steenbergs and Ottolenghi’s to source mine along with the Cardamom.

So there we go, if you know someone with a Gluten Intolerance, and Dairy is not an issue, have a go at this, you will be pleased you did.

L8ers……

Foodie Memories of 2013, Puglia & The Pukka Pakistani

As the new year starts, some thoughts on what happened in my foodie life during 2013, and the culinary skills learnt and food eaten seems appropriate.

It all started in May, and my weeks ‘vacation’ to Masseria Montenapoleone in Puglia, Southern Italy. Learning to cook with a local traditional Mama, on an Organic Farm, loads of new skills and techniques were learnt, including how to create Orcchiette by hand, NO pasta machine in site.

P1010953

This was followed by Strascinate, Braciole, Foccacia, Risotto & Polpettie di Carne,  the week flew by but much was learnt about how to get the best from simple ingredients.

P1020164

I have always been a bit of a foodie, but the week in Italy only encouraged me to be more adventurous and experiment with new tastes, flavours and recipes. You can find the start of the original posting here http://wp.me/p3LgUf-r

June, July and August was influenced by a number of chefs, the awesome Bethany Kehdy, Yotam Ottolenghi, Tomasina Miers and William Harcourt-Cooze  to name a few! The direction of travel was mainly the Middle East and South America.

WP_20130813_006

One of my favourite dishes was the one above, care of Bethany, Aubergine Veal and Yoghurt Crumble and was served with Bejewelled Rice.

WP_20130804_012

The Middle Eastern Chicken on Flatbread with Fattoush was also a delicious venture into the Middle East, a truly delightful meal.

The next venture was Spain, care of Omar Allibhoy and his book, ‘The Tapas Revolution’. Various dished were prepared including Pinchos, Tortilla, Braised Pork Cheeks, Mackerel Escabeche and Padron Peppers.

WP_20130824_027

During 2013 I started a new job and it became a bit of an excuse to try some baking, cakes at team meetings became quite popular! There were a couple of particular favourites, but the one that seemed to create the greatest impact was my variation on a Chocolate Brownie, but layered with Fresh Raspberries.

WP_20130821_006

This is before the final layer of cake mix was put over the top. Despite it seeming to weigh quite heavy, it was extremely light, thanks to the Balloon Whisk attachment on the Kenwood Chef which was used to whip the cake mix to a frenzy.

1387120104492

On the dessert and pie front practise and guidance from Richard Bertinet’s book ‘Pastry’, enabled the delivery of some classic dishes such as the Frangipane and Apple Tart above, and the Chicken Pie below!

WP_20131222_19_46_18_Pro

I have only made Rough Puff Pastry once, so the first attempt at proper Puff Pastry, whilst time consuming was well worth it, the results were awesome (even if I say so myself!). The Pie which was made from scratch was the best I have ever made, and I will be repeating the exercise sometime in 2014, but with a different filling.

WP_20131116_021

After a fantastic meal in a Thai Restaurant on business, I was keen to recreate a particular favourite dish of mine, Massamam Curry. Having an Oriental Store no more than 45 minutes away enabled authentic and fresh ingredients to be sourced and the flavours were truly delicious.

2013-11-23 15.39.00Then we ventured to Pakistan, I was booked on a course with the amazing cook Sumayya Jamil and learnt some more skills around making Massala’s and got to cook a genuine Biryani from scratch (amongst other amazing dishes).  I really recommend her courses, SJ has a breadth of knowledge passed down the family, and its a really great way to learn new skills, and get to better understand a lesser known cuisine.

So my whistle stop tour of the year is complete, food inspirations in no particular order from Bethany Kehdy, Ren Behan, Yotam Otolenghi, Richard Bertinet, Maria Elia, Rachel Khoo, Omar Allibhoy, Stephane Renaud, Sumayya Jamil and many others, with various visits to restaurants has inspired me to continue the adventure.

It goes without saying that my foodie adventure is only possible thanks to some fantastic suppliers, Caseys Farm Shop where the protein comes from, Riverfords for Organic Fruit & Veg, the BEST Spices and specialist products like Freekeh and Mograbieh, from Steenbergs and Ottolenghi’s online stores.

Here’s to more foodie life in 2014, thanks for following.

L8ers

π, No not that one, Pie! My take on an Egyptian Neolithic period or New Stone Age food!

Hi peeps, it’s Sunday, I’ve finished work until the 6th January and don’t need an excuse to get in the kitchen. We had planned to have Chicken on Saturday night, but instead went for a Cheese Fondue as I wanted to do something a little special, and Roast Chicken and all the trimmings so close to Christmas just didn’t seem right.

WP_20131221_16_23_33_Pro

I absolutely love a good Pie, but getting one is really challenging, I believe the best are ones made with love and care in your own home, by your own hands and fresh as a daisy!  I am sure there are good Pie’s available but quite often my eating habits change within the space of five minutes, so here is my take on something that first surfaced in 9500BC!

WP_20131222_11_40_31_Pro

For me a good Pie is made of the best ingredients you can get (or afford), in this case an excellent Free Range Chicken from our favourite supplier, no added ANYTHING! You also need a quality stock to make a sauce, the carcass of the Chicken is the base of this, with some aromatics such as Thyme, Rosemary, Parsley, Peppercorns and a Star Anise.

WP_20131222_12_09_52_Pro

I roasted the Chicken on the Saturday evening,  put half a head of Garlic in the cavity along with a halved Clementine, rubbed Olive Oil all over the skin and seasoned with Salt and Pepper. Roasting took 1 hour 20 minutes in my case, I then covered the beast with a couple of layers of foil, and a towel and let cool for a good couple of hours. Transfer the Chicken to the fridge, covering with greaseproof paper and foil to keep all those flavours where they need to be! DON’T clean the roasting dish, you are going to use it in the morning so cover with some foil to keep any nasties out.

The stock is simmering as I am writing this blog entry.

Earlier this morning I stripped the carcass of its meat and put the carcass back in the same roasting dish I used last night, adding to the flavour with the juices and crispy bits. Also in the dish went a stick of celery and a carrot, cut into chunks, and two onions cut in half with their skins still on, then into a 180deg oven (160 deg fan) for 1 hour.

Once roasted put into a stock pot if you have one, or a large saucepan along with about 4 pints of water, a bunch of Parsley, 2 sprigs of Thyme, a sprig of Rosemary, 10 Black Peppercorns (Lampung in my case), 5 White Peppercorns (I used Muntok) and one Star Anise. The Stock needs to gently simmer for 4 hours, skimming any impurities of the surface as you go.WP_20131222_15_07_42_Pro

After 4 hours, remove the stock from the heat and filter through a sieve, the aromas filling the kitchen were….CHICKEN! You can see a small amount of fat on the surface, this can be removed when the stock has cooled down if you want too.

WP_20131222_13_23_17_Pro

Whilst the stock is simmering, you can attack the Pâte Feuilletée or Puff Pastry. I know the shop bought stuff is apparently good, but this was to be a special pie and so an excuse to have a go myself. I followed the instructions of the well renowned Richard Bertinet, in his book Pastry, which I mentioned in the last blog.

There are a number of stages to go through, with chilling between each so allow yourself enough time (you could go and buy some but it won’t be the same!)

WP_20131222_14_50_10_Pro

This is my attempt after I had added ice cold water to the flour, and knocked ten tons of, no, only joking, flattened the butter between two sheets of cling film. After another chill in the fridge, the butter will be incorporated into the flour mix in layers.

WP_20131222_16_03_25_Pro

There a two ways of folding to create Puff Pastry, Double Book and Single. Double Book is where you take each end and fold it into the middle. Single is where you fold ONE end in, and the other overlaps.  Just for a challenge I went for single, which requires 6 folds and 1/2 hour resting in the fridge after each (Its not a fast process!). This is mine after fold three, the finger dimples are intentional to enable you to remember where you are!

WP_20131222_16_08_20_Pro

In between the puff pastry process you can start to prepare the filling. You need Onions, Garlic, Button Mushrooms, Butter, Flour, Stock, Roast Chicken (chopped) and frozen Peas; Salt and Pepper to taste, Herbs de Provence or whatever flavourings you fancy. I included a small amount of Chilli to provide a background warmth.

Chop the Onions and fry gently in some Butter and Olive Oil until translucent, then add the Garlic (crushed or chopped) and continue to cook. Quarter the button Mushrooms and add, cooking for at least 5 minutes then the Roast Chicken and a tablespoon or so of Flour, and continue to cook, then about 300 ml of the freshly prepared Chicken Stock. Gently simmer for about 15 mins and towards the end, chuck in about 3 handfuls of frozen peas and remove from the heat. It should look like the above.

WP_20131222_17_55_55_Pro

To accompany ‘The Pie’ was going to be one of my all time favourite potato dishes, Gratin Dauphinoise. Layers of Potato, Garlic, Salt & Pepper and grated Nutmeg, filled with double cream and cooked slowly until golden and bubbling. Its a very rich and flavoursome dish that can be a meal in its own right.

WP_20131222_18_13_47_Pro

I topped mine with grated Grana Padano Italian hard Cheese which i deemed acceptable as the dish is from the Dauphiné area of France, near the Italian border, you could also use Gruyere as an alternative.

Back to the Pastry and we are almost done. We are now at turn six of the single turn method.

WP_20131222_18_21_48_Pro

When you cut the Pastry you can see the thin wafer like layers of Butter, we are going to make a Flat Pie and you need to make the lid slightly larger than the base to cover the filling.

WP_20131222_18_33_09_Pro

Once you have the base rolled out to a thickness of a slightly less than a pound coin, brush egg wash  about an inch around the edge, pile in the chilled filling and place the lid on top. To seal the edges I used the thumb and two finger method to crimp the edge, and then rolled like a Cornish Pasty edge, nothing was escaping this bad boy!

WP_20131222_18_37_41_Pro

Brush the lid with egg wash and put in the fridge to relax for 10 mins. The take it out the fridge, egg  wash it again (this will help it go a deep brown colour) and using the BACK of a sharp knife, gently make curve patterns from the centre to the edge. If you don’t do this after the egg wash, you will loose the pattern. You can also make an incision in the centre to let some of the steam out during cooking.

WP_20131222_19_46_18_Pro

Approximately 45 minutes in a 180deg oven and you should end up with something like the above, be brave and turn the heat up a little during the last 10-15 mins, you want a deep brown and nearly caramelised colour and finish. The pastry should be flaky and crispy, the filling succulent and flavoursome.

WP_20131222_19_59_46_Pro

I also fancied another favourite, Green Beans & Pancetta, cooked beans, rolled in the salty Italian Bacon and fried quickly for a few minutes to crisp up.

The Boss is generally not to fussed about pies, until she tried this one, it was stunning, tasty and there is plenty left over for tea on Monday. So here it is, my take on a Pie, you could use Beef or Pork if you don’t like Chicken, just make the appropriate Stock base to match the filling.

As an aside, I use a Camera Phone for the pictures on my Blog. Those very kind people at Nokia gave me the Lumia 1020 last week, a 41 Megapixel beast with Carl Zeiss lense, the pictures on this entry were taken on the new Nokia.

Previous entries were on either the Nokia 920, BlackBerry Z10 or Samsung S4. (Maybe you can guess what my day job might be?) Maybe you can see the difference, i’m not the best photographer or stylist but try to make the images ‘real’.

Hope you all have a very Happy Christmas.

L8ers….

Kookaburra Almonds & Tart! (Dessert Recipe Challenge No. 3)

One of the fantastic teams I support at work clubbed together and gave me £100 in John Lewis vouchers as a thank-you last week, they know I like cooking but were not sure what to get.  I have now added some baking  stuff to my cooking cupboard and was inspired to try some more recipes ready for the Christmas break over the weekend.

Bertinet pastryRichard Bertinet is one of my french food heroes, along with Stephane Renaud, the Roux’s, Daniel Galmiche and Raymond Blanc.  A while back I got hold of  Stephanes’ book ‘Pastry’, and thought it was about time I  had a go at re-creating one of  the recipes and attempting to improve my pastry skills, which are at best lacking in finesse. You can order the book HERE.

This fine volume has over 50 recipes, but more importantly some hints and tips on how to get the best from your pastry by resting, cooling etc.  Thumbing through the pages I found several ideas to inspire an adaption,  Sweet Pastry Amandine & Frangipane Mince Pies.

My version of this tart was to include Caramelised Apples, Sultanas, Ginger, Chopped Hazlenuts and Allspice as a base layer, with the ‘Frangipane’ as a topping.

When doing some research on Frangipane there is also a reference known as frangipani, a Plumeria tree as in John Vanderslice‘s song Kookaburra, hence the title of this post.

So onto the baking, the recipe list is quite simple with only a few ingredients needed to create a delicious and impressive dessert.

2013-12-14 17.11.40

For the Pastry I used the following quantities;

  • 125 grms unsalted Butter
  • 100 grms icing Sugar
  • 250 grms plain Flour
  • zest 1/2 Lemon
  • 2 Eggs and 1 Egg Yolk
  • Pinch Salt

Following the process in the book, the pastry was prepared in stages, crumbing, bringing together gentle kneading and resting.

20131215_123654

A fluted loose bottom tin was buttered and lined with the pastry once rested and blind baked at 165 deg (fan), I used my newly acquired oven thermometer to check the temperature and followed one of Richards tips, you will have to buy the book to find out what the tip is! It took approximately 25 mins to get the pastry to the dry stage, and a further 15 with the baking parchment and ceramic beans removed and brushing the base with egg wash to create a seal.

20131215_140429

The first filling was going to be Caramelised Apples, for this I took 4 – 5 Braeburn’s, cored, peeled and put them in some Lemon juice to stop them going brown, and added about 2 Tbs Kirsch, a teaspoon each of Ginger and Allspice. They were then fried in unsalted butter and liberally sprinkled with Vanilla infused Castor Sugar, you can see the result above. I added a small amount of cracked Black Pepper to gives the Apples some ‘Edge’!

20131215_141137

The Frangipane cream comprised the following Ingredients;

  • 200 grms Castor Sugar
  • 200 grms Ground Almonds
  • 200 grms unsalted Butter
  • 40 grms Plain Flour
  • 2 Eggs
  • 2 Tbs Almond Liquor

Soften the butter and cream with the sugar until pale, fold in the Almonds and Flour then add the Eggs and Liquor mixing well. Before adding this to the Apples, I added a further texture of chopped Hazlenuts and Sultanas, and then topped the Frangipane with flakes Almonds, you can see the Tart before cooking in the picture above.

20131215_144028

After 20 – 25 minutes in a 165 deg (fan) this was the result, a lovely smell filled in the Kitchen. So there you have my dessert recipe challenge No. 3, with No.4 as work in progress but here is a sneak preview of my prototype home made Jaffa Cake Dessert!

20131213_185028

#getcooking,

L8ers……..

Jacobs Ladder – Slow Braised Beef Short Ribs In a Fragrant Sauce

As you will notice, many of my recipes are a bit time consuming, mostly due to the complex flavours I like to experience on my palate, but also the cuts of meat I like to experiment with.

WP_20131130_005

Earlier in the week I had been thumbing through some cookery books trying to find something to make at the weekend and came across a couple of recipes, further bolstered by a trawl on the internet I headed out to our favourite meat supplier, who has never disappointed with unusual and different cuts of meat.

These bad boys (to use a Tom Kerridge phrase!), are Beef Short Ribs and are extremely good value if you can find a supplier. In this case £4.89 yes, that cheap for 1.25 KG’s of taste sensation. They are also known as Jacobs Ladder, which is a reference in the book of Genesis, and in my case, one of my favourite rock songs by the group RUSH, a Canadian rock band.

The dish I am about to describe will take a couple of days to complete, as the preparation and cooking is done in several stages, most of the time is spent cooking/resting, the hands on prep is about 30-40 minutes max. I started on the Saturday afternoon for a Sunday evening tea. You will need the following for two hungry people:

  • 1.25KG’s Beef Short Ribs
  • 1 Tbs Coriander Seeds
  • 1/2 Tsp Cumin Seeds
  • 1/2 Tsp Lampung Black Peppercorns (available from Steenbergs), or whatever is in your cupboard
  • 1/2 Tsp Muntok White Peppercorns (available from Steenbergs), or whatever is in your cupboard
  • 1 Black Cardamom
  • 1 Star Anise
  • 4 Whole Cloves
  • 3-4 Shallots roughly chopped
  • 4cm piece Lemongrass (bash with a rolling pin or knife to break apart)
  • 4cm piece Galangal roughly sliced
  • 4cm piece Fresh Ginger roughly sliced
  • 6 Red Chillis
  • 1 Head Garlic sliced in half
  • 2 Litres Chicken Stock (preferable Low Salt & Organic, Kallo is great and readily available)
  • 1 Tbs Fish Sauce
  • 1 Tbs Light Soy
  • 1 Tbs dark Soy
  • 2 Tbs Shaoxing Rice wine
  • 1 Tbs Rice Wine Vinegar
  • 4 Tbs Tamarind
  • 2 Tbs Palm Sugar
  • 4 Kaffir Lime Leaves
  • 1 Tsp Shrimp Paste
  • 1 Bunch Coriander
  • 1/2 Lime Juiced

Stage 1

Take all the dry spices and roast them gently in a frying pan without any oil until you can smell the evocative aromas filling the kitchen. This process causes the oils in the spices to develop, if you look at the Cloves, you will notice they will have expanded considerably.

WP_20131130_004

Now that the spices are toasty the next stage is to season the ribs with Salt & Pepper and seal in some flavourless oil such as Ground Nut or whatever you have available. We are trying to get some colour on the meat and also release some of the sugars which turns the meat brown. You can click HERE for a really geeky explanation of the Maillard reaction which is what we are trying to achieve.

WP_20131130_008Mine looked like this after this stage and took 10-15 minutes making sure you turn the meat and cook each side.

Stage 2

We now need to put some oil in a dutch oven or decent size saucepan, the Ribs’s are going to braise for 4 1/2 hours at 125 Deg (fan), 145 Deg (Convection) and the meat needs to be covered so use this as you guide as to the size of pan to use.

Firstly, fry the shallots until the develop some colour, about 5 – 10 minutes. Then, add the toasted dry spices and continue to fry gently, you will start to smell the heady aromas fill the air. Then add the sliced Galangal, Ginger and Lemongrass, continuing to cook gently, then the two halved Garlic heads, and Chilli’s.

WP_20131130_009

At this stage it should look something like the picture above. You want to cook the spice mix gently so nothing burns but hard enough to extract the flavour oils from the ingredients. Now set your oven to 125 deg/145deg to warm up.

After 10 – 15 minutes start to add the wet ingredients, starting with the Soy Sauce, Fish Sauce, Rice Wine etc. Then a bunch of coriander, finish with the sugar, then the Chicken Stock at the end and put the Ribs in, ensuring the are covered completely. Finally add the Lime juice.

WP_20131130_011

You now need to get a piece of Tin Foil, doubled in half, that covers, and overlaps your pan. This is going to be used to seal the pan with the lid firmly pressed on top. Then place in the oven, set the timer for 4 /12 hours and go and put your feet up!!

Stage 3

After 4 1/2 hours, remove the pan from the oven and take out the ribs and place in a container and stick in the fridge, covered with foil or a Plastic container with lid. Drain the remaining sauce through a strainer and also place in the fridge overnight.

You will have noticed in the 1st picture, there is a decent amount of fat on the ribs, the slow braising will have rendered the fat into the sauce and in the morning you will have a ‘fat lid’, sitting on the sauce. The following morning, take the meat and sauce out of the fridge,  gently remove the fat and strain the sauce to remove as much of the fat as possible.

WP_20131201_001

This is what mine looked like before sieving the sauce to remove the remaining bits of fat which you can see floating on the surface. The colour has changed significantly into a deep rich brown colour, partly as a result of the browning stage (Monsr Maillard again!).

Once this is done, the meat on the left needs to go into the sauce, to marinade for a few more hours to further develop the flavours. Cover the pot with cling film or foil and pop it back into the fridge until you are ready to complete the final stage. It will take about 45 – 60 minutes at 160 deg/180deg before the ribs are ready to eat, so you can plan when dinner is served and when you need to be back in the kitchen.

Stage 4

Almost done! Set the oven to 160deg/180deg and remove the meat/sauce from the fridge about an hour before you are ready to cook to bring it up to room temperature. To go with the beef I was going to do some equally fragrant Rice and Bok Choi.

Take a saucepan, and put some water on to boil, you will need a Jasmine Tea bag, 1 star anise, kaffir lime leaves (2) and a couple of slices of Galangal. I left the tea bag in the water for a couple of minutes before removing, the remainder of the spices had a good 30 minutes in the pan. Thats the infusion completed, just follow the instructions on the rice packet, mine needed about 10 minutes.

The Bok Choi was quartered lengthways, and put in a pan with a glug of hot oil, followed by a splash of water to create a steam. I chucked in a couple of cloves of garlic that had been bashed, a splash of Shaoxing Rice Wine, similar of light Soy sauce and a little sugar to counterbalance the salty Soy.

WP_20131201_008Finish the Bok Choy with a twist of fresh cracked pepper and you are done. The beef can be removed from the pot, and set aside in a covered dish and left in a warm oven whilst you finish off the sauce. You may find its still a bit thin so you can reduce it on a hob, and use a little Cornflour or Arrowroot and water to thicken. Drain the rice and you are ready to serve.

WP_20131201_005 To add some further texture elements I dry fried some Cashew nuts and Red Chilli for a bit of punch, and fried some prawn crackers and dusted with 5 spice powder to accompany the ribs. All you need to do now is serve the meat/rice/sauce and vegetable on a warm plate and experience a tasty, sumptuous exotic meal, all prepared by your own hands and not breaking the bank!WP_20131201_010

So there you have it, Beef Short Ribs, with  a fragrant sauce and assorted accompaniments, delicious.

Go on, have a go yourself.